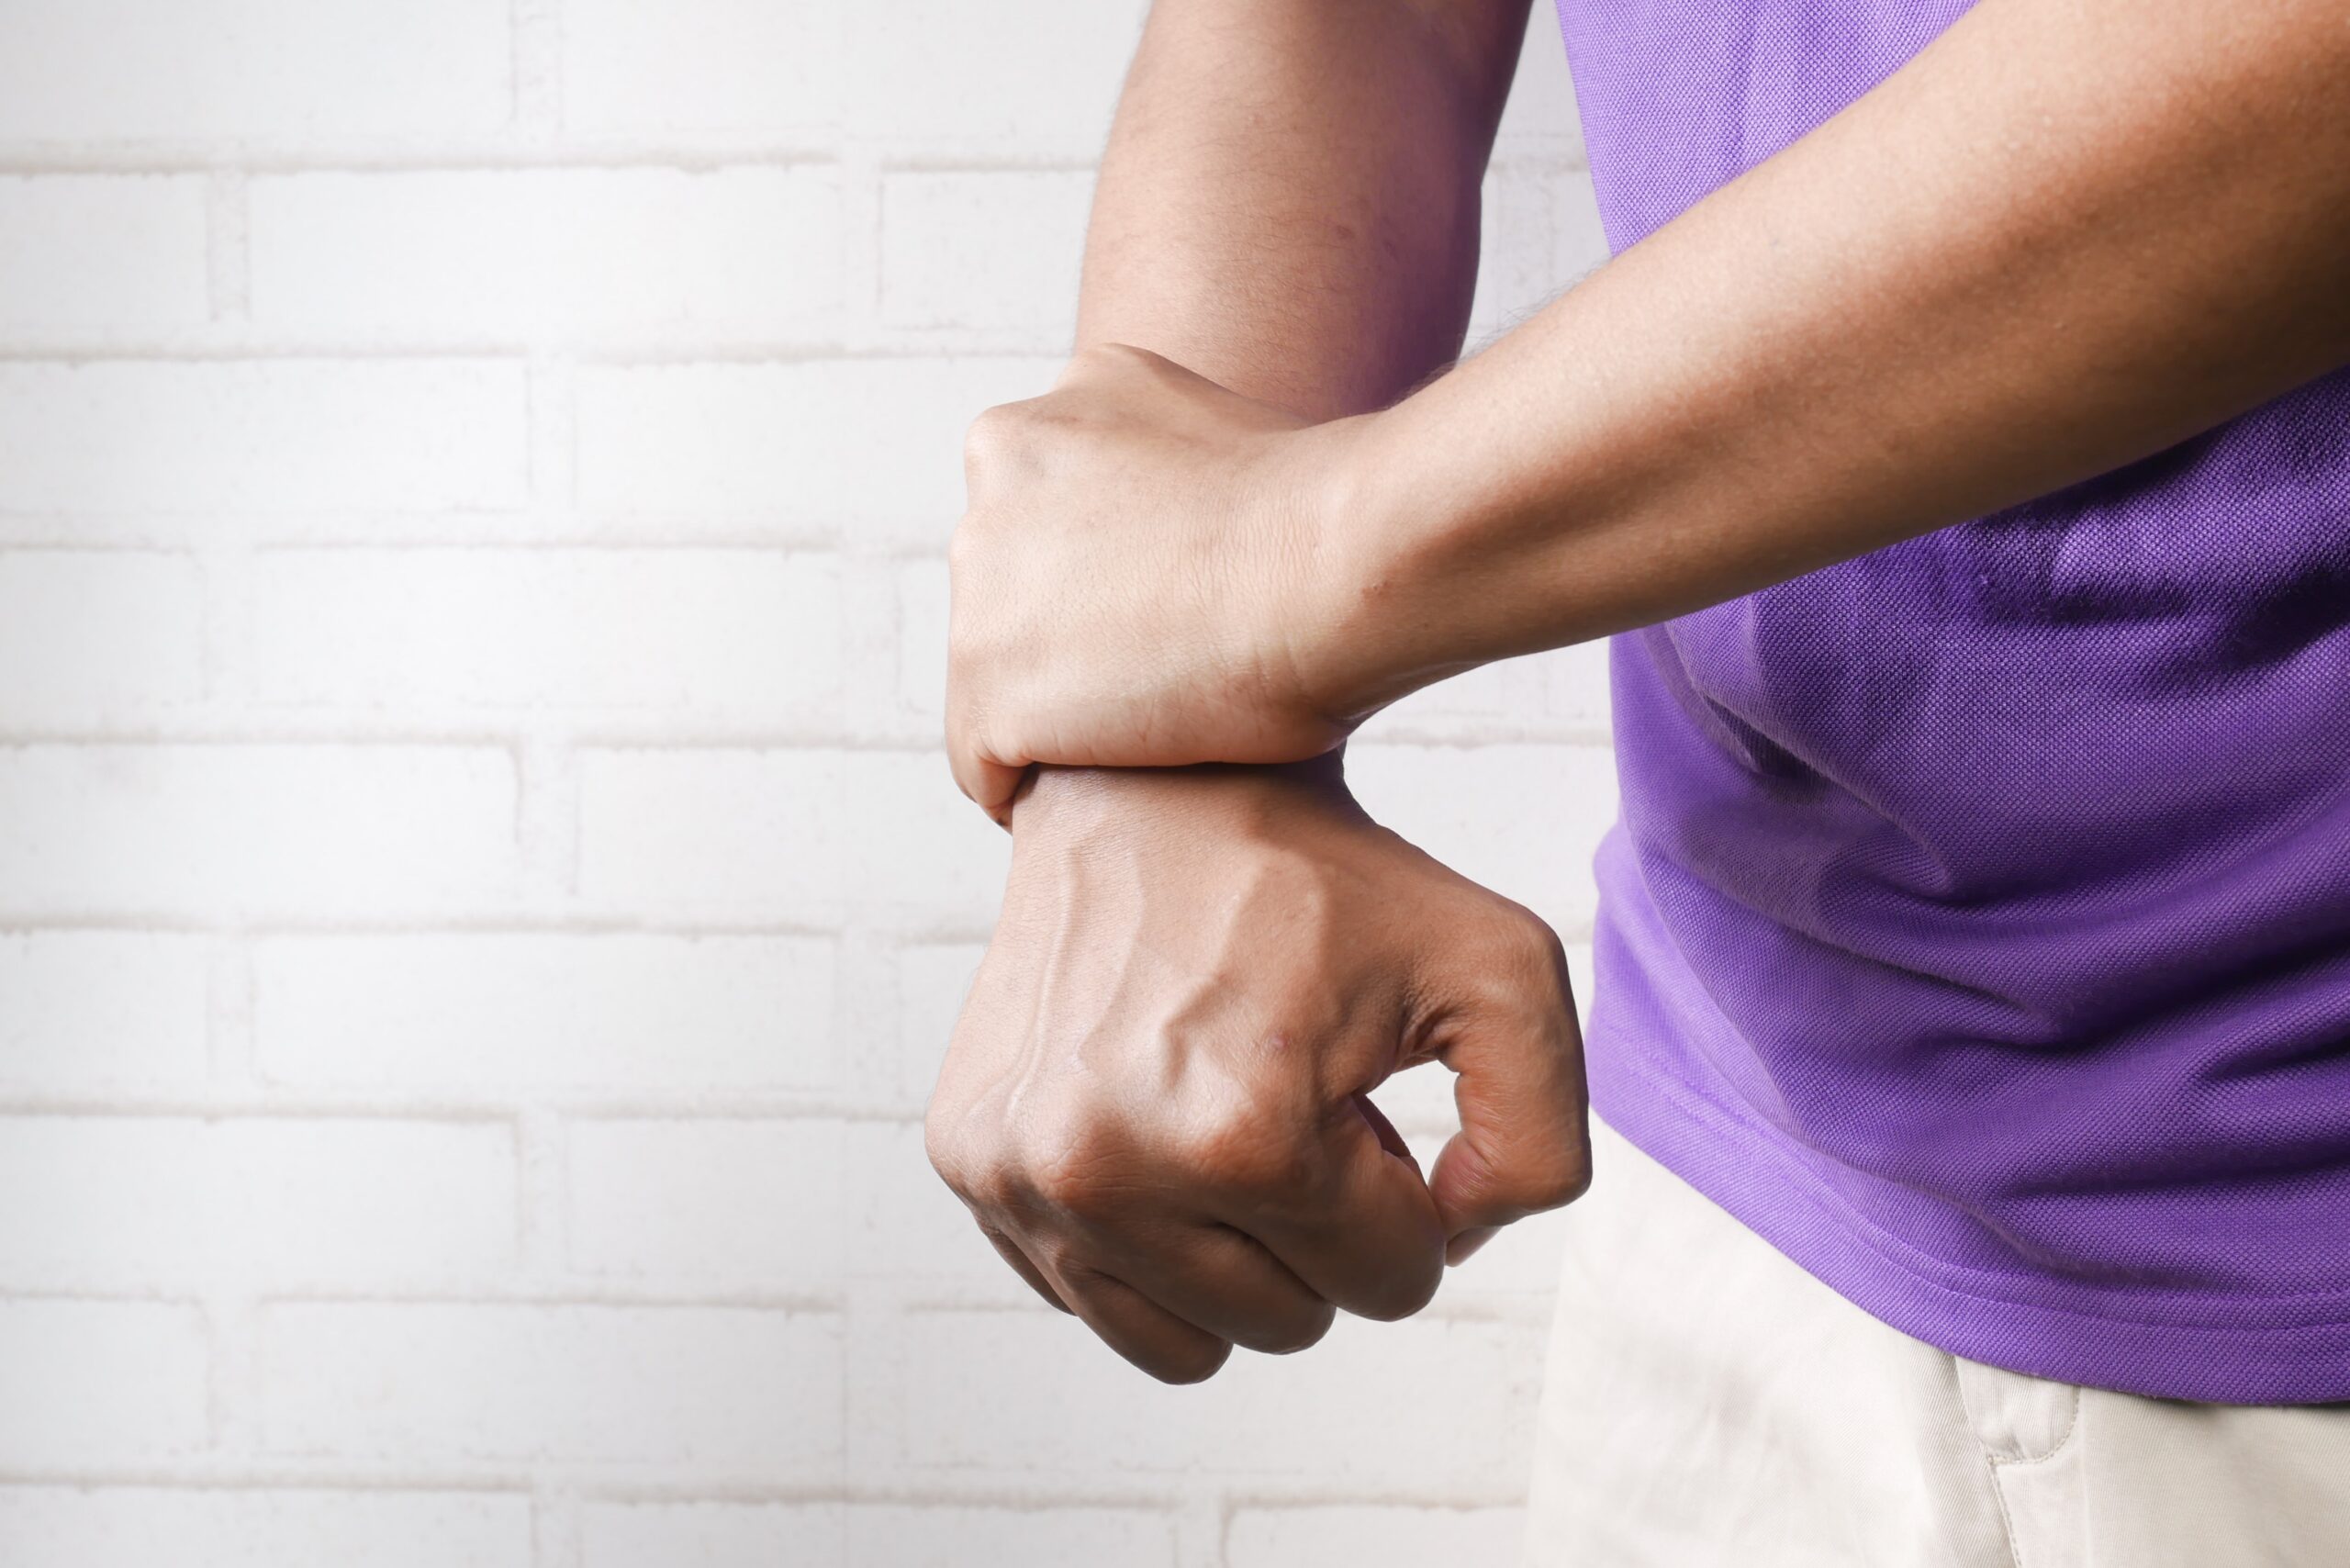
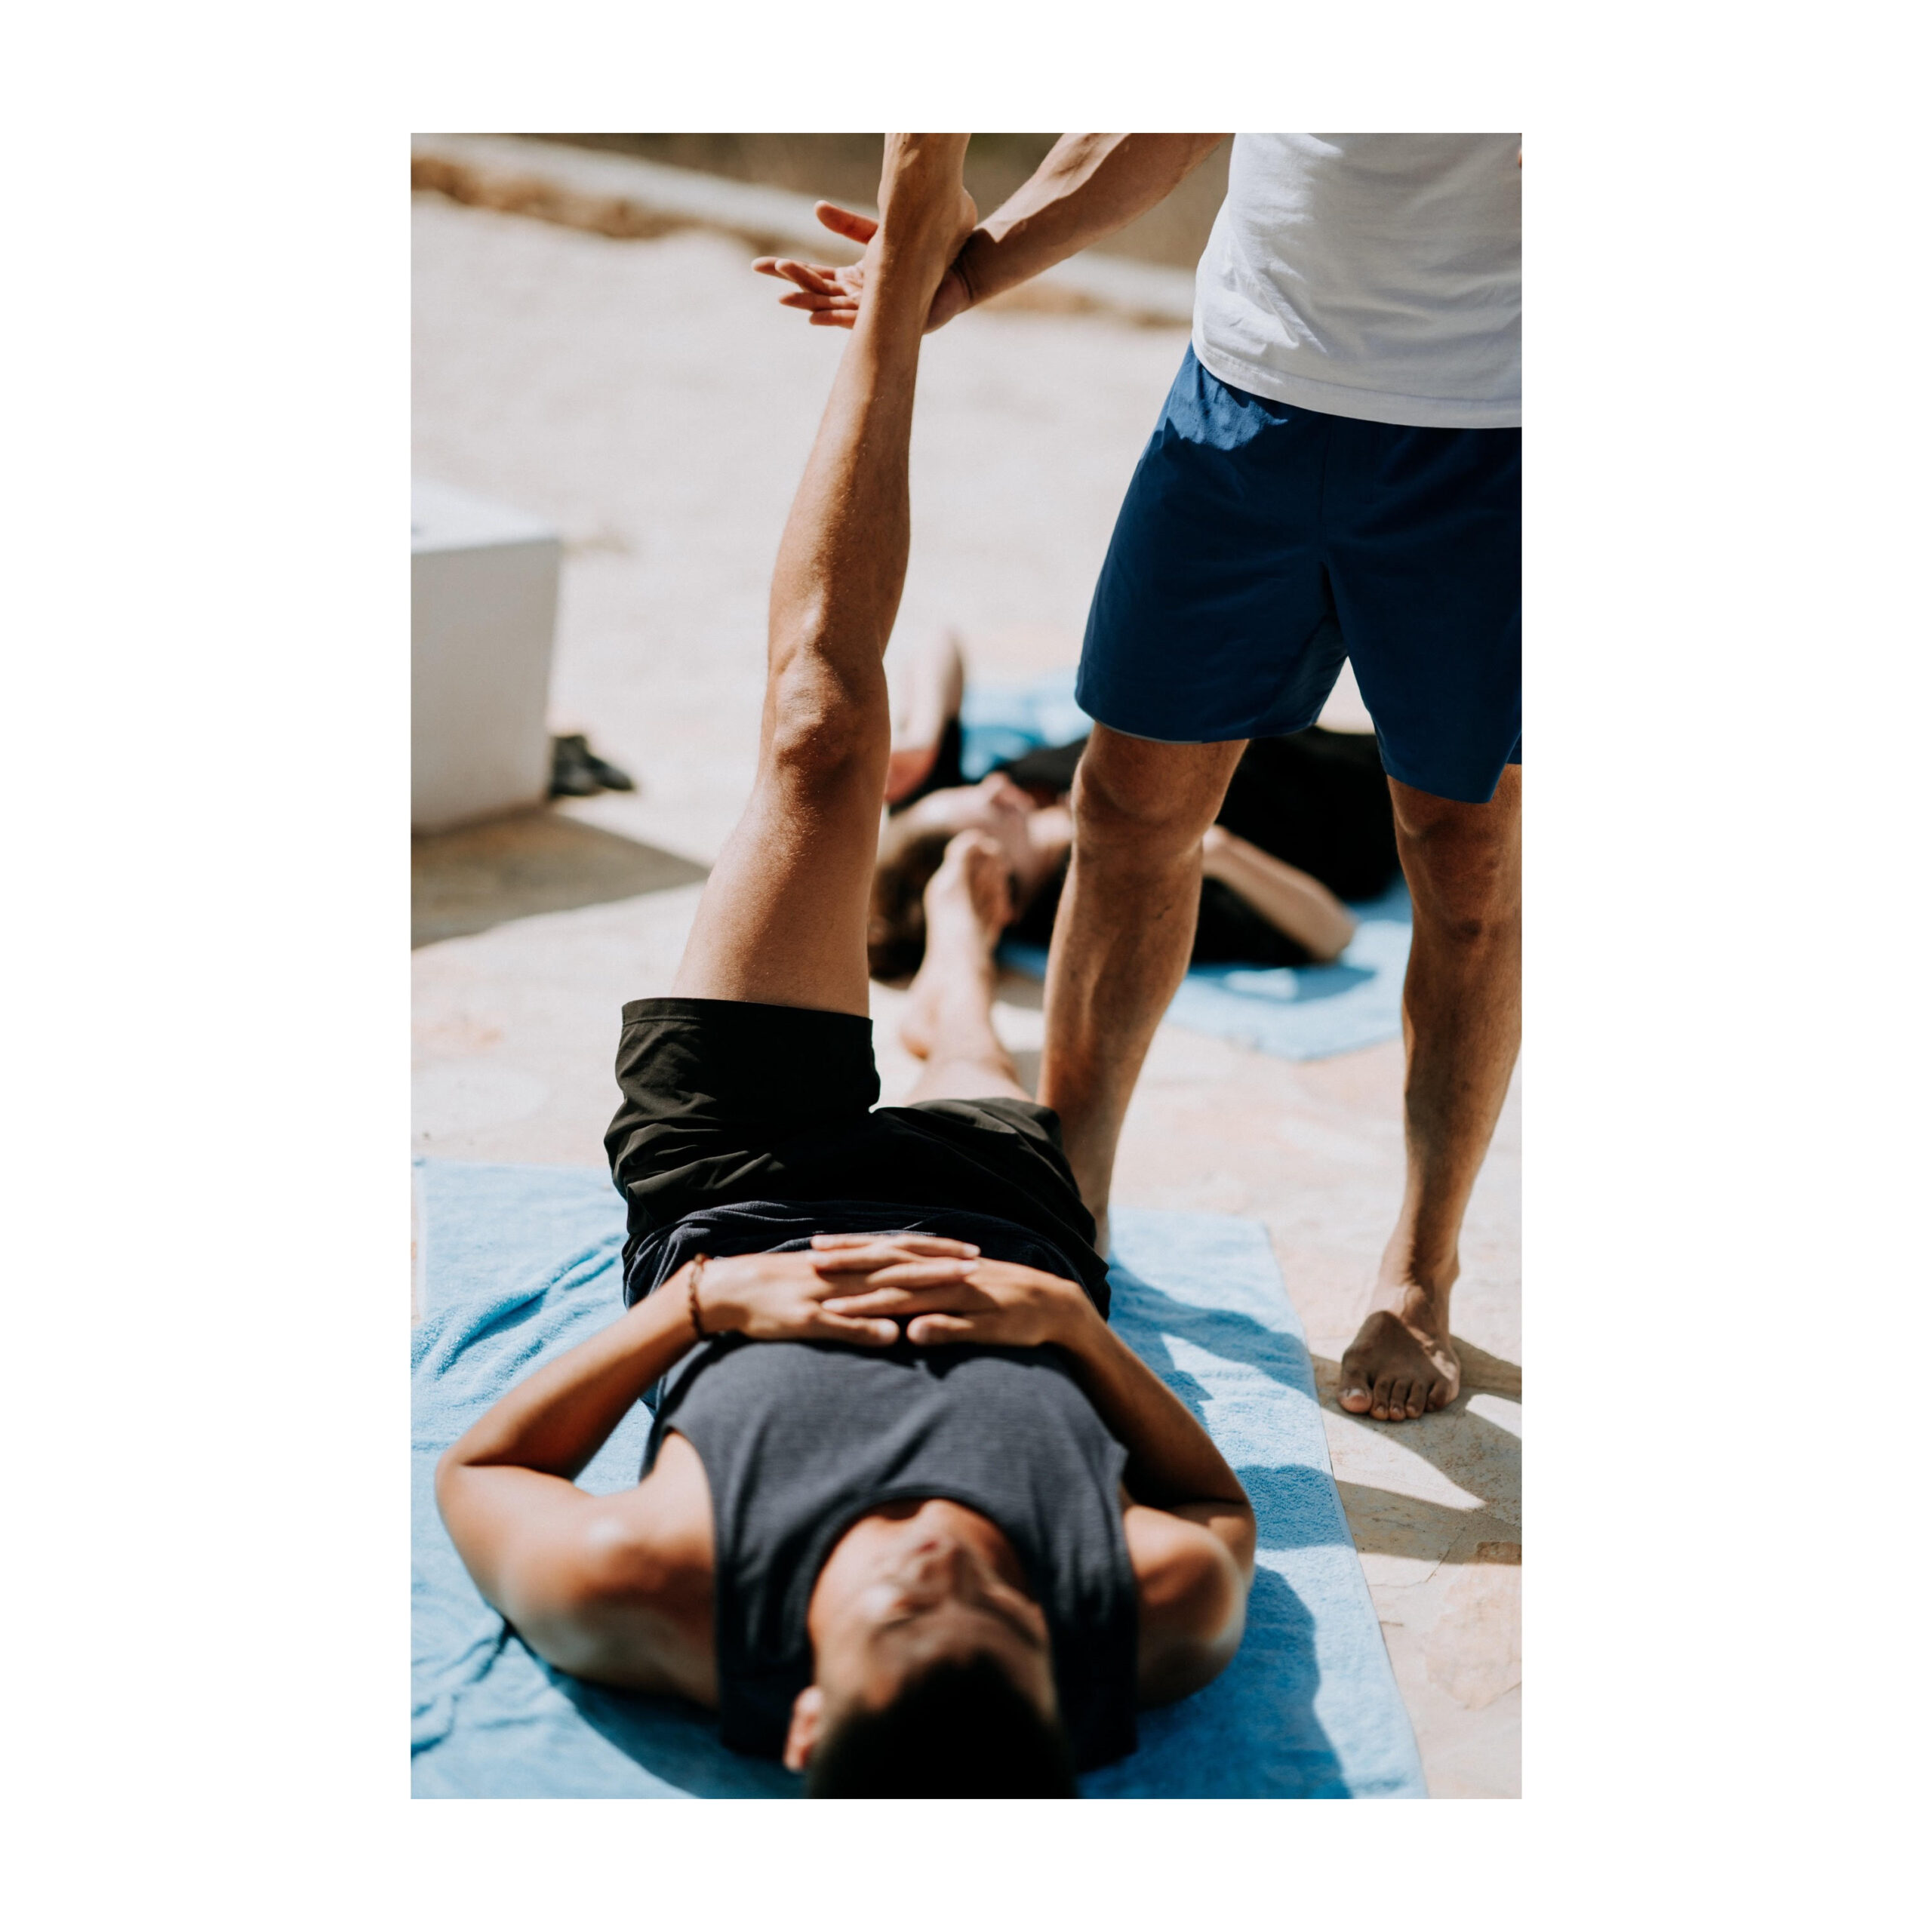
It’s not uncommon for some people who practice yoga regularly to develop wrist pain, especially if they have spent the majority of their life working at a desk. Decreased range of motion, strength, and flexibility of the wrists combined with an increase in the demand placed upon these delicate joints through regular weight-bearing in a yoga class can be the perfect recipe for injury. LYT yoga is the only method offering wrist stretches at the beginning of every class, but even in some cases, that’s not enough. If you’re having trouble with your wrists, a little extra warm-up before class could be just the thing you need. Try this out about 5-minutes before class starts and see if, over time, it helps!
Make fists and roll the wrists clockwise and counterclockwise for 15-20 seconds in each direction. Do this once with the thumbs outside the fists and once with them inside.
Open and close the hands quickly for 20-30 seconds, warming up the hand and forearm musculature.
In Quadruped (all fours):
Rock forward/back 5x and then side-to-side 5x. This range of motion should be pain-free, so you may not get your shoulders fully over the wrists to start.
Circle the shoulders around the wrists, 5x in each direction. Again, you might not be able to get the shoulders fully over the wrists to start.
Repeat the 2 steps immediately above with the fingers pointing out to the sides of your mat.
Flip the palms to face up, fingers pointing towards each other, and rock from side-to-side 5x, stretching the wrists into flexion. You will most likely have the majority of your weight in the hips and not over the wrists.
You can also catch my series on LYT Daily, “Weightless in the Wrists,” which includes six traditional LYT classes with little to no weight-bearing through the upper extremities, specifically for people with current pain and/or wrist dysfunction.
In my last PT Corner, I discussed upper extremity nerve glides, so today I want to piggyback onto how we can also perform nerve glides in the lower extremity. If you recall, nerves need freedom to move and glide, with just enough slack to allow the neural impulses to travel from the brain to the body and back. As I said before, it’s not uncommon to have areas of entrapment along these nerves, which can cause a whole host of issues including sensory changes, weakness, and pain. Normally, the nerves in our body glide and move as the rest of our body moves. This nerve movement is referred to as neurodynamics. When it is free and unlimited, the nerves slide and slide in a protective sheath, without being pulled taught. However, nerves can become caught up or compressed anywhere along these lines, including those that extend into the lower extremities.
Neural impingement in the lower extremities is typically secondary to tension on the sciatic nerve or one of its branches. The sciatic nerve comes from the L4-S2 nerve roots, which exit the spine to join at the pelvis and form the nerve. It’s the largest nerve in the body, measuring about the size of your pinkie finger as compared to most other nerves which are the size of spaghetti or linguine. The sciatic nerve exits the pelvis under and through the gluteal muscles, entering the posterior thigh. It courses down the leg, just underneath the lateral hamstring (biceps femoris) where it officially ends right above the posterior knee, bifurcating to become the tibial and common fibular (peroneal) nerves.
The tibial nerve first gives rise to the sural nerve, which innervates the posterolateral lower leg, and then courses down behind the knee into the lower leg, running just behind the tibia. At the foot, it curves behind the medial ankle (malleolus) and terminates in the foot. The common fibular (peroneal) nerve runs more laterally alongside the distal lateral hamstring, over the lateral head of the calf (gastrocnemius) muscle, wrapping around the neck of the fibula and terminating in the lateral leg.
Mobilization of the sciatic nerve and its lower branches can alleviate pain, increase range of motion, and heighten the adaptability of the nervous system, allowing people to move with less resistance. There are some simple nerve gliding techniques that can be done to restore normal or improved neurodynamics to the lower extremities, specifically targeting the sciatic nerve and its branches:
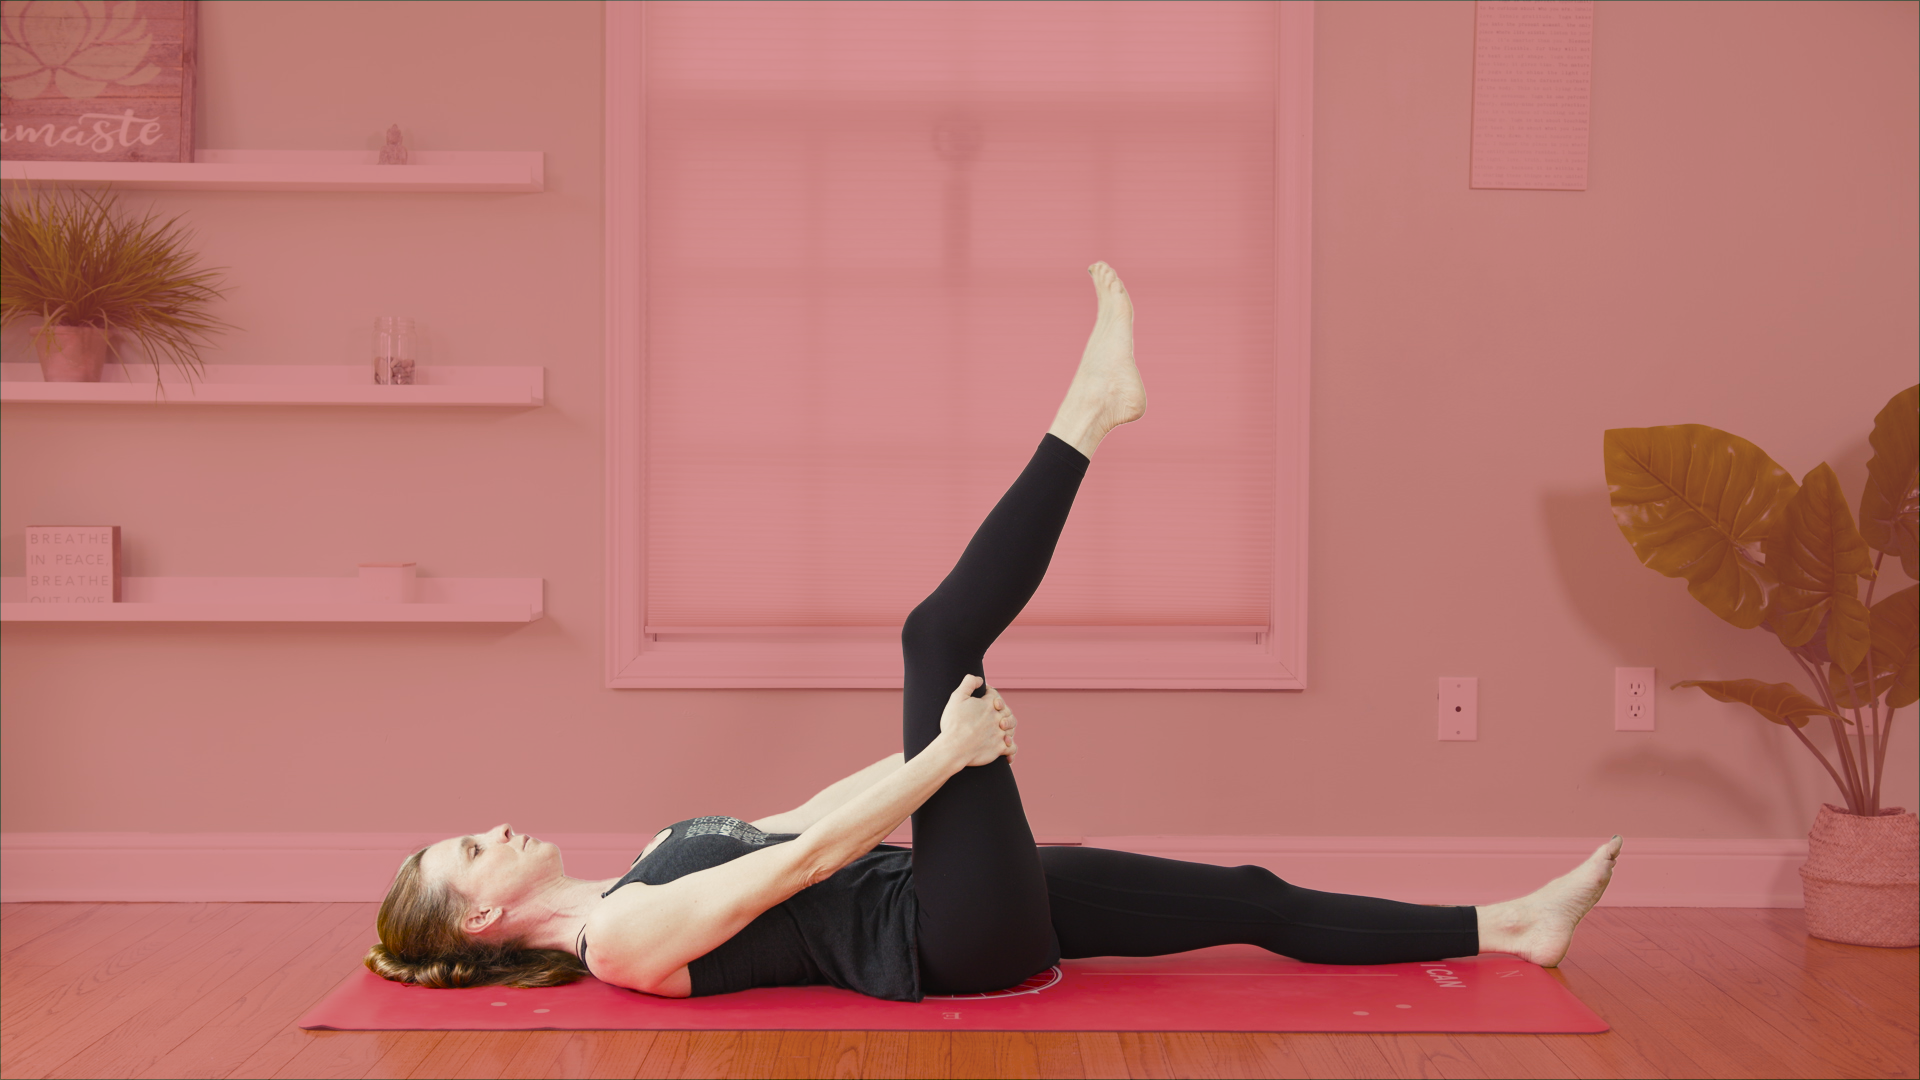
Sciatic Nerve Glide – lying supine, bend one knee into your chest and grab behind the thigh with both hands. Slowly straighten the knee to where you first start to feel symptoms or tension, and then rebend the knee. Repeat 20-25 times without going into pain. You can also extend the knee to the point of minimal tension and then point/flex the ankle, gliding the nerves from below.
Tibial Nerve Glide – lying supine, bend one knee into your chest and grab behind the thigh with both hands. Slowly straighten the knee to that point of tension and then dorsiflex and evert the foot (pull the toes back and turn the toes out). Repeat the motion at the ankle 20-25 times, without going into pain.
Common Fibular (Peroneal) Nerve Glide – lying supine, bend one knee into your chest and grab behind the thigh with both hands. Bring the leg slightly across midline, adducting at the hip. Slowly straighten the knee to that point of tension and then plantarflex and invert the ankle (point the foot and turn the toes in). Repeat the motion at the ankle 20-25 times, without going into pain.
Many of these can be done in a seated position as well, which can serve to further glide the lower extremity nerves by slouching at the spine and/or involving the head and neck from above. Remembering that our neural network extends all the way from the brain and surrounding dural tissue allows us to effectively mobilize our peripheral nerves in multiple planes and various positions. Beginning in the supine position as stated above is the gentlest way to start, as the spine is supported throughout.
You can find a demonstration of these glides on our YouTube channel by clicking the link below! As always, seek the help of a physical therapist or other healthcare professional if symptoms progress or do not improve. Let’s keep those nerves moving and grooving so I can keep seeing you on the mat!
If you’ve ever heard me talk about nerves, I like to describe them as telephone wires. I visualize how these wires have a decent amount of slack on them as they traverse from pole to pole, transmitting countless conversations along the way. I will see birds come to perch and wonder if there’s a breaking point to where the slack needed to transmit the electrical impulse is no longer available due to the weight of the birds along the way. The nerves in our bodies can be visualized in much the same way. They need freedom to move and glide, with enough just slack to allow the neural impulses to travel from the brain to the body and back. It’s not uncommon to have areas of impingement along these nerves, which can cause a whole host of issues including sensory changes, weakness, and pain. I imagine those areas of impingement as birds sitting on that wire, taking up slack and causing tension. These “birds” can be anything from disc bulges, bone spurs, tight muscles, poor posture, to restricted soft tissues, etc. It’s my job as a physical therapist to remove as many of these birds from the wire, especially if they’re causing pain.
A common place people will experience nerve impingement symptoms is in the neck and arms. We have a bundle of nerves coming from our neck into our upper extremities called the brachial plexus, which exits the neck and splits into five nerve branches in the arm: the axillary, musculocutaneous, median, radial, and ulnar nerves. For the purposes of this PT Corner, we are just going to discuss the median, radial, and ulnar nerves, as these are the nerves we most commonly treat when it comes to nerve impingement syndromes.
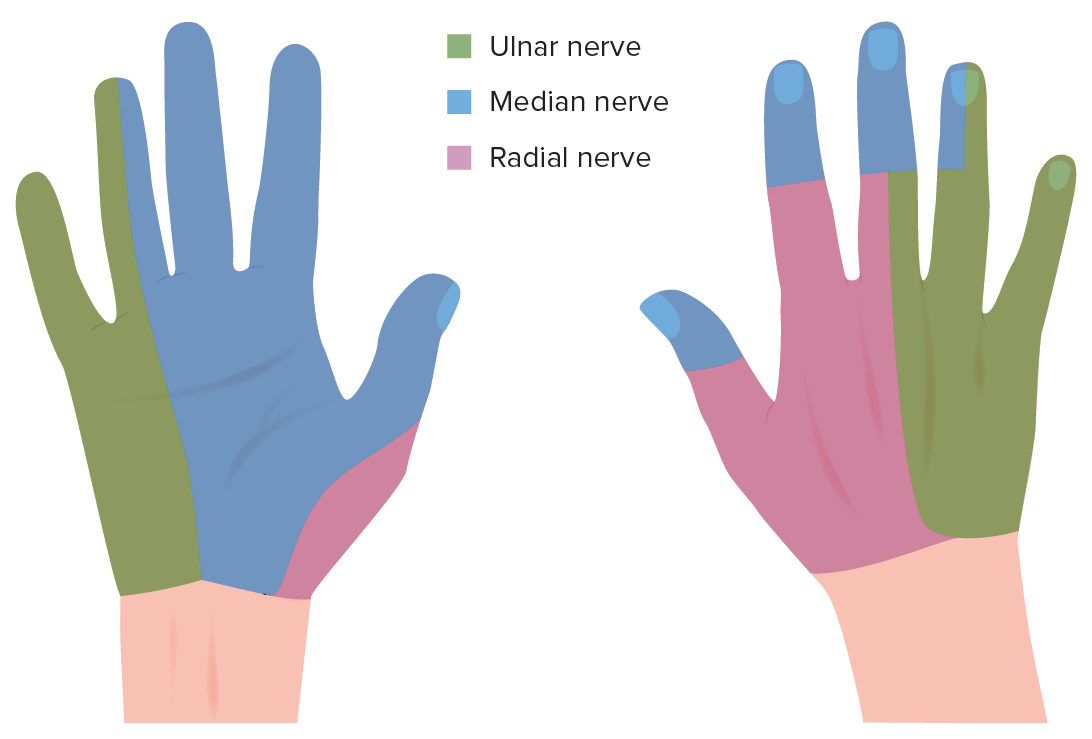
The median nerve runs down the inside of the arm and through the center of the forearm and wrist. It is probably the most well-known of the three, as when it is impinged, people may develop something called carpal tunnel syndrome. The median nerve provides sensation to the palm of the hand, palm side of the thumb, index, middle, and half of the ring finger, and ends of the back side of the thumb, index, middle, and half of the ring finger. It innervates the muscles that pronate the forearm, flex the wrist and fingers, and abduct the hand.
The radial nerve runs more along the back of the arm before wrapping around the thumb side of the forearm to the thumb side of the hand. It provides sensation to the posterolateral upper arm, the posterolateral forearm, lateral side of the base of the thumb, and thumb side half of the back of the hand, and back side of the thumb, index and half of the middle finger. It innervates the muscles that flex and extend the elbow, supinate the forearm, extend the wrist and fingers, and move the thumb.
Finally, the ulnar nerve runs along the inside of the arm, inside of the elbow, and down the pinky side of the forearm to the pinky side of the hand. It’s the nerve you feel when you hit your “funny bone”. The ulnar nerve provides sensation to the pinky side of the hand, front and back, including the entire pinky and half of the ring finger. It innervates the muscles that flex the wrist and fingers, move the pinky, and adduct the thumb.
Nerve gliding or mobilizing is one way to take “a bird off the wire”, by restoring homeostasis in and around a nerve. It is believed to decrease pain caused by entrapment of a nerve by encouraging movement between nerves and their surrounding structures. These nerve glides can be manual techniques performed by a healthcare professional on a patient or by the patient themselves. Studies have shown that mobilizing a nerve can decrease edema (swelling) and improve fluid dispersion within a nervous structure, reduce pain, and reverse the increased immune responses following a nerve injury. When mobilizing a nerve, you do not want to irritate or stretch the nerve. Just imagine that you are flossing the nerve along the path it follows from the head to the arm, freeing up any areas of entrapment. Here are some simple beginner nerve glide exercises for the upper extremities, which can be done on your own:
Median Nerve Glide – begin with your arm at your side, palm facing forward; you can place the opposite hand on the space between your neck and shoulder as an anchor; slowly flex and extend your wrist. Repeat 10-20 times.
Radial Nerve Glide – begin with your arm at your side, palm facing back; you can place the opposite hand on the space between your neck and shoulder as an anchor; extend the arm slightly behind you; slowly flex and extend your wrist. Repeat 10-20 times.
Ulnar Nerve Glide – extend your arm out to the side with the elbow bent to 90 degrees and your palm facing your face; you can place the opposite hand on the space between your neck and shoulder as an anchor; slowly flex and extend your wrist. Repeat 10-20 times.
You can find a demonstration of these glides and some more advanced versions on our YouTube channel by clicking the link below! As always, seek the help of a physical therapist or other healthcare professional if symptoms progress or do not improve. Let’s keep those nerves moving and grooving so I can keep seeing you on the mat!
When it comes to athletics, nothing can be more devastating than an injury. Being sidelined has not only physical, but emotional effects as well. Athletes want to get back on the field or court as soon as possible. Many physicians still prescribe the decades old remedy of RICE – rest, ice, compression, elevation – despite more recent research demonstrating this is not the treatment method of choice. In fact, Dr. Gabe Mirkin who originally coined the term in 1978 publicly renounced his position in a 2015 publication on his personal website.
Ice, or cryotherapy, has been used in medicine for years to bring down inflammation in the area of the injured soft tissue structure. However, the literature in recent years has found that when ice is applied for prolonged periods, the lymphatic vessels increase their permeability and fluid flows from their walls, resulting in a greater degree of swelling. Ice has also been shown to delay the healing process, as it inhibits the natural inflammatory production of insulin-like growth factor, which is an important stimulant of protein synthesis in muscle.
Evidence for compression and elevation is equally fallible. In the case of compression, it is mostly anecdotal. A 2012 study by Van der Bekerom et al concluded that “no information can be provided about the best way, amount, and duration of compression” for the treatment of ankle sprains. Elevation has been used clinically to increase venous flow from the extremity back to the circulatory system to keep swelling to a minimum. However, once again, there is no high level evidence that this is true.
Finally, there is rest. Rest has long been prescribed for loads of injuries, including minor ankle sprains to lumbar disc herniations. For healing to occur in the body, the lymphatic system needs to move out the metabolic waste products that accumulate in the area of the tissue trauma and relies on both intrinsic and extrinsic pumping mechanisms to do so. Surrounding muscle contractions create the extrinsic mechanism, making movement a key component to healing. As they say, if you don’t use it, you lose it. With rest and inactivity comes atrophy, where the tissues of the injured area become weaker, less functional, and more susceptible to injury.
The push towards a more active recovery is growing in popularity in medicine. In fact, a new acronym that is sweeping the medical and athletic training fields is a far cry from RICE…MEAT – movement, exercise, analgesics, treatment. The first step is movement through a pain free range of motion as early as possible. These movements will both help move fluids from the tissues and load the injured tissues lightly, allowing them to heal properly. The next step is exercise. This should be done slowly, methodically, and also in a pain free range. For injuries to tendons, eccentric or lengthening exercise is best. Since pain can limit one’s ability to move, analgesics in the form of acetaminophen, or Tylenol, can allow movement through a fuller range of motion. Naproxen (Aleve) or ibuprofen (Advil), both NSAIDs, may delay the recovery process as they slow the natural inflammatory response of healing. Other naturopathic forms of analgesia may help as well. The final step is treatment, which is a rather broad category. It can include formal physical therapy or more invasive therapies such as prolotherapy or platelet-rich plasma injections. But no matter, in all four stages of this treatment paradigm, movement is key. So while RICE may be applicable in some instances during the first 24 hours following an injury, current studies are confirming that movement is the best medicine. LYT Yoga® is one of the ways I utilize movement for healing each and every day! I hope you’ll join me on the mat for some movement medicine soon!
Research has shown that regular physical activity is among the factors that have the most beneficial effects on health. It helps maintain body weight, can boost your brain health, reduces the risk of heart disease, enhances the immune system, and slows the effects of aging. So why do less than 5% of adults perform the minimum recommended amount of exercise (150 minutes at moderate intensity or 75 minutes at vigorous intensity) per week? Many find that getting into the habit of working out can be a huge challenge. Not to mention that there are right and wrong ways to go about it safely. In the spirit of New Year’s resolutions, let’s talk about how to ease into a workout routine.
The best place to start is to determine your “why” and go from there. One of the reasons listed above may be motivation enough! Figuring out which is most important to you can help you stay on track when you might feel like quitting. Keep it in the back of your mind as you go through your fitness journey. You’re going to have good days and bad days, so having this “why” may be the thing that keeps you on track.
The next step is to set a realistic goal within a realistic timeframe. Upwards of 65% of all people who begin an exercise program end up dropping out in three to six months. This is likely due to the fact that we tend to set unrealistic goals that are unattainable within our projected timeframe. Start with smaller and more attainable short-term goals. Once you’ve set your goals, create a plan to reach them.
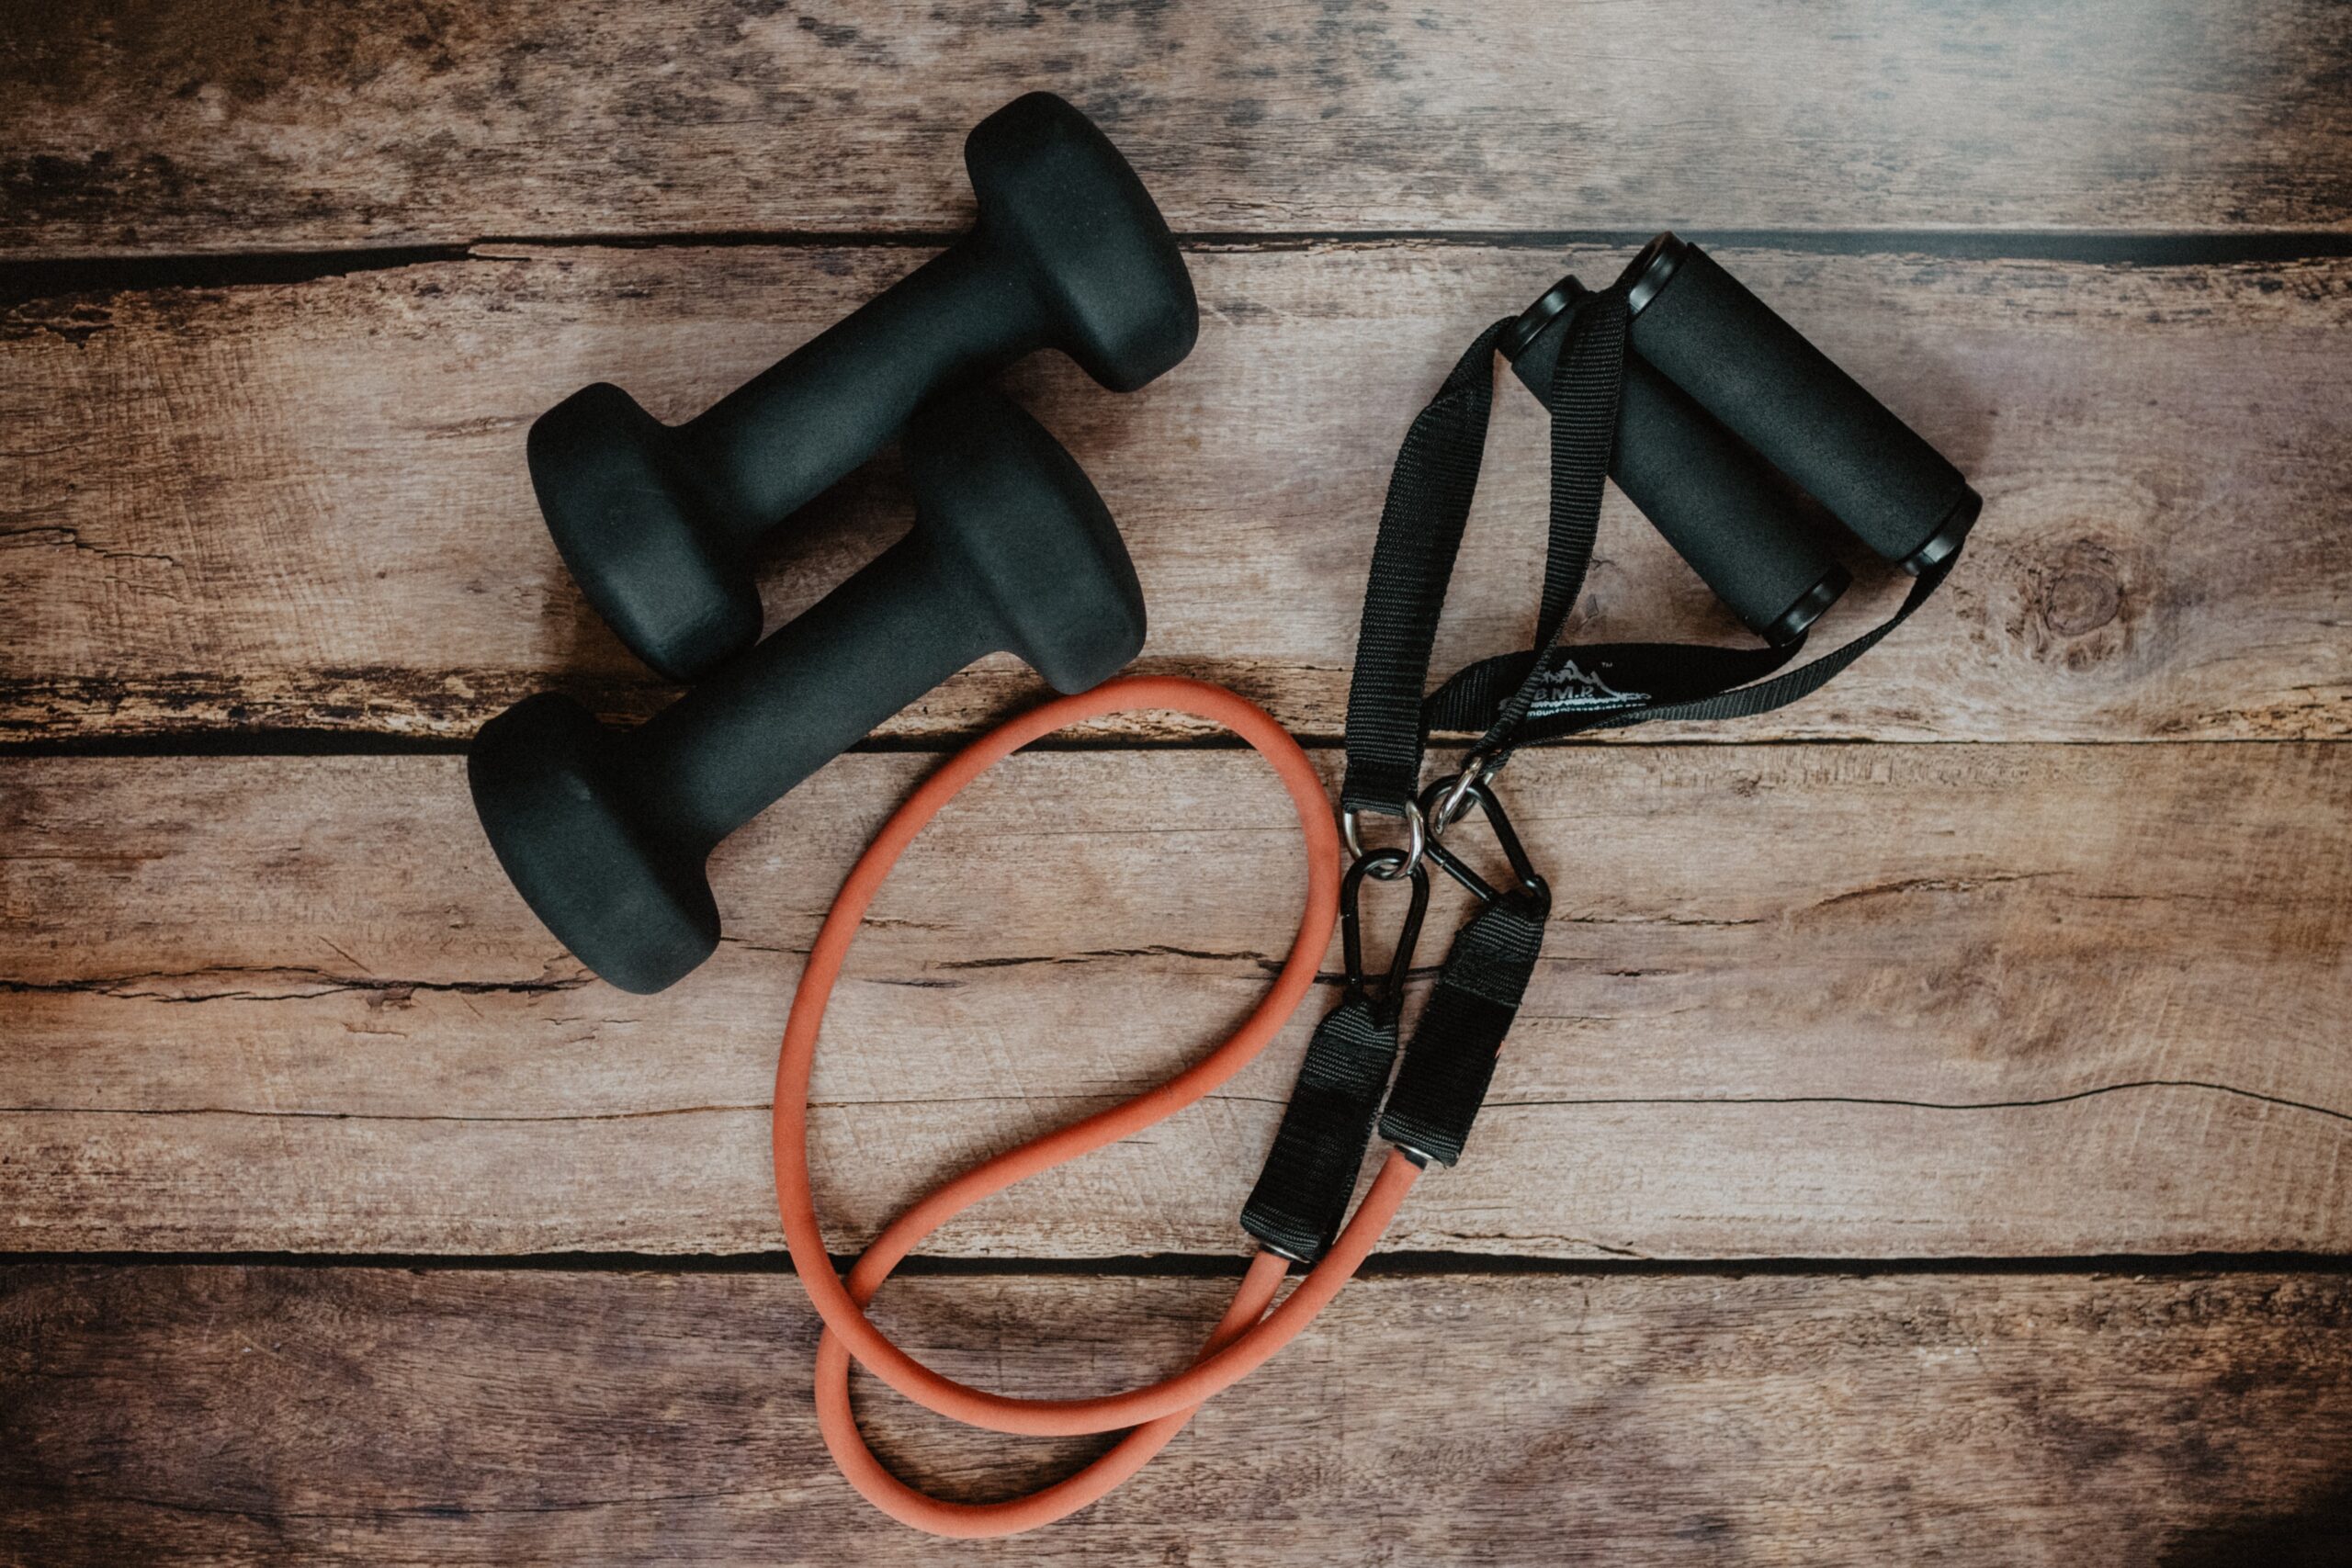
First and foremost, start slow. Progressive overload is a commonly utilized method with weight training and involves gradually increasing the weight, frequency, or repetitions in a routine. But it can be applied to cardiovascular fitness programs as well. Exercise is a science and should be approached as such. Your weekly routine should include cross-training, as I wrote about in last week’s PT Corner. Starting with anywhere from 10-15 minutes of exercise and slowly building in intensity, duration, and frequency. A general rule of thumb is increasing by no more than 10% per week.
Having a formal training plan or schedule to follow is a great way to help stick with the plan. When I used to train for marathons, I would write my six-month training regimen on the calendar as a way to stay motivated. Scheduling time into your day until exercise becomes part of your routine is a great place to start. Look at your schedule, determine the most ideal time for you to exercise each day, and then make it a recurring appointment. Always have a Plan B for when life gets in the way. If you can’t make your 60-min LYT Yoga Expresso class because of an unexpected engagement, schedule time for a 20-min HIIT class instead! If and when setbacks happen…and they will…don’t just throw in the towel. Be compassionate with yourself and get back in the game when you’re able. Doing something is better than nothing at all.
Finally, accountability is huge. I used to pick a fun destination for my marathons, so once I bought that plane ticket and entry fee, there was no turning back! Many times I would run them with friends as well. Finding a social network to exercise with is a game changer! My 5:45 am classes at the LYT NJ studio grew in popularity because we all began to feel like family. People would ask about or check up on those who missed a few days in a row. We looked forward to seeing each other and sweating together, even at the wee hours of the morning!
On that note, we just launched our LYT Yoga 6-week Build Your Capacity challenge, which is a great way to ease into a cross-training program, which has been designed to help you build better habits in the new year! You don’t need to be a LYT Daily subscriber to join, so it’s the perfect way to introduce friends, coworkers, and family members not only to LYT Yoga, but also meditation, strength training, HIIT, mobility, and flexibility work. Even experienced LYT yogis will find the cross-training to be a useful addition to their LYT Daily! Click the link below to check it out! Until then, I’ll see you on the mat!
Most people are well aware of the benefits of exercise for not just the body, but also the mind and soul. We often find something we like, establish a routine, and not vary too far from it. I am as guilty of this as anyone! And while this is markedly better than not exercising at all, there’s a substantial argument in health and fitness for cross-training, or the practice of mixing exercise activities. It can be ideal to incorporate into your exercise regimen for a variety of reasons, beginning simply with novelty.
Doing the same routine every day can get tedious, which can lead to finding excuses not to work out. Simply stated: cross-training keeps you from getting bored! Different types of exercise can offer different feelings of exertion and gratification, helping to keep you motivated. This is why in LYT Yoga, we have you change direction on your mat regularly, keeping the perspective fresh and helping to keep you from getting bored.
Cross-training also allows you to seamlessly adjust your plan when life gets in the way. We’re all going to have those days where we simply don’t have 60 minutes to spend exercising. Opting for a 30 minute HIIT class or going for a run can give you the same bang for your buck when you’re short on time.
Including cross-training into your fitness program allows you to vary the stress placed on your muscles and reduce the risk of injury, as well. Any time one type of exercise is performed repeatedly, the possibility of injury increases. If there is no change or chance to rest, there is a higher risk of sprains and strains. Cross-training allows you to continue exercising parts of your body while the other parts rest.
While months of doing the same movements, again and again, can be beneficial for sports and competition, it can significantly limit the level of your overall fitness and wellbeing. If the frequency, intensity, time, and type of exercise never changes, the body plateaus and has no reason to become more efficient or more fit. Stagnant routines cause stagnant metabolism. If the body has become used to the energy and task requirement, caloric expenditure will not increase. On the other hand, if we cross-train, the body must continually make adjustments, more energy is required to meet these needs, and metabolism and fitness increases.
Finally, by cross-training, you can strengthen and condition your entire body in multiple planes of motion to improve your overall mobility, balance, flexibility, and agility. We need a variety of movements in our bodies in the same way we need variety in our diet. If you do the same exercise regimen every day, it would be kind of like eating the same meal every day. You wouldn’t get all the nutrients your body needs.
This matters at a genetic level as well, for the genes associated with how healthy and fit you are get expressed in your muscles. Research from 2014 on the programming of the human genome and human skeletal muscle after exercise found that training actually changes the shape and function of our genes. If certain muscle groups are left unused, those genes for health and fitness are left unexpressed. Which is why cross-training is so important. It maximizes the number of muscles used and therefore, the number of health and fitness genes triggered.
The LYT Yoga Method already requires moving the body in multiple planes of motion, utilizing plyometrics, core strengthening, and stability work to maximize the effects of cross-training in a yoga platform. On the LYT Daily, we offer HIIT, resistance bands strengthening, and stretch classes as well. Next month, we are launching our 6-week Build Your Capacity Program, which will be available to all people of all fitness levels. With daily classes that build in length and intensity level, it utilizes the concepts of cross-training and works towards building better habits both on and off the mat. Keep an eye out and join us! Until then, I’ll see you on the mat!
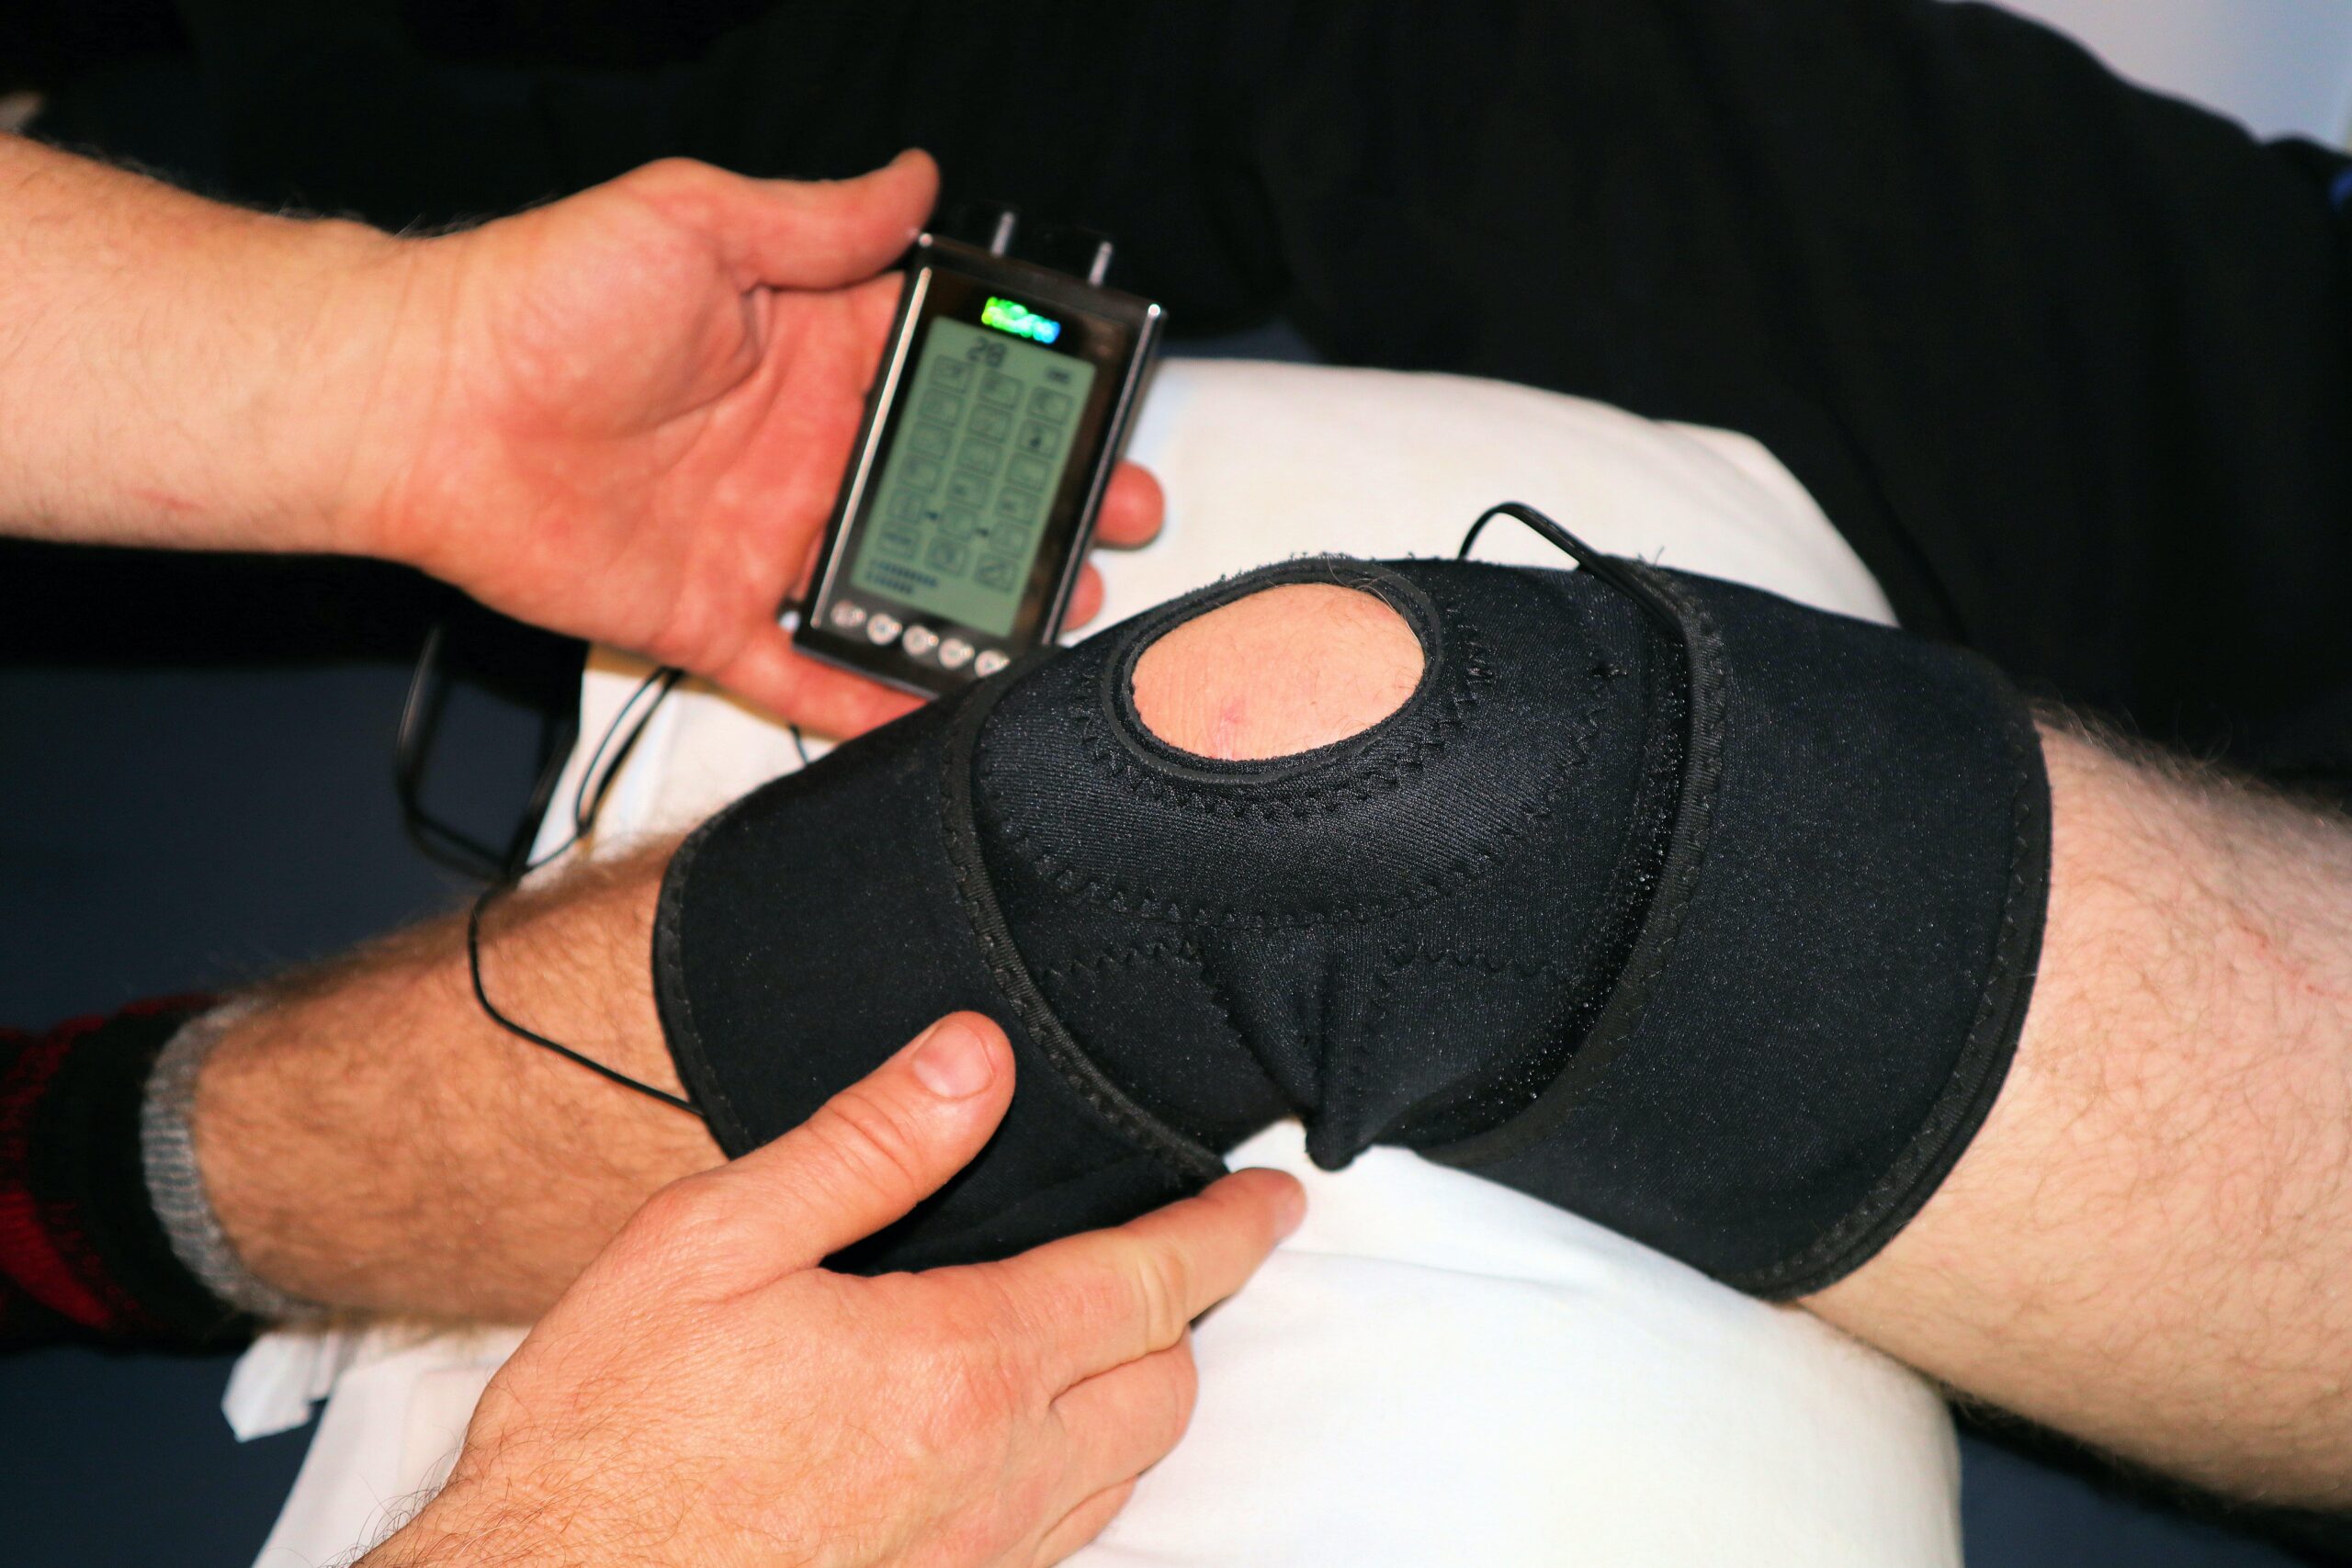
It’s that time of year where we may find ourselves kneeling down more than usual…wrapping gifts, playing on the ground with children or grandchildren, and picking up after the aforementioned children or grandchildren! Over time, many people find weight-bearing through the knees to become less and less comfortable and it’s usually due to degenerative changes in the knees. This can include arthritis of where the femur articulates with the tibia or patella.
The term “arthritis” refers to inflammation (-itis) of a joint (arthr-). Osteoarthritis is the most common form of arthritis in the knees. It is a degenerative, wear-and-tear type of arthritis that occurs most often in people ages 50 and older. There is a gradual wearing away of the protective covering of the bones of the knee, which results in a decrease in the joint space. As the cartilage wears away, it becomes frayed and rough. Over time, this can result in bone rubbing on bone and the development of painful bone spurs. The knee may become stiff and swollen, which may be worse in the morning or after prolonged sitting. Loose fragments of cartilage can interfere with knee range of motion and cause locking or a grinding noise called crepitus. But all of this usually doesn’t occur until the later stages of OA, so a lot can be done to manage symptoms and halt the progression of this degenerative diagnosis.
With any type of wear-and-tear issue, the most important thing to evaluate is the body in motion. In the simplest of terms, humans are just very advanced machines. In the same way that your tires will wear unevenly if you don’t rotate them, your body will wear down if you don’t give it regular tune-ups and move in multiple planes of motion! So typically if someone has developed OA in the knees, it’s traditionally due to both poor body mechanics and overuse of some sort. It is important to note that the knees are pretty simple joints in that all they really want to do is bend and straighten. If that’s all we ask them to do and if the weight is evenly distributed, they tend to stay pretty healthy. It’s when medial, lateral and twisting moments occur at the joint that we see injury. It’s with overuse that we see wear-and-tear. But the fact of the matter is that we need weight-bearing exercise to maintain the health of our articular cartilage. Studies have shown that 10% of sedentary people have knee OA as compared to only 3% of recreational runners. In elite/professional runners, the percentage increases to 13% due to the overuse.
By improving the way in which we move, we decrease the wear and tear through our joints. Keeping the kneecaps tracking over the feet, sitting back into the hips with heels-down squatting to keep the knees behind the toes, and maintaining strength in the core and hips all help minimize the amount of weight through the articular cartilage of the knees. Maintaining full joint range of motion allows weight to be transferred across a larger surface area and minimizes the amount of force through in any area in particular. Add exercise in additional planes of motion, such as LYT Yoga®, which increases strength of the hips and core, increases muscle and joint flexibility, and focuses on proper joint mechanics, and I’d argue your chances diminish even further. But sometimes no matter what we do, we are unable to bear weight through the knees due to pain. This doesn’t need to affect your yoga practice! I’ve created a 4-class beginner series on LYT Daily called “No Weight Thru the Knees”, so you can stay on your mat or help encourage someone you know to get LYT with you, knee pain and all! Click the link below to our YouTube channel for a short video on ways to modify your practice without bearing weight through the knees, so you can keep moving all season long! Until then, I’ll see you on the mat!
While it may be the “most wonderful time of the year”, it can also be quite stressful. So many studies are emerging revolving around the negative impact of stress on the body in so many ways. What happens in the body when we are stressed? What is the physiology of stress?
Any physical or psychological stress can disrupt the equilibrium of our body’s systems and result in a stress response, which manifests either in our body or in our behavior. This stress response is moderated between the nervous, endocrine, and immune systems, in order to prepare the body to handle the challenges presented by the stressor. But if the stressor is intense (or just perceived as being so), repetitive, or prolonged, the stress response becomes maladaptive and harmful.
Stress generally affects all systems of the body, including the cardiovascular, endocrine, respiratory, gastrointestinal, nervous, muscular, and reproductive systems. With regards to the cardiovascular system, acute stressors, such as awaiting test results or slamming on the brakes to avoid an accident, cause an increase in heart rate, stronger heart muscle contractions, dilation of the heart, blood pressure elevation, and redirection of blood to larger muscles. This is also known as the “fight or flight” response. The endocrine system increases its production of stress hormones – epinephrine (adrenaline), norepinephrine, and cortisol – which act as messengers for these effects and provide the energy required to deal with the challenge. Once the acute episode passes, the body returns to its normal state. Acute stress manifests in the respiratory system as shortness of breath and rapid breathing due to the constriction of the airway between the nose and lungs. It has been shown to trigger asthma attacks and bring on panic attacks as well. The gastrointestinal system has hundreds of millions of neurons which are in constant communication with the brain, explaining that feeling of “butterflies” in the stomach. It can affect how quickly food moves through the bowels, digestion, and what nutrients the intestines absorb. Stress can also make the intestinal barrier weaker, causing changes in the gut bacteria, which can then impact the ability to think and affect emotions. With regards to the nervous system, stress will activate the sympathetic nervous system, which in turn activates the adrenal glands to produce more stress hormones. Stress affects the musculoskeletal system by tensing up the muscles to guard against pain and injury. Finally, in the reproductive system, acute stress can cause impotence and adversely affect menstruation cycles.
As the duration of stress lengthens, it becomes chronic. Stress responses go through three different stages in this progression:
Recovery Phase – following the acute phase, the body begins to repair itself by lowering cortisol levels and normalizing the physiologic responses but remains on high alert.
Resistance Stage – if the stressors persist, the body will adapt by continuing to secrete stress hormones, which keeps the body’s physical response to stress elevated – symptoms include poor concentration, irritability, and frustration.
Exhaustion Stage – the body’s immune system begins to weaken as a result of the suppressive effects of stress hormones, causing symptoms of burnout, fatigue, depression, anxiety, and reduced stress tolerance.
Chronic stress manifests in all of the systems of the body as well. It can increase the risk for hypertension, coronary artery disease, heart attack, and stroke. It results in a long-term drain on the body due to the continuous activation of the nervous system and has been linked to the development of chronic fatigue, metabolic disorders like diabetes and obesity, depression, and immune disorders. Chronic stress can affect testosterone production resulting in a decreased sex drive and can negatively affect a woman’s ability to conceive and her postpartum adjustment. Finally, it causes the body to be in a relatively constant state of guardedness, which may trigger other musculoskeletal reactions in the body. For example, low back and upper extremity pain have both been linked to stress, especially job-related. Both tension headaches and migraines are associated with chronic muscle tension in the shoulders, neck, and head. Muscle tension and eventual muscle atrophy all promote chronic, stress-related musculoskeletal conditions.
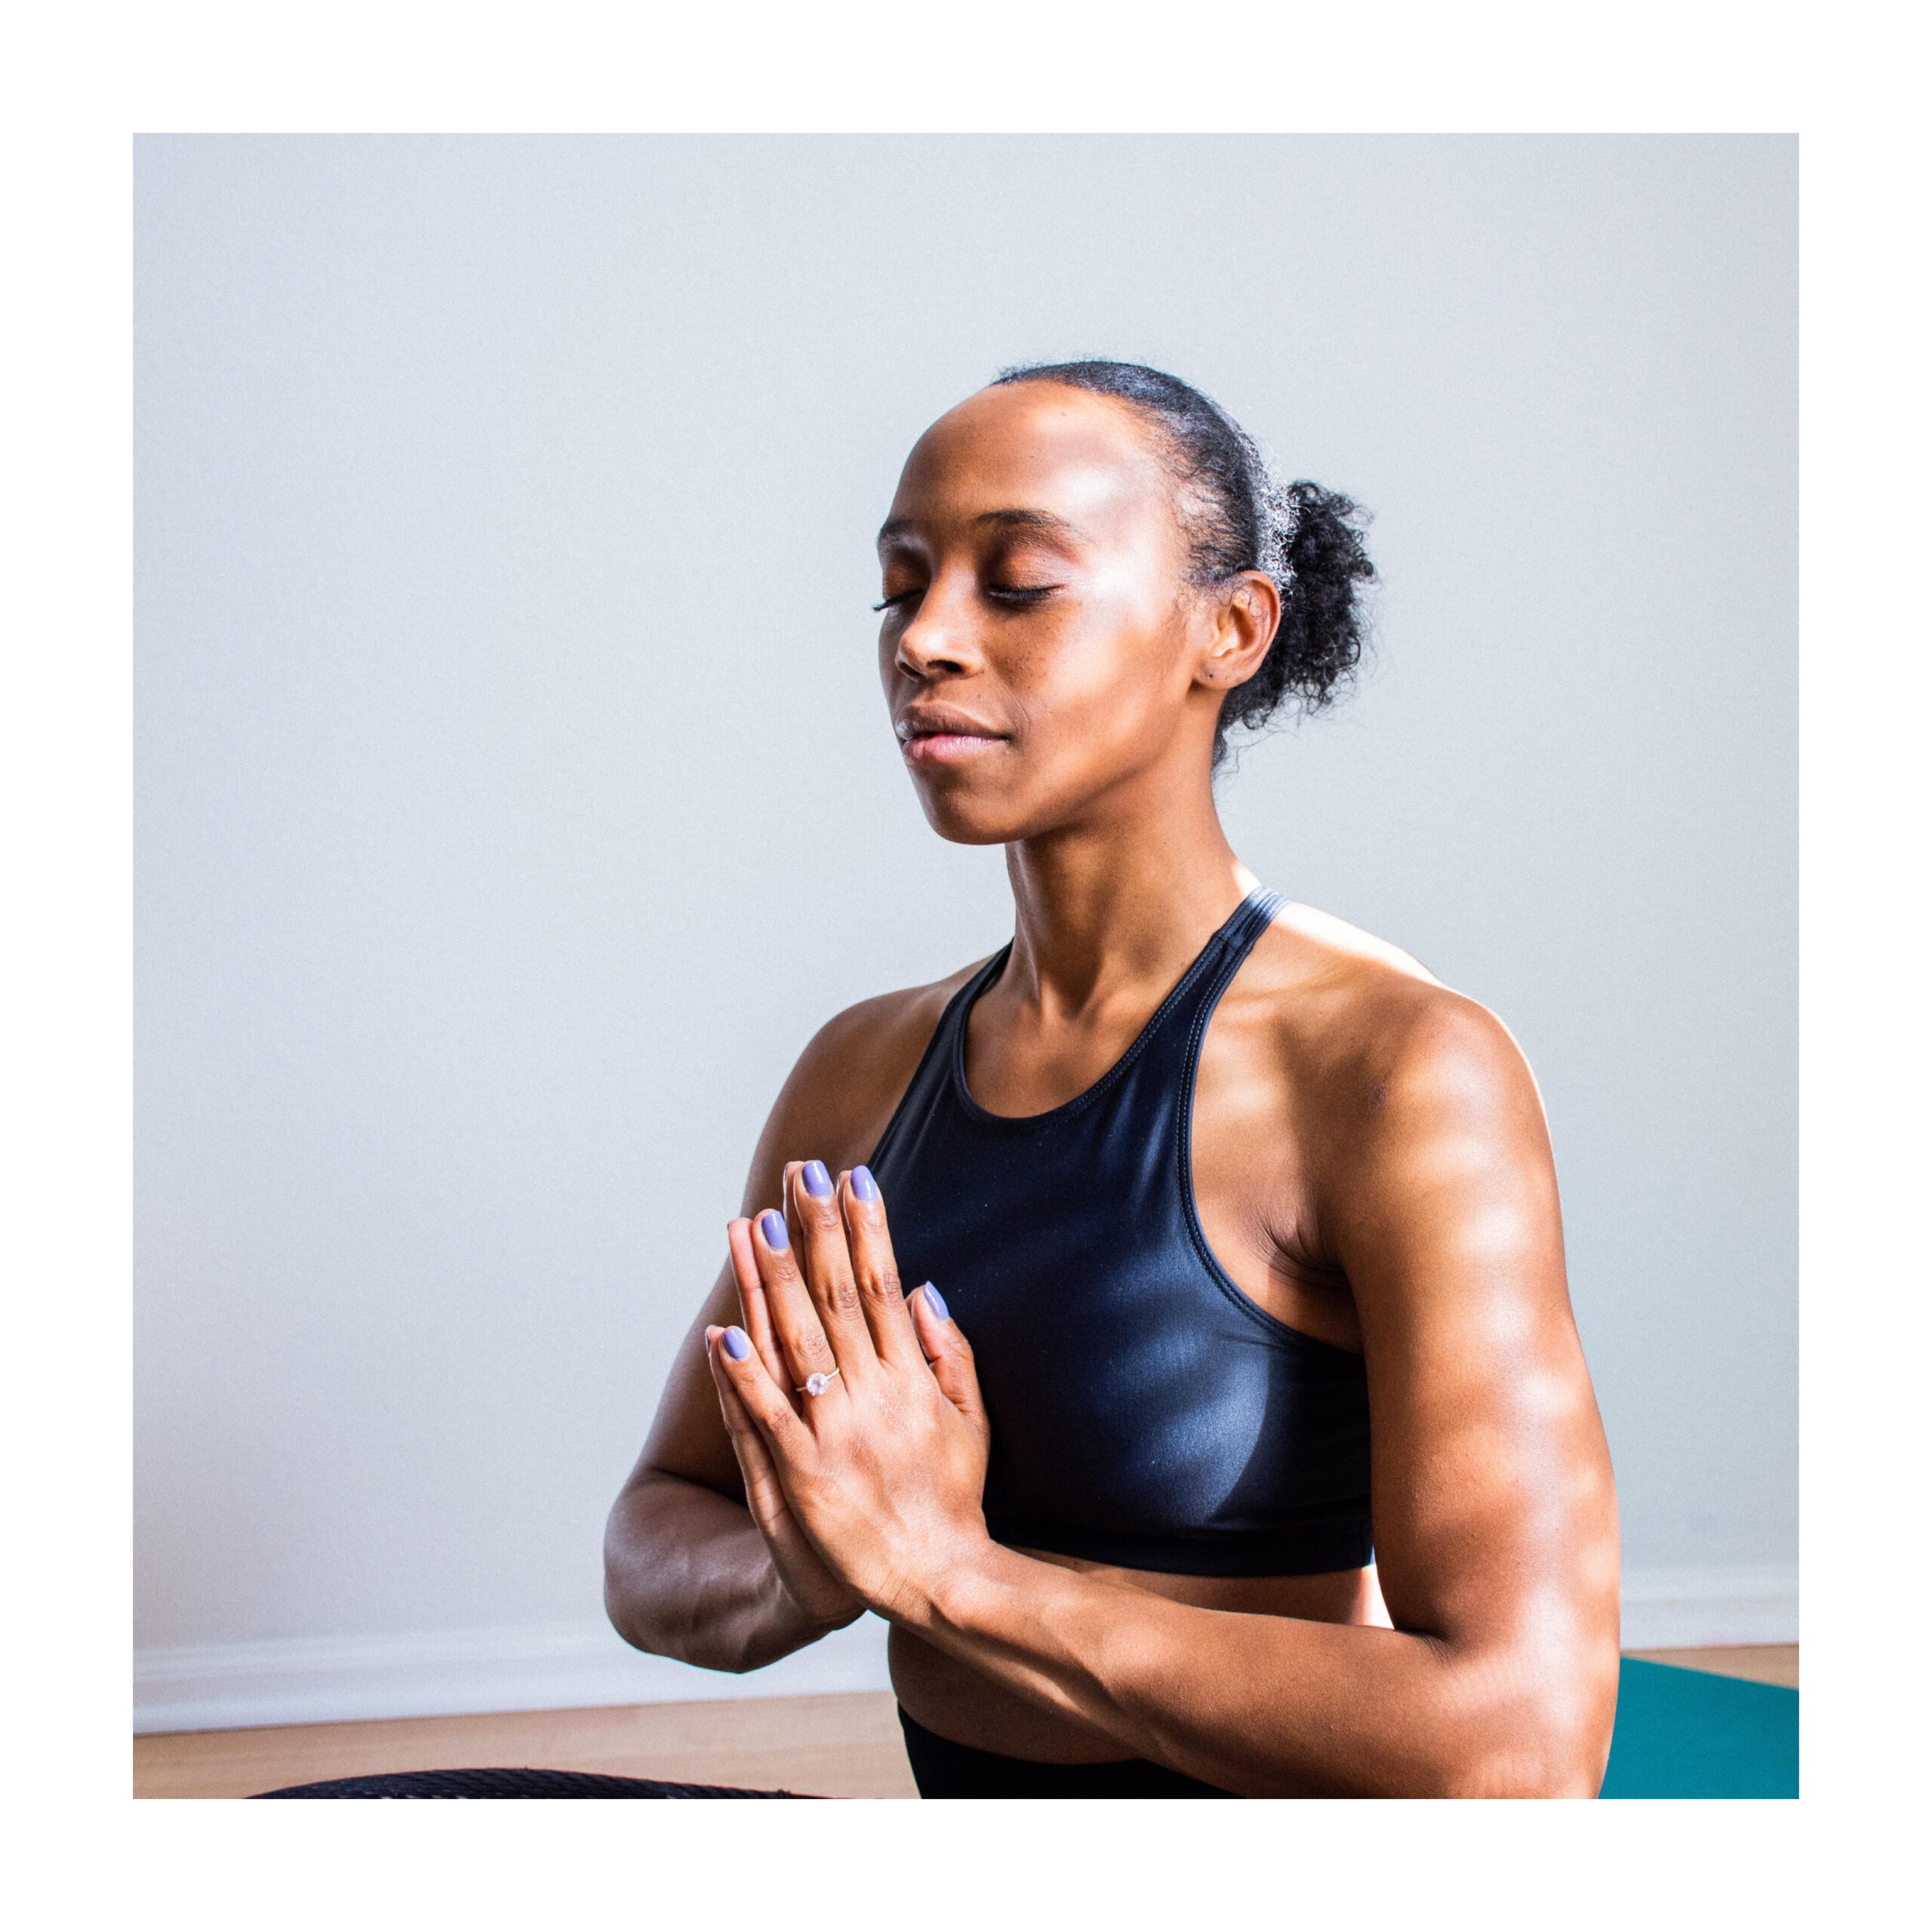
So what can we do about it? Exercise and mindfulness have been shown to be effective remedies for stress, both acute and chronic. So head on over to LYT Daily for hundreds of on-demand classes or to the LYT Studio for LIVE Zoom classes with feedback from our fabulous LYT instructors. See you on the mat!