Category: PT Corner with Kristin Williams

  • Keep on Track

    Keep on Track

    When my kids were little and needed to be soothed, I would have them lie across my lap and I would count their bones. I’d tell them what each bone was called by their full Latin name and eventually move onto the muscles. They LOVED it. I’ll never forget the first time Betsy fell down and told me that she “scraped her patella”! I was at first super proud and then a little horrified, imagining the hard time the kids in her class would give her for being weird or the looks I’d receive from the school teachers! Luckily, they quickly outgrew the medical terminology, latched onto the easier terms like “kneecap” and “elbow” (instead of olecranon process), and any social trauma I might have inadvertently caused was averted. 🙂


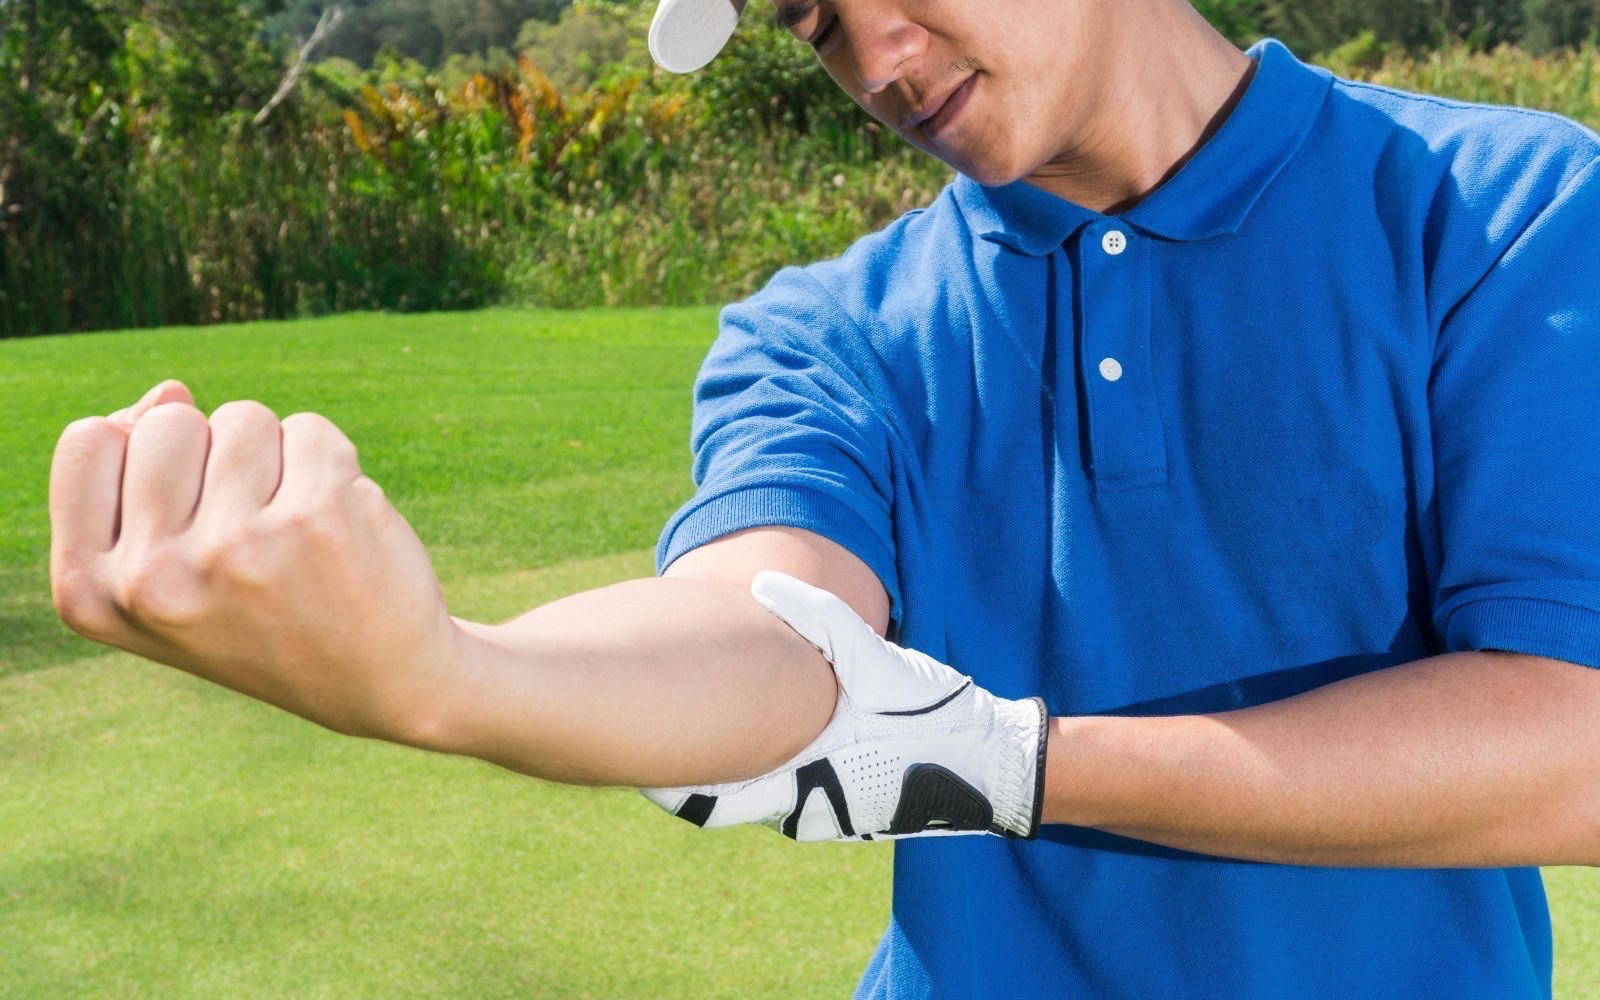
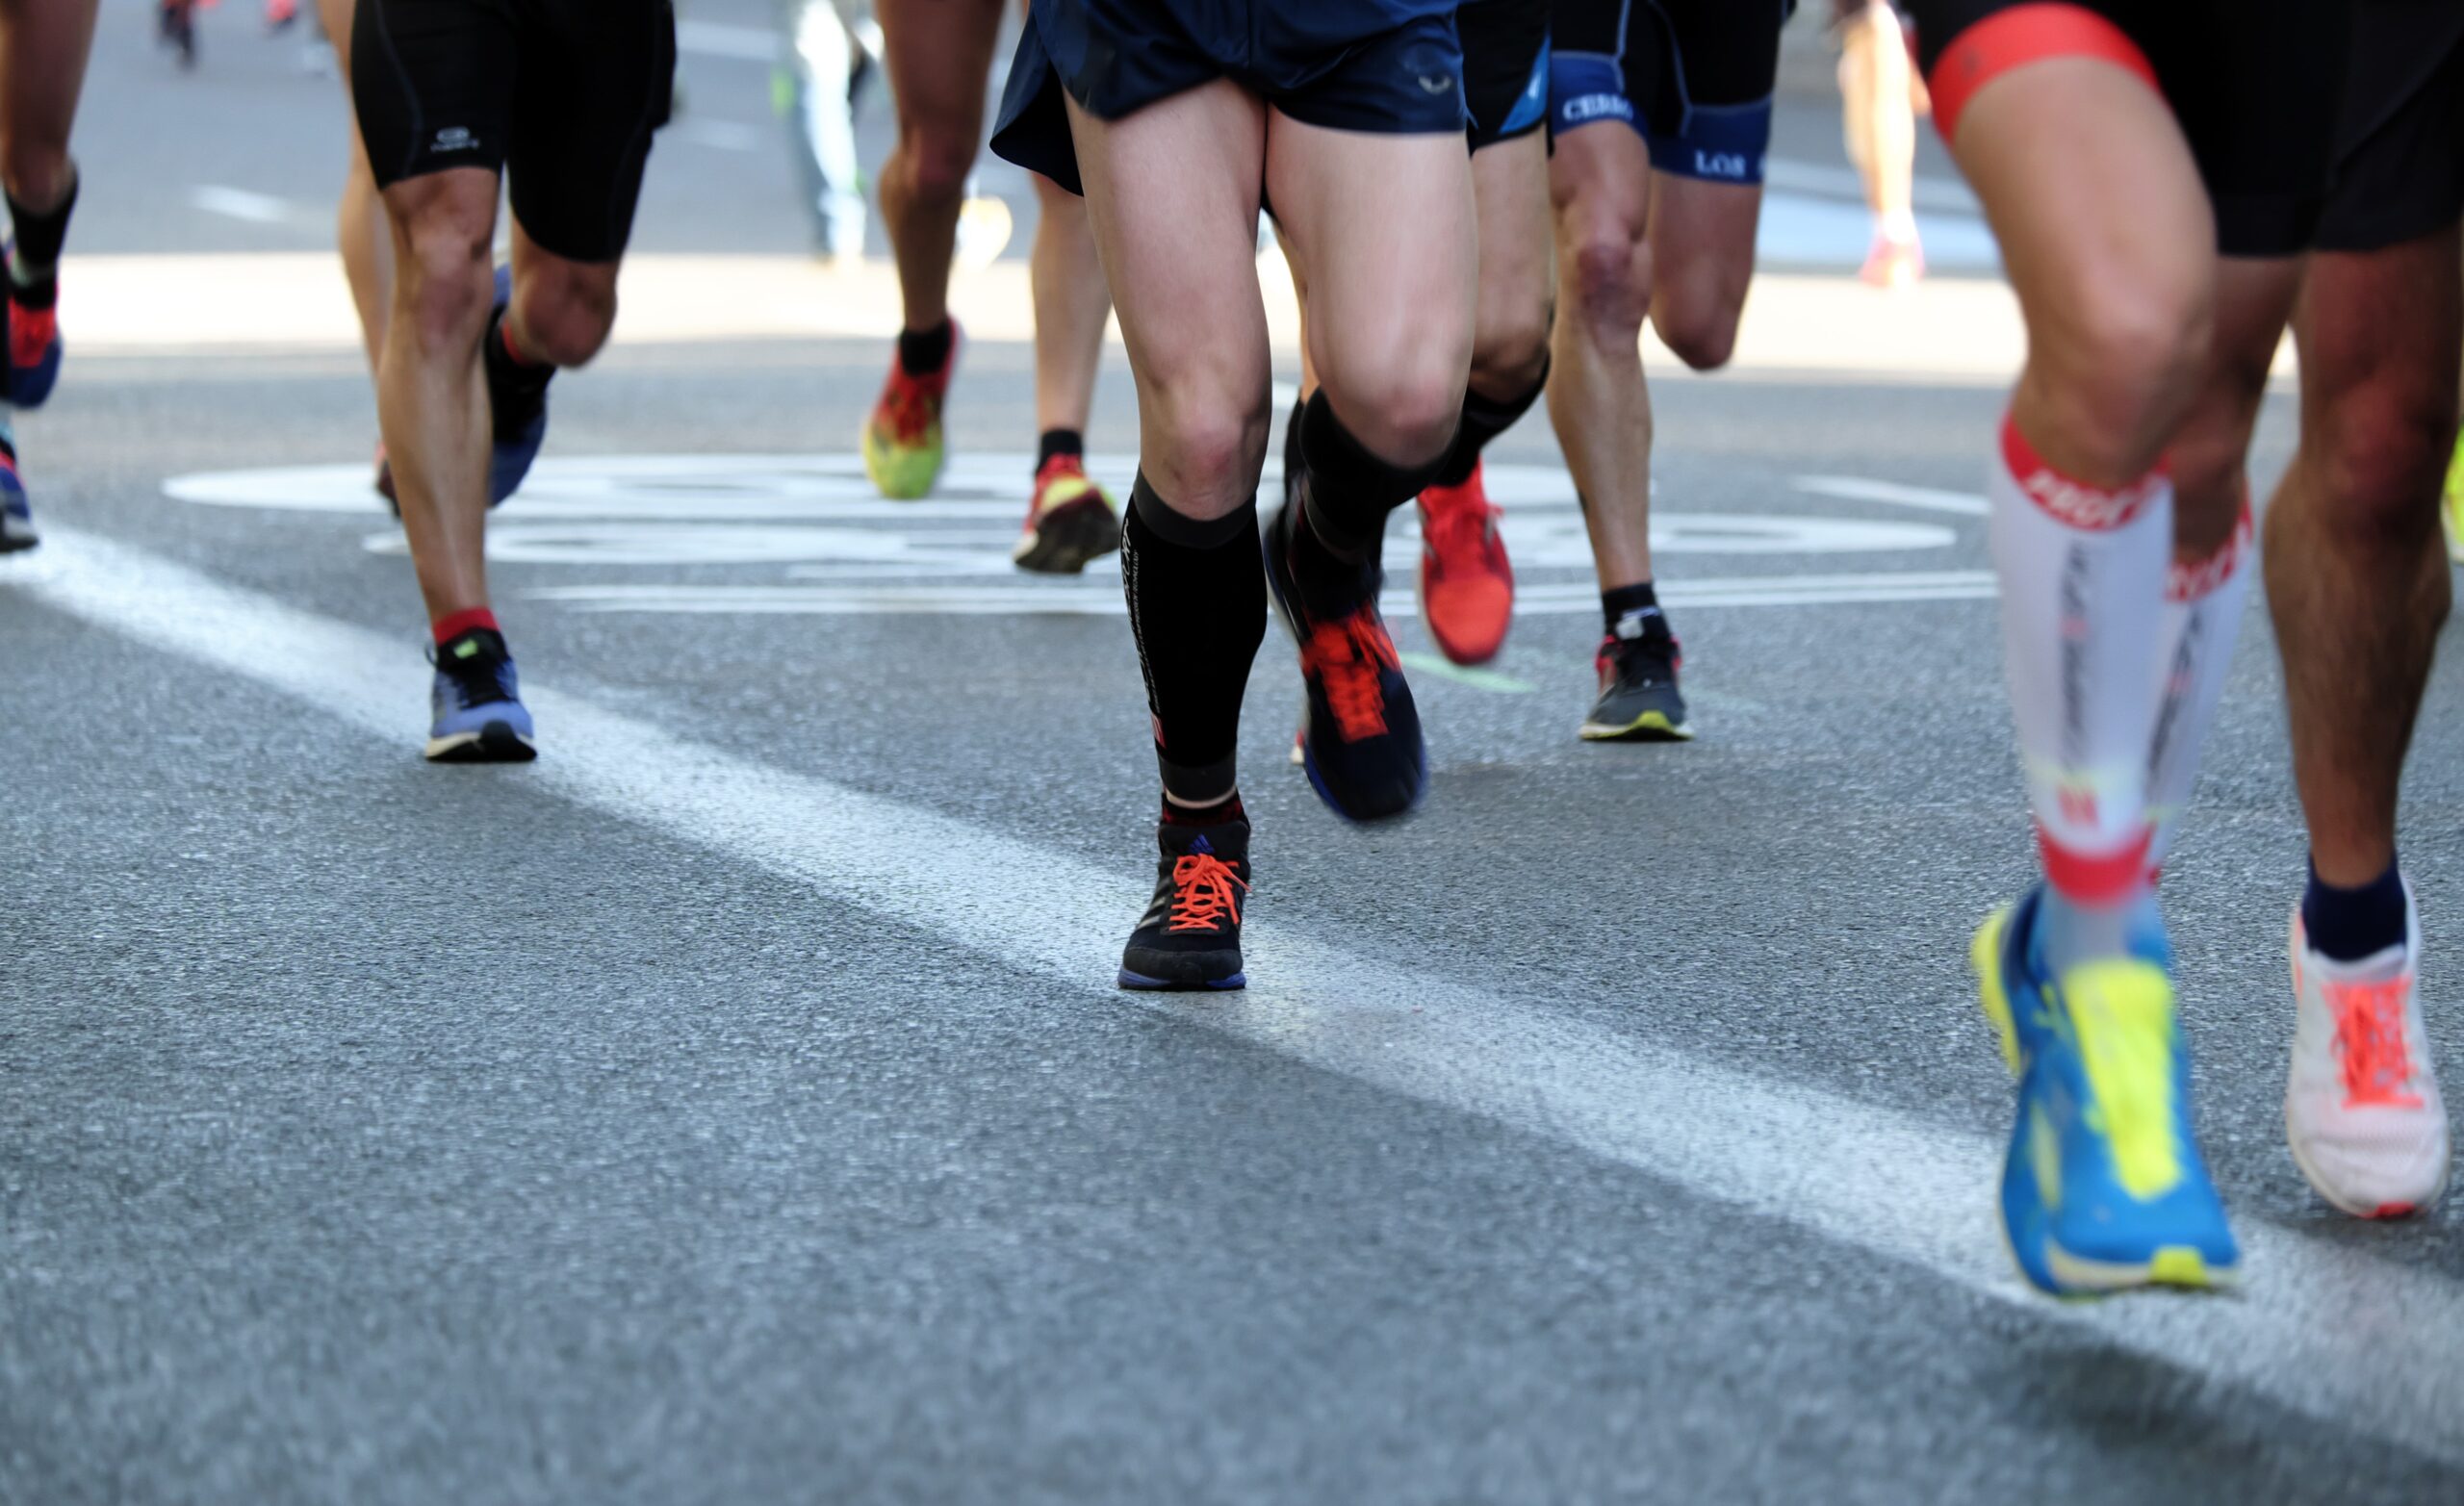
    As we grow older, whether or not we choose to go into medicine, pretty much everyone learns that the kneecap is called the patella. So many people experience knee pain at one time or another, or know someone who has, making terms like patellofemoral syndrome and patellar tendinitis commonplace. Since I’ve gotten back into regular jogging, my patellae are making themselves known again. Sometimes I’m afraid you all can hear the crackling over Zoom when I come from a deep squat to stand! Why does that happen? What is that noise? What is the point of the patella anyway? I hope to answer all three of those questions and if you’re interested in the answers, read on.


    The patella is also known as the kneecap. It’s the largest sesamoid bone in our body. Sesamoid bones are bones embedded within a tendon or muscle. It attaches the tendon of the quadriceps to the tibia, via the patellar ligament. The patellar ligament is also known as the patellar tendon, but since it goes from the patella (bone) to the tibia (bone), it’s technically called the patellar ligament.


    The primary function of the patella is to act as a fulcrum for the quadriceps, increasing its extensor strength by 33-55%. The bottom surface is covered by 3-5mm of cartilage, which is the thickest layer of cartilage anywhere in the body. The structure of the knee joint is such that the compressive force on the patella is SEVEN times the body weight when descending stairs, so it’s no wonder its articular cartilage is so thick! However, it should come as no surprise that it is subject to wear and tear over time with repetitive climbing, descending, and running on hard surfaces. Under normal circumstances, the role of the cartilage lining the undersurface of the patella is to decrease friction between the patella and the groove of the femur, in which it articulates. Sometimes we have issues that arise with the “tracking” of the patella within this groove and we develop areas of increased wear, called crepitus. The crackling sound from the knees when going from squat to stand or vice versa is secondary to crepitus. The smooth surface of cartilage is normally soundless. When we start hearing noises (aka crepitus), it’s because the surfaces are no longer smooth…more like sandpaper.


    There are several different reasons why the patella may not track correctly, including:

    • Weak hip muscles – poor gluteus medius strength allowing internal rotation of the femur and “knocking” on the knees
    • Poor static alignment of the patella – too high or low, tilted, or rotated
    • Connective tissue restrictions around the patella – too tight or too lax


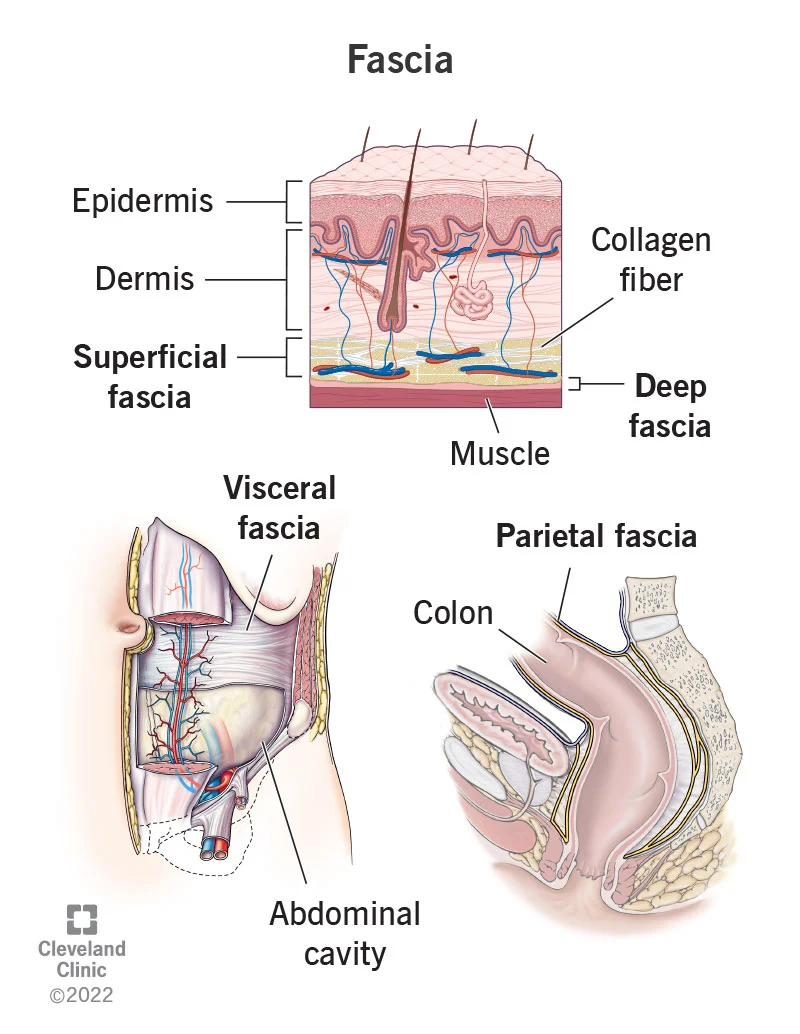
    We can have the greatest effect on patellar tracking with movement retraining. Strengthening the hips, glutes, hamstrings, and core musculature. The knee joint really just wants to flex and extend, keeping the patella tracking superiorly and inferiorly. Keeping the knees moving over the feet allows for this. Not allowing the knees to go over the toes with repetitive up-and-down movement is also ideal. Keeping our body weight within normal limits, without any added body weight pressure on the patella is crucial. Mobilizing the soft tissue structures surrounding the knee, including both fascia and muscles, to allow the patella to track freely up and down is a great way to minimize patellofemoral wear and tear.


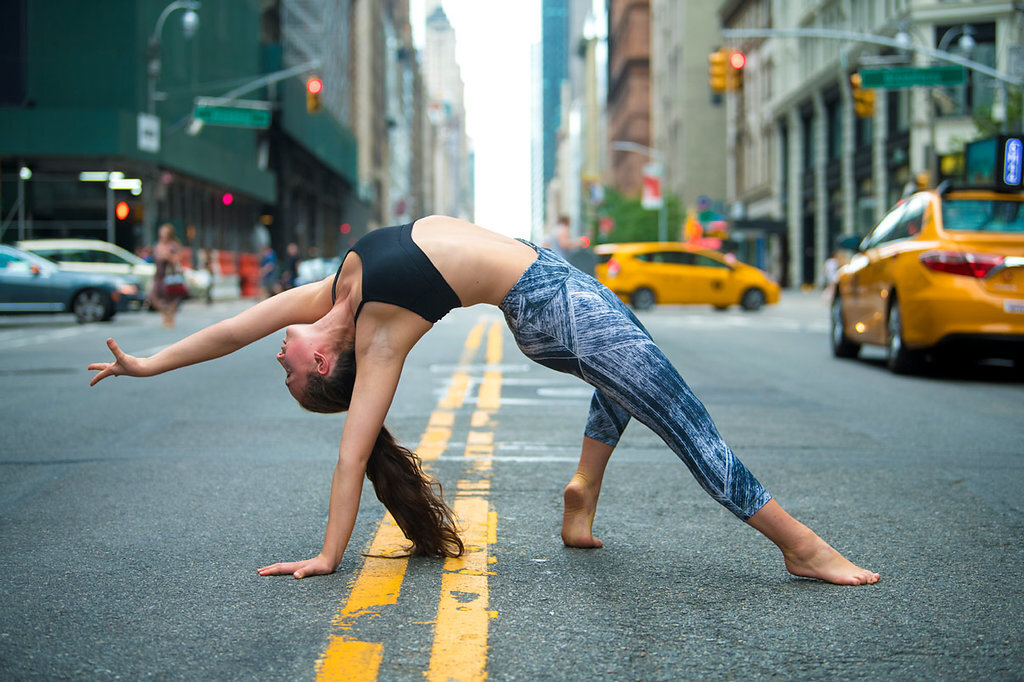
    Keep on track with your LYT yoga practice, which challenges the body and core in all of the above ways! https://old.lytyoga.com/


    See you on the mat!


    Xoxo,

    Kristin

  • Golfer’s Elbow

    Golfer’s Elbow

    Golfer’s Elbow


    The weather is getting nice and people are already hitting the green and getting back into the swing of things, literally.


    One injury we see in golfers is called medial epicondylitis, or golfer’s elbow.


    In athletics, it is also seen in throwers, rock climbers, bowlers, and weightlifters. Golfer’s Elbow (GE) is primarily caused by repetitive eccentric loading of the wrist flexors and/or forearm pronators, coupled with valgus overload at the elbow. A valgus force is one where the lower arm moves away from the body while the upper arm stays in close (so imagine “knock knees”, but in the arms).


    With golf, the intense valgus force at the elbow occurs during the late phase of the golf swing just before and during contact with the ball. This same valgus force occurs during the late cocking phase of throwing, which is why this is also called thrower’s elbow. Simultaneous wrist flexion and/or forearm pronation during ball release may produce even greater stress on the tendon, which is why technique matters. Medial epicondylitis is also seen in the general population in careers requiring repetitive upper extremity use, such as carpenters, massage therapists, utility workers, and butchers.


    Golfer’s elbow is a chronic tendinosis of the flexor-pronator muscle group, right where it inserts on the medial epicondyle of the humerus. The flexor-pronator muscle group is composed of the pronator teres (which pronates or turns the forearm down) and common flexors of the wrist and hand, including flexor carpi radialis, flexor carpi ulnaris, flexor digitorum superficialis, and palmaris longus. With GE, the tendons of the flexor carpi radialis and pronator teres are the most commonly involved. The inside ligament of the elbow, called the ulnar collateral ligament (UCL), also attaches to the medial epicondyle. Together, the UCL and the common flexor tendon provide stability against flexion and valgus forces at the elbow.


    Just like lateral epicondylitis or tennis elbow, medial epicondylitis or GE is considered a chronic tendinosis as opposed to an acutely inflamed tendinitis. There are four proposed stages of epicondylar tendinosis:

    1. Generalized inflammation – friction causing inflammation of tendon
    2. Angiofibroblastic degeneration – weakening of the tendon
    3. Structural failure – microtearing of tendon
    4. Fibrosis/calcification – failed reparation process which yields scar tissue


    People with GE usually present with pain at the medial aspect or inside of the elbow. It is worse with activities, especially gripping, flexing the wrist, pronating the forearm, and throwing. Pain usually comes on gradually, but can be sudden if caused by trauma. Occasionally the pain radiates into the forearm and wrist. Some people may complain of associated numbness in the lateral wrist and last two fingers secondary to impingement of the ulnar nerve at the elbow. Often, there is tenderness to touch roughly 0.5-1 cm below or distal to the medial epicondyle. Symptoms are normally relieved by rest. Pain is aggravated by resisted wrist flexion and pronation.


    Treatment of Golfer’s Elbow begins with rest. People should refrain from activities that exacerbate the symptoms, particularly repetitive wrist flexion, forearm pronation, and valgus stress at the elbow.


    Kinesiotape is useful to limit the maximum contractile force generated by the flexor-pronator muscle group. Once acute symptoms are alleviated, the focus turns to stretching and strengthening. Each phase of rehab requires targeted exercises with increasing repetition and speed. Initially, motion of the wrist and elbow is emphasized with non-weight bearing exercises and self-directed stretching. Once pain-free range of motion is achieved, tendon rebuilding and strengthening begins. Concentric open and closed chain exercises are used, increasing in weight and repetitions as tolerated. Finally, eccentric strengthening is implemented.


    A popular exercise that has been shown to treat chronic GE is the Reverse Tyler Twist. A rubber bar is held at one end near the chest with the involved hand, palm facing the body and wrist fully flexed. The other end of the bar is grasped by the uninvolved hand, at the other end of the bar, from above with the palm facing out. The rubber bar is then twisted by bringing the uninvolved elbow down so both palms are facing in. The arms are then brought in front of the body by straightening the elbows, while maintaining the twist in the rubber bar by maintaining full flexion of the involved wrist and extending the uninvolved wrist. The bar is slowly untwisted by moving only the involved wrist and hand back towards neutral. This slow, controlled motion provides an eccentric strengthening and lengthening component to the flexor-pronator group and its common tendon.


    For golfers, equipment and technique should be addressed to reduce undue stress at the elbow. When selecting golf clubs, the length, shaft weight, club head weight, and club head strike zone must be considered.


    Golfer’s elbow is often found in the trail arm. Stress on the pronator teres of the trail arm is more often seen in amateur golfers than in pros, who use the lead arm in a protective manner to obtain optimum swing speed and power without excessive stress. Strengthening of the shoulder girdle and scapular stabilizers is key. Core and lower body strengthening may also aid in golfing mechanics, to relieve stress at the elbow when return to sport is allowed. Please be sure to check out Lara’s Golf Series on LYT Daily, where you can be sure to find the best prescription for your body! The Series is also available for purchase if you aren’t a LYT Daily subscriber! Happy golfing everyone!

    Xoxo,

    Kristin

  • Neurodevelopmental Sequence

    Neurodevelopmental Sequence

    When we had a brick-and-mortar LYT NJ studio, we used to sell shirts with the phrase “Smart Yoga” on them. One day, someone asked me what that meant and I realized she probably isn’t the only one who didn’t know! What is it about the LYT Method that makes it “smart”? In my opinion, it comes down to one thing: following the neurodevelopmental sequence from beginning to end. 


    The neurodevelopmental sequence is the normal movement progression that babies follow as they learn to roll, sit, crawl, stand, and then walk. Many rehab professionals use this sequence to progress their older patients in a clinical setting. The lower developmental postures provide the necessary strength, stability, and coordination required of the higher developmental postures. The milestones that babies reach on their way to standing is the basic premise of the neurodevelopmental sequence. In infants, the sequence normally followed is as follows:

    • Supine → Head and Neck Control in Prone → Rolling → Grasping → Sitting → Quadruped → Crawling → Tall Kneeling → Half Kneeling → Standing → Walking


    If we convert this to the adult population in a rehab or functional training setting, we may adjust the head and neck control since most people can easily hold up their head. However, it doesn’t mean we eliminate it completely, as many people lack correct cervical positioning or posture. The same is true with grasping. While we may not have to teach someone to hold objects in their hands during a training session, we often need to educate about the use of hands successfully in weight-bearing positions. Skipping over any of these developmental levels can leave people without the foundation they need to be successful at the higher levels. This includes yogis. Without these basic foundational skills, people are at a higher risk of injury. Each movement pattern serves as a stepping stone, helping to sufficiently build correct posture, balance, mobility, and stability to allow movement onto the next level.


    So how does this translate to LYT Yoga®? Every single time you get on your mat, we are following the neurodevelopmental sequence. We begin every class with the Reset for a reason. Within the Reset alone, we go from Bridge (Supine) → Ab Work (Supine) → Supine Twist (Rolling) → Cat/Cow (Quadruped) → Dolphin (Quadruped) → Half Kneeling/Standing (Sun Salutation 1). With the Bridge and Ab Work, we’re preparing the body at its lowest developmental level. This allows us to really focus on neutralizing the pelvis, waking up the back body, and heating up the core cylinder. We don’t have to worry about balance or stability (unless we choose to). The LYT version of the Supine Twist is active (not a passive stretch) for a reason. With adults, the rolling movement strategy isn’t used very often and becomes deficient. It’s a great technique to restore balanced movement between the legs, trunk, and arms. The movement is initiated at the leg (pressing the inner edge of the foot into the mat), transmitting force through the core to the arms (stabilizing through the scapulae). Moving into Cat/Cow and/or Dolphin progresses the body into Quadruped, where stability through both the hip and shoulder girdles is required. This uses the proximal stabilizers of the pelvis, scapulothoracic region, and spine. Finally, the reason we do Sun Salutation 1 in every full LYT class is because it follows the neurodevelopment progression into half kneeling (Low Lunge) and standing (Tadasana). In my early Beginners classes, I actually add tall kneeling into my Sun Salutation 1 between Down Dog and Low Lunge, as many people lack the strength, stability, or simply the hip range of motion to step the foot forward with control.


    Another principle of neurodevelopmental sequencing is that you move from simple to complex. This is where the Sequences and the Stream come into play. You should notice in every class a progressive increase in difficulty and complexity from one Sequence to the next, which culminates to the Stream, where we may spice it up even further. In the simplest of terms, repetition is how we learn, and tweaking things is how we grow. This turns every single LYT Yoga® class into a therapeutic rehabilitation and functional movement training session. It’s smart because it’s intentional, it’s planned, and it follows the neurodevelopmental sequence. 


    If you’re interested in learning how to teach the LYT Yoga® Method or just want to deepen your knowledge about the body and how to move better, we have our next online teacher training cohort beginning on March 12th! Click the link below for more details!!


    Xoxo,

    Kristin


    Purchase LYT Level 1 Teacher Training

  • Fascia and Why We May Want to Release It

    Fascia and Why We May Want to Release It

    Coming up next weekend (Sunday, February 12, 10-11:30am ET), Lara is doing her monthly workshop on ways to take care of our various soft tissues. Sounds AMAZING right? One area she will be focusing on is fascia and if you’re wondering what fascia is and why you may want to free it up, keep reading. 🙂


    Fascia is a connective tissue that covers every structure of the body, giving it form and function. It wraps, penetrates, supports, and forms the skin, vascular and nervous structures, bones, organs, and muscles. This three-dimensional structure provides an environment that allows all of the systems of the body to operate in an integrated way. Another important feature of fascia is that it is capable of responding to mechanical stress. It constantly transmits and receives mechano-metabolic information to influence the shape and function of the body.


    Because fascia is one of the richest sensory tissues in our body, it has both mechanical and emotional effects within the body. Normal movement is due to the presence of fascia. It allows the sliding of muscles, nerves, and blood vessels between joints, and the organs to slide and move in response to the position of the body in space. Whenever we change position, mechanoreceptors in the fascia detect the change, send the information to the brain where it is interpreted, and then this information is relayed to the muscles. Dysfunction of the fascial system can cause a disconnect between the central nervous and musculoskeletal systems and greatly affect posture and movement patterns. In addition to these receptors for spatial awareness, receptors for pain and body image/awareness are also found within the fascia. Since they are in close proximity to one another, disruptions may affect these areas as well. In fact, the position of the body has been shown to stimulate areas of emotionality in the brain. Therefore, dysfunction of the fascial system can change not only one’s posture, but also one’s emotional state, body image, and pain perception.


    Fascial dysfunction can occur for a variety of reasons. Stress on the fascial system due to poor movement patterns, sub-optimal nutrition, habitual postures, and physical or emotional trauma can all impact fascia’s ability to glide and slide. The absence or reduction of sliding causes an inflammatory environment, which creates adhesions between the various fascial layers. These adhesions then vascularize, become innervated, and can be the reason for recurrent pain, stiffness, tissue fatigue, and reduced function. Furthermore, compensatory movement patterns secondary to adhesions can then occur, resulting in more stress on the fascial system, and the cycle restarts.


    If fascia becomes fibrotic, as described above, movement is difficult. Movement patterns become uncoordinated, producing more anaerobic metabolites, which are registered by the brain and spinal cord as fatigue. This is common with conditions like fibromyalgia. Studies have also shown fascia to be a potential cause of pain. There is a decrease in viscoelasticity, or sliding and gliding, within the fascial system causing the pain receptors to become activated. Studies have shown that mobilizing fascia leads to an overall reduction in pain. Movement can be restored allowing optimal force transmission across the tissues of the body so a person can move and therefore function better. It should always be supplemented with exercise and functional movement like LYT Yoga® to retrain the body, addressing musculoskeletal strength and imbalances throughout. 


    If you want to free up your fascia and other soft tissues in the body, join Lara next weekend on LYT® Daily for her workshop! Click the link below for more details or to sign up. You won’t regret it! 


    Soft Tissue Self-Care Workshop with Lara Heimann

    Sunday, February 12, 10-11:30am ET

    https://lytyoga.uscreen.io/programs/selfcare


    Xoxo,

    Kristin

  • Easing Into A Running Program

    Easing Into A Running Program

    Many people hate running. I used to be one of those people too, believe it or not. Back when I was in PT school, I was having a hard time getting into a routine with exercise and felt like all I was doing was studying and working. That’s when I decided to train for my first marathon. The best thing about running is you can do it anywhere, at almost any time, and with minimal equipment. However, there are right and wrong ways to go about getting started running safely. In the spirit of October, which one could argue is the start of marathon season, let’s talk about how to ease into a running routine. 


    The best place to start is to determine your “why” and go from there. For me, it was simply wanting to get in shape with the littlest cost and time, so running fit the bill perfectly. Determining why running is important to your overall health goal can help you stay on track when you might feel like quitting. Keep it in the back of your mind as you go through your running journey. You’re going to have good days and bad days, so having this “why” may be the very thing that keeps you on track.


    The next step is to set a realistic goal within a realistic timeframe. Upwards of 65% of all people who begin an exercise program end up dropping out in three to six months. If your goal is to run a marathon, there are plenty of 4-6 month programs out there. But if you’re new to running, this timeframe is highly unrealistic. I gave myself a year of training before my first marathon, as the furthest I’d ever run was three miles at that point. So start with smaller and more attainable short-term goals, such as a 5K. Once you’ve set your goals, create a plan to reach them. 


    Having a formal training schedule to follow is a great way to help stick with the plan. The internet is full of training programs. I’ve found that running 3-4 times per week works best for my body. I run every Monday, Wednesday, and Friday morning, even when I’m not training for a race. Were I to run another marathon, I would add Sunday into the mix. Look at your schedule, determine the most ideal time for you to hit the road, and then make it a recurring appointment. Always have a plan B for when life or weather gets in the way. If you belong to a gym, running on a treadmill is a great substitute in a pinch. If and when setbacks happen, and they will, don’t just throw in the towel. Be compassionate with yourself and get back in the game when you’re able. 


    Remember to start slow. Progressive overload is a commonly utilized training method with weight training and involves gradually increasing the weight, frequency, or repetitions in a routine. It can be applied to running programs as well. Exercise is a science and should be approached as such. Your weekly routine should also include cross-training. Starting with anywhere from 10-15 minutes of running and slowly building in intensity, duration, and frequency. A general rule of thumb is to increase by no more than 10% per week. Also, choosing a run/walk method is a great way to avoid injury. On my shorter runs, I run 9 minutes and walk 1 minute throughout. On my longer runs, I run 4 minutes and walk 1 minute. It allows me to enjoy the entire run and gives my muscles and lungs a little break from start to finish. 


    Getting the right equipment is important too. Go to a reputable running store where they will let you try on and run in multiple different pairs of shoes. Finding the right pair for you is key. Clothes that wick the moisture away from your skin are paramount. Cotton is NOT your friend when it comes to running! Wearing layers works best for me in the fall and winter months. Having a thin windbreaker on the outside keeps you from getting chilled when sweating. If you’re going for a long run, having a belt to carry water and refueling nutrition is an absolute must. Lastly, if you know it will be dark when you run, reflective gear and headlamps can be found cheap and are important for your safety. 


    Finally, accountability is huge. I used to pick a fun destination for my marathons, so once I bought that plane ticket and paid the entry fee, there was no turning back! Finding a social network to run with is a game changer too. Your running partners will begin to feel like family. People will look forward to seeing each other and sweating together, even in the wee hours of the morning! 


    So lace up those shoes and hit the road! I just filmed a wonderful LYT Yoga class you can do on your off days called “Runner’s Recovery”, which will help you loosen up any tight areas and recover quicker after a long run. LYT Yoga is a wonderful cross-training option for running. I have a Runner’s Series of classes on LYT Daily as well. Click the links for the class or the series! 


    Xoxo,

    Kristin

  • The Safe Way To Do Yoga For Back Pain

    The Safe Way To Do Yoga For Back Pain

    For anyone who doesn’t know my story, the reason I got into yoga is that numerous patients in my physical therapy practice were coming having injured themselves in yoga, particularly in online yoga classes. I couldn’t understand what people could be doing in these classes to strain their backs, so I decided to check it out for myself. It only took one class for me to realize why I was having an influx of patients. 


    The bottom line is that traditional yoga puts most participants at risk for injury. The extreme end-range poses, coupled with either too much or too little flexibility/mobility, is the perfect recipe for painful results—especially low back injuries. Still, the challenge of yoga appealed to me, so I kept dabbling in it. 


    It wasn’t until I was introduced to the LYT Yoga Method that I realized there was a safe, correct way to do yoga. When performed safely, yoga can be great for back pain. I started adding the principles of LYT Yoga to my outpatient practice, recruiting many of my patients to join me on their yoga mats. 


    The keys to safely doing yoga for back pain include finding a neutral pelvis, mobilizing and strengthening the hips, and strengthening the core. 


    Many people who suffer from low back pain exhibit poor movement patterns that originate from the pelvis. If you observe people in their day-to-day activities, you’ll often see them dipping into their low back or sinking into one side. So why would we want to ask someone to do the same thing over and over on the yoga mat? 


    A traditional Low Lunge puts the pelvis into a deep anterior tilt while dumping into the low back and sinking into the hips. The same is often true of other poses, such as Crescent Lunge, Cobra, Plank, and Upward Facing Dog. 


    By finding a neutral pelvis, we eliminate the hyperextension that occurs in the low back and hips. This greatly decreases compression on the discs and lumbosacral joints. In upright poses, the pelvis should be perpendicular to the floor. In prone or supine poses, the pubic bow should draw up towards the sternum, creating length and space in the low back. By minimizing compression and actively lengthening your body with a neutral pelvis, we can decrease low back pain.


    My patients with low back pain are often surprised when we work largely on hip mobility and strength. They feel confused because they came for treatment of their backs, but end up thrilled when, in relatively no time at all, they feel so much better.

    Our hips are the second most mobile joints in the body. If we don’t move through them or stabilize around them, the stress and strain of daily life will shift to the next closest areas: The low back, pelvis, and knees. Utilizing your yoga practice to develop mobility and stability around the hips allows your yoga to become your low back therapy. 

    Many traditional poses sink into the hips passively rather than moving with strength and intention. For example, a traditional Standing Split or Three-legged Down Dog tilts the pelvis to one side and sinks into the standing hip. In LYT Yoga we level the pelvis, allowing for more active hip engagement and a longer lumbar spine. This makes the exercise safe and sustainable. 

    A traditional yoga Forward Fold flexes at the low back, tipping forward in the pelvis. Neither of these movements is conducive to a healthy lumbar spine over time. Sitting back and flexing the hips and knees keeps the spine long and puts the demand on the larger gluteal muscles instead of the low back muscles.

    Finally, strengthening the core is paramount to practicing yoga, especially yoga that is safe for low back pain. In LYT Yoga, we begin every class with The Reset. We want to establish a neutral pelvis, but we also want to awaken the core, which includes the deep abdominals plus the shoulder and hip girdles. These areas are weak in many people who suffer from low back pain. 

    The Reset warms us up from the inside out. It lets the brain know that the core will be a major player throughout the rest of our practice. Just the act of maintaining a neutral pelvis and scapula during your practice is enough to strengthen your core against future back injuries. Moving from the core container to lift out of the pelvis decreases compression in the low back and alleviates unnecessary weight from the vertebral discs. This is why one of our mantras is “More Core”!

    I have yet to come across a patient suffering from low back pain who wouldn’t benefit from a neutral pelvis, better hip mobility/stability, and increased core strength. I can’t think of a better way to do it than with LYT Yoga. Through our online yoga classes, we strive to educate you on the mat so you can be a better and stronger version of yourself off the mat. 

    The type of yoga matters. The way we move matters. And yes, posture matters. Until next time, I’ll see you on the mat!

    Title tag: Safe Online Yoga Classes for Back Pain

    Meta Description: Online yoga classes are a great way to stay in shape, but they can be dangerous. Learn how to safely do yoga poses to reduce injury and back pain.

  • Barefoot and Happy

    Barefoot and Happy

    The month of June is all about bare feet on LYT! This week, Lara interviewed podiatrist Emily Splichal for her Redefining Yoga podcast and on Saturday, June 18th, I’ll be doing our monthly workshop on LYT Daily about being Barefoot Happy. If you’re like me, you find yourself barefoot around the house all the time. I do it for comfort reasons, but being barefoot has dramatic benefits for our bodies as well. 

    Barefoot Happy


    The human foot is a very complex structure, which allows it to be adaptable to the loads placed upon it. During the gait pattern, it must be stable at heel strike and push off, while becoming a mobile adaptor during mid-stance. The arch possesses spring-like characteristics, storing and releasing energy with each step and the deformation of this arch is controlled by both intrinsic and extrinsic muscles. Therefore, stability of the arch is imperative for normal foot function and can be likened to the “core” of the foot. 


    The general consensus in the literature is that habitually barefoot people have stronger feet and fewer foot deformities. Studies have shown that barefoot walking individuals tend to have a wider forefoot, higher arch, more pliable feet, and reduced bunions/hallux angle as compared to people who regularly wear shoes. The literature has also shown that footwear has a significant impact on the gait pattern and can be an extrinsic factor for decreased gait performance over time. McKeon et al. found that permanent support to the foot may result in decreased efficiency of the foot muscles. Their study also suggests that walking barefoot is less restrictive to the motion of the foot, thereby increasing the sensitivity of the stretch mechanisms and activating the musculature of the foot and lower leg. 


    Another advantage of being barefoot is the increase in sensory input received from the sole of the foot. Sensory input has long been recognized for its importance in postural stability and dynamic gait patterns. Stability has been shown to progressively decrease with increasing amounts of footwear support. It’s a fact that as we age, we lose sensitivity in our feet. Coupling that with losing mobility by wearing restrictive shoes all the time can have a detrimental effect on balance and increase the risk of falling as we age. Being barefoot sharpens the connection between the sensory receptors of the foot and brain, giving us better and quicker information about where we are in space. Walking barefoot is one of the most fundamental sensorimotor tasks we perform. If you don’t use it, you lose it. By using and stimulating the nerves in the feet more often, you encourage their physical growth, which improves sensitivity. It is even believed to improve circulation, as we use more of the fine motor muscle of the foot and ankle while barefoot, which moves the blood and lymph more efficiently. When we’re more sensitive to changes occurring under the feet, we’re more able to react when our balance shifts and therefore, reduce our chances of falling. So when we put an overly-supportive or overly-cushioned shoe on the foot, we significantly reduce the amount of sensory feedback from these receptors. In another study, Shinohara and Gribble found that even wearing thin socks decreases postural stability in single-leg standing as compared to bare feet! So one can only extrapolate the effects of regular shoe wear.


    I think the message is clear here…slip off your shoes whenever you can! We do it every time we get on our mat, which is just one of many things I love about yoga in general. Try it around the house and around the yard. Free up those toes by checking out a pair of Correct Toes at our LYT Store! Your body and your brain will thank you in the long run!


    Xoxo,

    Kristin

  • Scapular Winging

    Scapular Winging

    Scapular winging…it’s one of those mysterious musculoskeletal diagnoses that you might never hear of until you get it…and then it seems like literally everyone you come across has it or knows someone who has it! As a physical therapist, if I had a dollar for every person who asked me to “fix” their winged scapula, I’d be rich. Ok, maybe not rich, but I think you get the picture. 🙂 So what is scapular winging and what can you do about it?


    Scapula is the anatomical term for the shoulder blade. Under normal conditions, the scapula should rest flush upon the thorax and move along the rib cage in conjunction with the upper extremity. Scapular winging is when the medial border, closest to the spine, pops off the ribs and “wings out”. So what causes it? In most cases, scapular winging is caused by damage to one of three nerves:


    • Long Thoracic Nerve – innervates the serratus anterior, which attaches to the medial border of the scapula from ribs underneath
    • Spinal Accessory Nerve – innervates the trapezius muscle, which attaches to the spine of the scapula
    • Dorsal Scapular Nerve – innervates the rhomboid muscles, which attach to the medial border of the scapula from the spine


    Various sports or blunt traumatic related injuries can cause injuries to the nerves and yield scapular winging. Surgeries can also damage the nerves, specifically those surgeries related to breast cancer. In many instances, people develop scapular winging as a result of repetitive upper extremity motion. Greater than 50% of medial scapular winging is caused by a traction nerve injury to the long thoracic nerve. So think of repetitive throwing, overhead volleyball serves, wearing a heavy backpack, or overhead weightlifting. Many cases of injuries to the long thoracic nerve which temporarily paralyze the serratus anterior will resolve on their own within 2 years, as long as the repetitive stretching stops.


    Rehabilitation following atrophy of the scapular stabilizers can be long and arduous. Depending on the severity of the scapular winging, a visit to your local physical therapist may be warranted. However, so much of what we do in LYT yoga addresses scapular stability and the serratus anterior in particular. Use of manual and visual cues to encourage forced use of the serratus on the side of the dysfunction can help to speed up recovery once the neural trauma is resolved. Maintaining optimal posture both on your mat and off also help to facilitate a neutral scapula and cervical spine, which facilitate healing and strengthening as well. So if your scapula wings, it’s not the end of the world. No need to “fly” off the handle! (Bad pun, but I couldn’t resist!) Take a hard look at what might have caused or be causing the issue and go from there. See a physical therapist for specific treatment. And as always, get on your mat and keep those scapulae neutral! Fly high friends!


    Xoxo,

    Kristin