Category: Blog Posts

  • Effects of Yoga on Asthma and Allergies

    Effects of Yoga on Asthma and Allergies

    by Sarah Kingsley, DPT


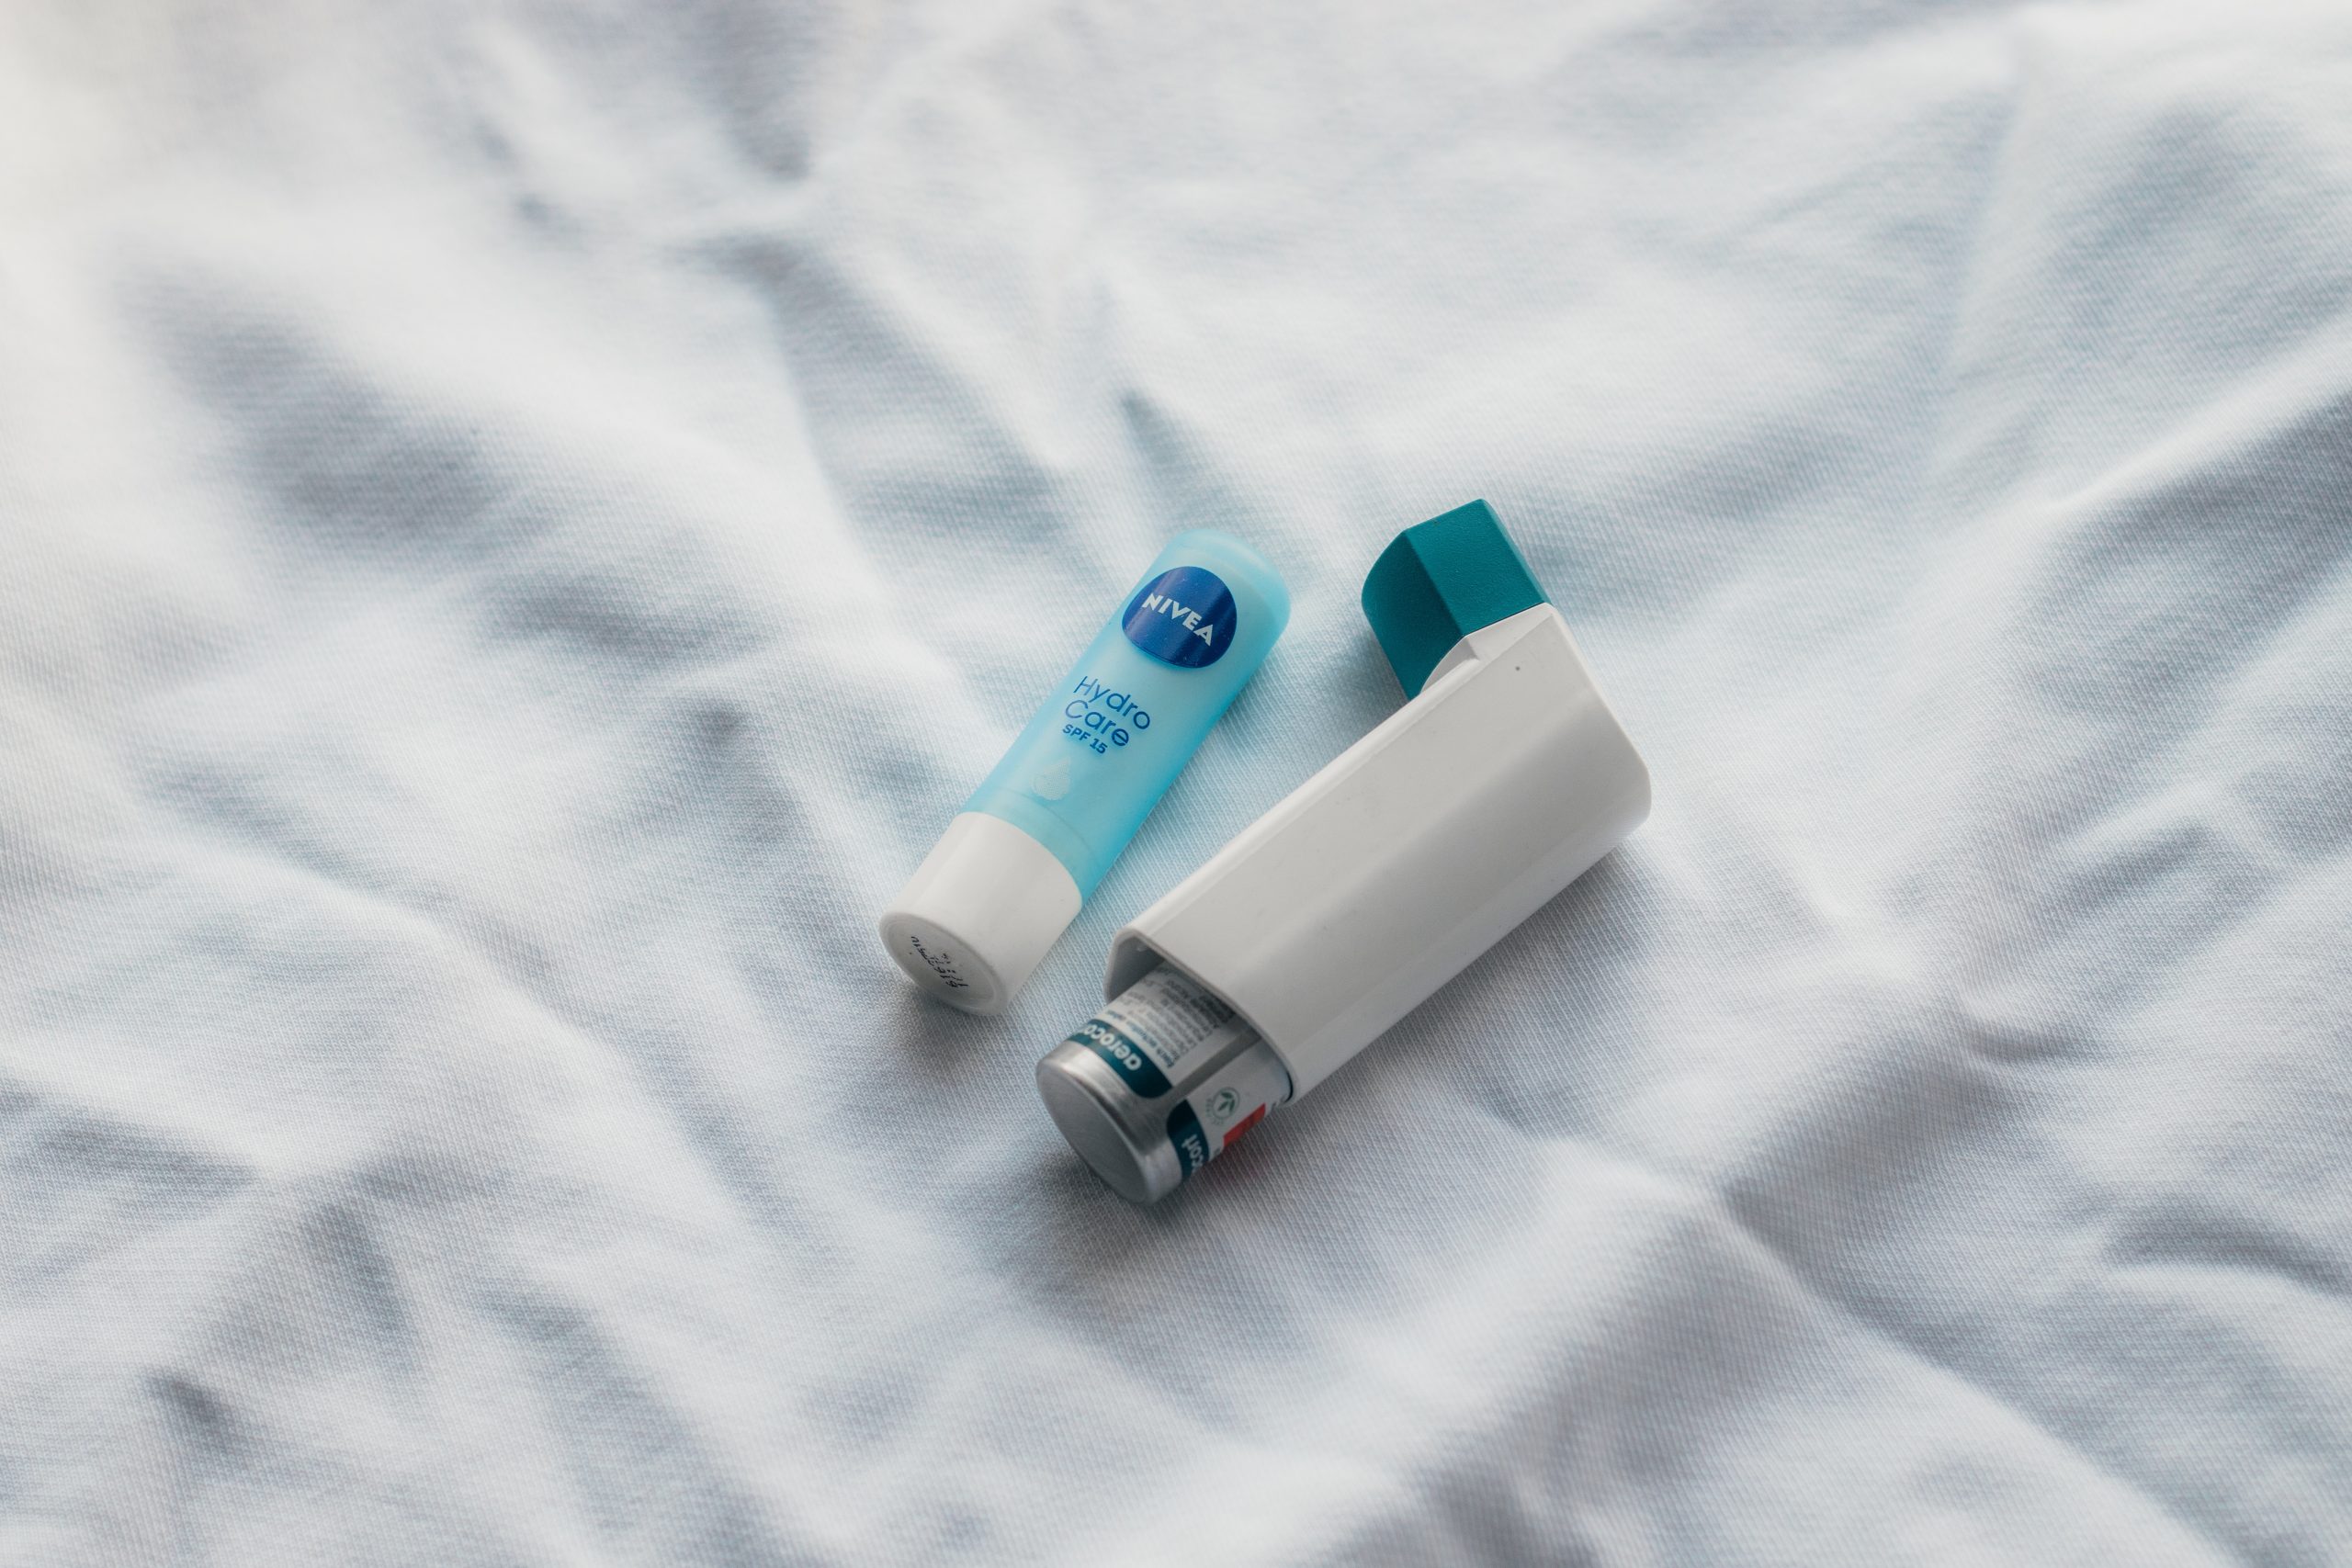
    Asthma is termed as a chronic inflammatory condition affecting the airways. It is characterized by hypersensitivity to stimuli and widespread intermittent and episodic airway obstruction. Symptoms associated include coughing, wheezing, tightness in the chest, and difficulty breathing. Incidences are more common amongst young boys, however in adult women as opposed to men. 


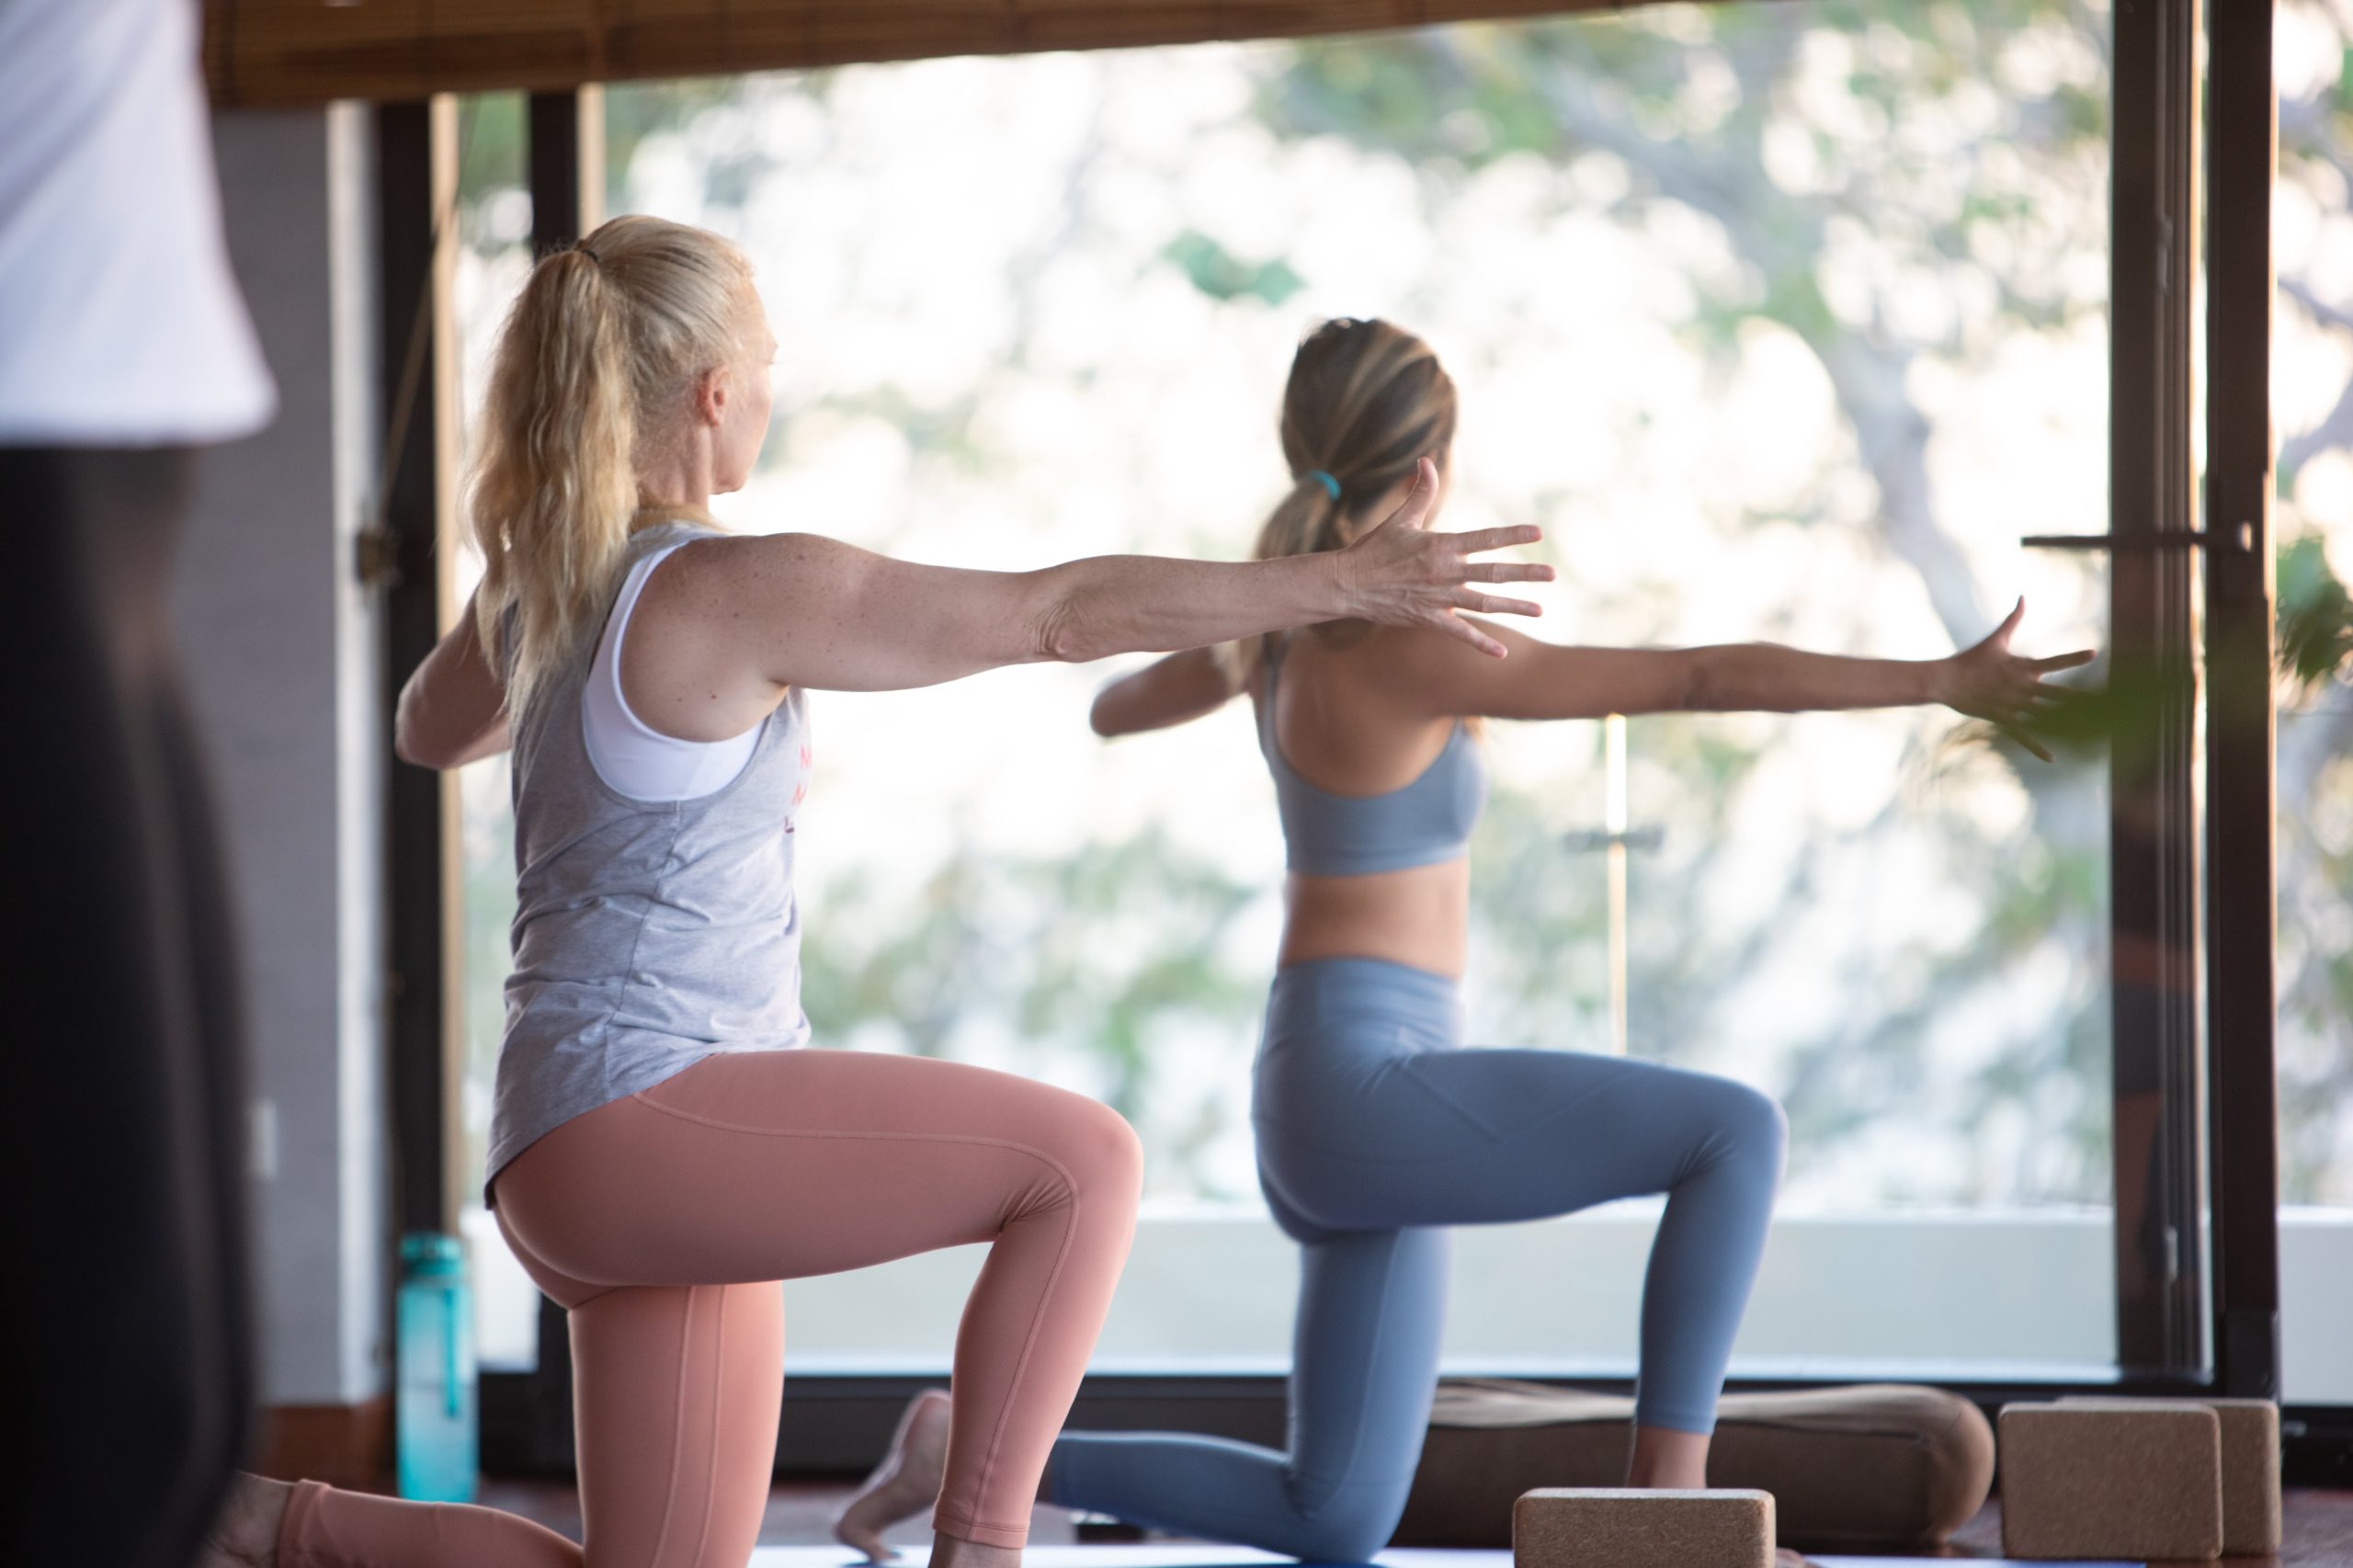
    Many people with asthma have chosen yoga as a form of safe exercise, as it often incorporates attention to breathwork, posture, and a connection between mind, body and spirit. Many studies have shown that yoga can help reduce the frequency and severity of asthma attacks. However, until recently the exact safety and effects of yoga on quality of life, asthma control, symptoms and pulmonary function had not been formally assessed. In 2014 a complete meta-analysis of these exact parameters was completed. The results showed positive effects of yoga on quality of life and pulmonary function when compared to other usual and psychological care methods. The benefits were specific to yoga practices that implemented breath retraining.


    For example, a 2012 study found that pranayama yoga breathing and practicing stretching postures over the course of 2 months increased respiratory stamina, relaxed the chest muscles, expanded the lungs, improved energy levels, and helped calm the body. If you are struggling with asthma, you will want to avoid especially Bikram or “hot yoga” due to the high humidity and temperature that negatively affects your breathing. Traditional Ashtanga forms of yoga that are intensely physical are also not recommended for those suffering with asthma, as you want to strive for more relaxation in the body to improve your immune system function. If you are congested nasally, avoiding forceful inhalation through the nose is also best, instead aim for a short inhalation with a slow and long exhalation to further stimulate the parasympathetic nervous system and relaxing state. 


    Specific poses that incorporate a standing position with various movements of the spine into each flexion, extension, and especially rotation that help massage your spine, mobilize your thoracic rib cage and help condition your lungs will have a positive impact on your immune system. The following are some examples of beneficial poses for Asthma and Allergy sufferers:


    Warrior 1 – This pose utilizes gravity to allow mucus to drain out of the nose and lungs by opening the chest.


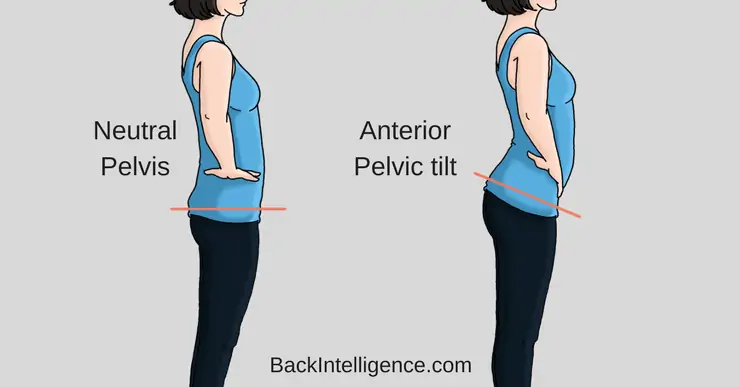
    To perform: Begin standing with feet shoulder-width apart. Take a large step back with your right foot, opening your hip into external rotation and allowing the toe to turn out to the side at whatever degree is available to you, pressing the heel down into the floor. Your feet should be on two separate lines with your front foot facing forward. Your front knee will bend, and aim to keep your pelvis positioned facing forwards and as neutral as possible. Breathe in as you reach both arms up towards the ceiling, in line with your ears, with your palms facing each other. Exhale slowly and hold this pose for 3-10 breaths. Step back to start with your right foot, and repeat stepping back with your left foot.


    High Crescent Lunge – Similar to warrior 1 and allowing for the same benefits. 


    You will perform in the same manner as Warrior 1, however when stepping back with the right leg, the toes and hip will continue facing forwards. Keep your back heel lifted and a soft bend in your right knee in order to keep your pelvis neutral as your front knee bends. Again, inhale as you reach your arms up towards the ceiling, palms facing each other. Exhale slowly and hold this pose for 3-10 breaths. Step back to start with your right foot, and repeat stepping back with your left foot.


    Half Moon – This pose helps in clearing your head from hay fever, alleviating symptoms such as wheezing, runny nose, and watery eyes by opening up the rib cage and lungs. 


    To perform: Stand with your feet hips-width apart. Bring your left hand to your left hip. Think about energetically dialing your right foot out to the right/pinky toe to aid in externally rotating your hip as you reach the right arm down towards the floor OR a block. The left leg will lift back behind you parallel to the floor with the toe pointing perpendicular to your mat. Pull your left toe up towards you and reach back through your left heel to keep the back leg active. If you are able, reach your left arm straight up towards the ceiling so both arms are wide. You may keep your gaze and neck aiming straight down to the floor which will put less strain on your neck and drain the sinuses in a downward direction out of the nasal canal, OR you can turn your head up towards the ceiling which will drain the sinuses more down towards the cervical lymph nodes. Hold for 3-5 breaths, then return your left leg to the starting position and repeat on the other side.


    Goddess Squat with Arms Wide and Rib Cage Mobilizations – This move is not one you might find in traditional yoga practices, but a fan favorite in our LYT Yoga method. This is an upright posture that aims specifically to mobilize the rib cage, allowing for good breath expansion and release of any inflammation or fascial restriction limiting breath or contributing to asthmatic symptoms.


    To perform: Turn sideways on your mat and bring your feet wider than shoulder width. Turn your toes out to whatever degree of hip external rotation is available to you. No need to force the turnout. Bend your knees, trying to keep your pelvis neutral (not tipping forwards or backwards) sitting down into whatever squat position is comfortably available to you. Bring your arms wide with open palms facing either straight in front of you or down towards the floor. Begin to shimmy your upper torso ONLY from side to side, feeling the mobility come from your rib cage, while attempting to maintain a stable and neutral pelvis below. Continue shifting left to right/side to side about 10 times while breathing. Alternatively, you can count the breaths performing for 5 breaths.


    If you want to improve your asthma and allergy symptoms, try yoga today by signing up for our online on-demand platform, LYT Daily: https://lytyoga.uscreen.io/


    References: 

    https://www.sciencedirect.com/science/article/abs/pii/S1081120614001987

    https://www.prevention.com/fitness/g20480173/4-best-yoga-poses-if-you-have-allergies-or-asthma/

  • Coccydynia: The Enemy of Sitting

    Coccydynia: The Enemy of Sitting

    By Ashley Newton, PT, DPT


    Pain in the butt? That could be your tailbone talking to ya! The coccyx, aka tailbone, is a small bone at the base of your sacrum. Believe it or not, it’s a joint! The tailbone can flex forward and extend backward. It moves in coordination with your breathing and its position is influenced by your pelvic floor and hip musculature. Depending on its position, when we sit, we may feel pain in this tiny bone. So, why does this happen and what can we do to reduce tailbone pain to make those long drives, meetings, and flights more tolerable? 


    The pelvic floor and the ligaments at the back of your hip stabilize the tailbone. If that support system is compromised, whether it be the pelvic floor is overactive and pulling abnormally on the tailbone or underactive and not providing support to this tiny bone, when we sit, the pressure of sitting can cause pain. 


    But posture may overwhelmingly be to blame. If we are slumped, overly arched, cross-legged in seated, we are ultimately putting excess pressure down on the pelvic floor and tailbone. Thus, working on our endurance in upright posture in seated, and working on neck and shoulder girdle stability, can help relieve pressure and pain at the tailbone!


    Now, if working on posture and stability doesn’t cut it and you still have pain, a pelvic floor evaluation, and treatment may be the next step in figuring out symptoms. Pelvic floor physical therapists assess and treat the muscles of the pelvic floor and teach clients techniques as well as stretches and exercises to provide relief to the tiny tailbone! 


    Pillows and taping techniques (kinesiotape) are also useful to provide support to the tailbone while the root cause it being uncovered. The pillows are designed with cutouts to relieve pressure on the tailbone. These can be used in meetings, at home, you name it! The taping techniques can provide stretch to tissues as well as compression and support that can also alleviate that nagging pain in the butt.


    Long story short, don’t just live with your tailbone pain! There are plenty of resources, exercises, and modifications to be able to support that tiny bone! Get started with my top three exercises for tailbone pain below!


    1. Supported squat stretch: hold onto a counter or other stable surface and sit the buttocks down into a low squat. Initiate deep breathing into the rib cage, focusing on making space between the SIT bones as you inhale. Perform for 5-8 breaths
    2. Frog stretch: In hands and knees, bring the knees wider than the hips and kick the feet out to the side (mimicking frog legs). Rock the hips backward as you take a big inhale in through the nose. Remain in the frog position for 5-8 breaths, again focusing on reaching the inhale phase of your breathing down to the tailbone and SIT bones 
    3. Open books: open that mid back! Lay on the side and straighten the bottom leg and bend the top knee so that it is supported on the ground. Bring the hands together in front of your chest with the elbows extended. Rotate through the upper back to bring the top hand to the other side. In that position, take a deep breath into your side waist and return to start. Try 10x on each side.


    Hope this helps!


    Xoxo Ash

  • Summer Spritzer

    Summer Spritzer

    Looking for a refreshing summer SPRITZ? We’ve teamed up with our friend Louisa Visco, founder of  Sobrietá Boutique, to share her favorite non-alcoholic summer spritzer, and this one is making us feel anything but BLUE! Try her Sparkling Blueberry Spritzer and save 20% off bitters and wine using the code SUMMER.

    https://www.sobrietaboutique.com


    Spritzer recipe vegan lyt yoga online classes physical therapy

  • Keep on Track

    Keep on Track

    When my kids were little and needed to be soothed, I would have them lie across my lap and I would count their bones. I’d tell them what each bone was called by their full Latin name and eventually move onto the muscles. They LOVED it. I’ll never forget the first time Betsy fell down and told me that she “scraped her patella”! I was at first super proud and then a little horrified, imagining the hard time the kids in her class would give her for being weird or the looks I’d receive from the school teachers! Luckily, they quickly outgrew the medical terminology, latched onto the easier terms like “kneecap” and “elbow” (instead of olecranon process), and any social trauma I might have inadvertently caused was averted. 🙂


    As we grow older, whether or not we choose to go into medicine, pretty much everyone learns that the kneecap is called the patella. So many people experience knee pain at one time or another, or know someone who has, making terms like patellofemoral syndrome and patellar tendinitis commonplace. Since I’ve gotten back into regular jogging, my patellae are making themselves known again. Sometimes I’m afraid you all can hear the crackling over Zoom when I come from a deep squat to stand! Why does that happen? What is that noise? What is the point of the patella anyway? I hope to answer all three of those questions and if you’re interested in the answers, read on.


    The patella is also known as the kneecap. It’s the largest sesamoid bone in our body. Sesamoid bones are bones embedded within a tendon or muscle. It attaches the tendon of the quadriceps to the tibia, via the patellar ligament. The patellar ligament is also known as the patellar tendon, but since it goes from the patella (bone) to the tibia (bone), it’s technically called the patellar ligament.


    The primary function of the patella is to act as a fulcrum for the quadriceps, increasing its extensor strength by 33-55%. The bottom surface is covered by 3-5mm of cartilage, which is the thickest layer of cartilage anywhere in the body. The structure of the knee joint is such that the compressive force on the patella is SEVEN times the body weight when descending stairs, so it’s no wonder its articular cartilage is so thick! However, it should come as no surprise that it is subject to wear and tear over time with repetitive climbing, descending, and running on hard surfaces. Under normal circumstances, the role of the cartilage lining the undersurface of the patella is to decrease friction between the patella and the groove of the femur, in which it articulates. Sometimes we have issues that arise with the “tracking” of the patella within this groove and we develop areas of increased wear, called crepitus. The crackling sound from the knees when going from squat to stand or vice versa is secondary to crepitus. The smooth surface of cartilage is normally soundless. When we start hearing noises (aka crepitus), it’s because the surfaces are no longer smooth…more like sandpaper.


    There are several different reasons why the patella may not track correctly, including:

    • Weak hip muscles – poor gluteus medius strength allowing internal rotation of the femur and “knocking” on the knees
    • Poor static alignment of the patella – too high or low, tilted, or rotated
    • Connective tissue restrictions around the patella – too tight or too lax


    We can have the greatest effect on patellar tracking with movement retraining. Strengthening the hips, glutes, hamstrings, and core musculature. The knee joint really just wants to flex and extend, keeping the patella tracking superiorly and inferiorly. Keeping the knees moving over the feet allows for this. Not allowing the knees to go over the toes with repetitive up-and-down movement is also ideal. Keeping our body weight within normal limits, without any added body weight pressure on the patella is crucial. Mobilizing the soft tissue structures surrounding the knee, including both fascia and muscles, to allow the patella to track freely up and down is a great way to minimize patellofemoral wear and tear.


    Keep on track with your LYT yoga practice, which challenges the body and core in all of the above ways! https://old.lytyoga.com/


    See you on the mat!


    Xoxo,

    Kristin

  • A Case of Tight Hips

    A Case of Tight Hips

    How HIP MOBILITY AFFECTS THE LUMBAR SPINE

    by Thalia Wynne, PT, DPT, AT, RYT


    Have you ever gone to a PT for back pain and wondered why they start checking out your hips? What do your hips have to do with your back? 


    That’s a wonderful question! Let me introduce you to a patient of mine to help illustrate this for you. Meet Jan, a kind 40-year-old corporate manager with pain in her back that would not go away despite everything she tried. When I asked her about her lifestyle, she told me she mostly works at her desk all day but loves to take a daily walk – often getting over 10,000 steps a day. I examined her and here’s what I found. 


    Jan had strong legs but was lacking core strength. She couldn’t extend her hip without arching her low back. Aha! I think we’re on to something. Let’s take a look at what functional anatomy might be contributing to her back pain problem. 


    anterior pelvic tilt pelvis physical therapy pt corner lyt yoga online classes


    neutral pelvis anterior tilt low back pain physical therapy pt corner lyt yoga online classes


    This pelvis position is called an anterior pelvic tilt. What this position does is encourage a shortening/tightness of the low back muscles and the hip flexors and quads. Because the hip flexors and quads are so tight – it limits Jan’s ability to extend her hip and instead, she uses the anterior pelvic tilt technique to get her leg behind her, compressing her low back. 


    Think about the amount of steps Jan takes in a day. That’s 10,000 hip extension moments that are actually low back compression moments. No wonder she’s having pain here. 


    All Jan needs to fix her low back pain are strategies to adopt a neutral pelvis, especially as she walks to give her back optimal space to function as it is anatomically meant to. 


    Here is what I gave Jan: 

    1. Posture retraining. Jan has the head knowledge of what a neutral pelvis is, but she is missing the body knowledge. The first step is to train her neuromuscular system to learn this new posture. 
    2. Hip mobility. Jan’s tight hip flexors are making it difficult for her to get full hip extension when she walks. But hip mobility is more than just stretching. Jan needs glute, core, and hip flexor strength to be able to control the hip movements required for walking while holding a neutral pelvis. So truly, hip mobility is achieved through hip strengthening while moving through available ranges of motion. If she decided just to start stretching her hip flexors, she’ll still be missing the muscle strength required to actually hold her pelvis in a neutral position and she will likely still fall into anterior pelvic tilt, compressing her spine. This is why I define mobility as strength through motion. 


    Jan applied these two tools and over time she now has mobile, strong hips, maintains neutral pelvis on her walks and at her desk, and she no longer has back pain. Way to go Jan! 


    This is something you can do too. LYT Daily is full of classes to train neutral pelvis and build hip mobility (strength through motion). Check them out with our 2-week free trial or try this free sample class for harmonious hips on the LYT YouTube channel! https://www.youtube.com/watch?v=yRe1zFMhg0s 


    Happy hip training! 


    Thalia Wynne, DPT, PT, AT, RYT 

    IG: @thalialovee 


    Picture sources: 

    Pic 1: https://caloriebee.com/workout-routines/Fix-Anterior-Pelvic-Tilt 

    Pic 2: https://backintelligence.com/anterior-pelvic-tilt-fix/


  • Pelvic Posture and Its Relation to Shoulder Strength and Function

    Pelvic Posture and Its Relation to Shoulder Strength and Function

    by Sarah Apple Kingsley, pt, dpt


    When most people think of shoulder pain, weakness, and dysfunction, their next thought is rarely if ever, “well what about pelvic posture?” In most health care and physical therapy settings, the scope of treatment is very narrowly focussed on the primary issue or problem at hand. An orthopedist or medical doctor may choose to inject a cortisone shot to the area or request an MRI to diagnose a rotator cuff tear or issue. A typical physical therapist in this scenario would likely prescribe some shoulder stretches and multiple shoulder strengthening exercises. If they are a good therapist, these exercises will hopefully include those to help strengthen the scapular stabilizing muscles.


    Unfortunately, even in this “best case PT” scenario, it is still possible to miss the broader picture. Studies and evidence have shown that many of the standard treatment exercises, when performed in isolation, can be ineffective in resolving or even improving shoulder pain, weakness, and dysfunction. So why is that? A GREAT PT needs to look at the whole body and how each segment relates, connects, integrates, and participates with each other for true working order. At the center of this multifaceted working vessel is…..THE PELVIS!


    Spinal posture plays a large role in the strength and function of the shoulder. Consider, for example, a patient with weak shoulder strength and limited mobility. When the patient’s pelvis is anteriorly tilted, or tipped forwards, this creates an increase in lumbar lordosis. We are supposed to have a natural small arch in our low back, but the excessive curve or “swayback” as it is commonly termed is due to an anteriorly tilted pelvis. This increase in lumbar LORDOSIS directly relates to an increase in thoracic KYPHOSIS. An increase in thoracic kyphosis or rounding/humpback of the upper back contributes to an anteriorly tilted and internally rotated scapula, which causes the rounded shoulder posture. EMG studies have shown that this forward shoulder posture limits the activation of the scapular upward rotators such as your upper and lower trapezius as well as significantly reducing the firing of the serratus anterior muscle, our major scapular stabilizer. Less activation = less strength = less function!


    With typical shoulder dysfunction, we tend to see an OVERactivation of the upper trapezius muscle. This leads to excessive shoulder hiking, causing pain and strain in the neck and shoulders due to a compression of the nerves, muscles, and ligaments in the subacromial space and often leads to rotator cuff tears or thoracic outlet syndrome. Conversely, a well-working shoulder primarily uses what is referred to as the “forced couple” of each the upper and lower trapezius as well as the serratus anterior to aid in the initial upward rotation of the shoulder to work effectively and prevent strain, compression, and injury when reaching up overhead. A forced couple is when two muscles with opposing actions work together with equal forces in order to create one action simultaneously, in this case, upward rotation of the scapula.


    EMG assessments can specifically show that an increased anterior pelvic tilt increases the activation of the upper trapezius and decreases the work of the lower trapezius and serratus anterior. When pelvic tilt was reduced, the results showed a significant INCREASE in the activation of both the lower trapezius and serratus anterior, while just slightly decreasing the activity of the upper trapezius. When just the upper trapezius is active or overactive, this typically leads to more pain and dysfunction and less range of motion. With more equal activation of all 3 supporting muscles, the joint can function more optimally, with more strength, more range of motion, and less pain and injury!


    So how can we promote better activation, strength, AND function of the shoulder complex??!! Neutralize the pelvis! Reducing the anterior pelvic tilt posture can have dramatic changes on the working order of the shoulder girdle. How do we do this? Our LYT yoga classes are amazing at retraining the body how to properly stack the girdles of the shoulders over the pelvis and hips. This not only provides the best stability but also the best functional strength and adaptability for powerful and reactive movement through a variety of planes of motion.


    If you are anteriorly tipped in the pelvis it is likely that your hip flexors (the muscles in the front of your hips) are tight and also possibly weak, but even more likely that your gluteals and hamstrings (the opposing muscles) are very weak. Working the strength of these posterior chain muscles by biasing a POSTERIOR pelvic tilt or slight tucking of your tailbone can help reduce this excessive arching of the low back. We also stretch the hip flexors in each of our LYT yoga classes by coming into a 90/90 low lunge position. It is important to focus on keeping the back knee directly underneath the hip, wrapping the back glute under, and lifting up in the abdominals to create an active stretch into the front hip muscles, as opposed to leaning forwards which creates additional compression into the hip joint structures and also likely further biases an already anteriorly tilted pelvis position. 


    References:

    https://www.ncbi.nlm.nih.gov/pmc/articles/PMC7082681/

  • Williams’ Family Salsa

    Williams’ Family Salsa

    Want to make homemade salsa in minutes? The Williams’ Family salsa is packed with fresh and healthy ingredients, making it the perfect summer snack! Try this easy recipe today! 


     williams family salsa lyt yoga online classes physical therapy

  • Neutral Pelvis – Why Does It Matter?

    Neutral Pelvis – Why Does It Matter?

    BY ASHLEY NEWTON, PT, DPT


    Neutral pelvis is the state when the pubic bone and the sacrum are parallel to the floor. The pelvis is not tipped forward nor backward and the heads of the femurs are centered in their sockets. When our hips and pelvis are at neutral, we are distributing forces evenly across our pelvis. Meaning, we are not excessively loading in the back and sacrum and the muscles of the core and hips are balanced to keep us upright. To truly be in neutral, however, means that the head is stacked over the ribs and pelvis so that if we were to draw a line straight down the side of the body, that line would intersect the earlobe, the acromion of the shoulder, and greater trochanter of the femur. Now that’s all well and good, but why does being neutral matter? 


    If our pelvis and trunk are neutral, it means that our body is able to evenly distribute loads across the trunk. Load refers to how our bodies stabilize against gravity as well as how we interact with our environment – everything from how we pick up our toothbrush to pushing a lawnmower. The muscles of our trunk that stabilize the spine have anticipatory stability – meaning that they contract prior to a pre-planned movement to stabilize us in space. However, when we are not at neutral, these muscle fibers are not in their optimal position – they are either shortened or over-lengthened and thus have difficulty generating force to stabilize us. As a result, the body compensates. It finds other ways to stabilize us that may work in the moment but turn out to be harmful long term. Think about a time when you sat to take an exam or write an essay in school. Over time, we get more slumped over in the chair and wind up holding up our head with our hand. When we eventually stand up, our back is stiff and we have neck pain. Our body has adapted to stiffen other muscles to keep us stable as we resorted to a more and more slumped posture. This is an example of muscles getting overloaded to compensate for the core! 


    Now, does this mean that we have to walk around constantly correcting our posture? Yes and no. I do not think it is helpful for folks to be constantly walking around drawing their belly buttons toward their spines and tucking their tail bones. These habits abnormally pressurize the muscles of the pelvic floor which can lead to problems such as urinary leakage and prolapse. Rather, I think folks should work from the ground up when it comes to being in neutral. So, stand up and try this exercise below to see if you can connect with your body and find neutral.


    1. Ground down through the four corners of the feet. Can you feel the big toe, pinky, inner heel and outer heel all make contact with the earth.
    2. Shift the weight forward and back on the feet. Can you end in a place where your weight is through the middle of your feet.
    3. Place one hand on the sacrum and the other on the pubic bone. You should be able to draw a straight line between your two hands that is parallel to the floor
    4. Take your hands and make an upside down “V” where your ribs meet in the middle. Is this angle 90 degrees?
      •  If less than 90 degrees, soften your belly and think about making space between the top of the hip and rib. 
      •  If greater than 90 degrees, draw the ribs backward and make space between the bottom of the rib and the hip
    5. Drop the shoulders away from the ears
    6. Interlace the hands at the base of the skull and draw your head back into your hands as you get tall.
    7. Think about growing through the crown of the head as you ground down through your feet.