Category: Blog Posts

  • Nicecream

    Nicecream

    During these (down) dog days of summer, a cold and refreshing snack is a great way to cool off!

    Ever want ice-cream but dont have your favorite on hand? I love a good nice cream because a bag of frozen banana pieces always lives in my freezer for smoothies. With a few simple ingredients and my food processor, I can create a sweet treat out of ingredients I know and love.


    Here are all of the ingredient you will need to get started:

    4 medium ripe bananas, cut into slices and frozen

    8 Oreo cookies

    2 T peanut butter

    1/4-1/2 c plant milk


    Instructions

    1) Cut bananas, lay on baking sheet in single layer and freeze for 12 hours

    2) Place frozen bananas, peanut butter, three Oreo cookies, and 1/4 cup of plant milk in a powerful bender or food processor.

    3) Puree till smooth, adding more milk if needed

    4) Add three more Oreos and pulse for five seconds

    5) Place nice cream in a cup and top with more Oreos, banana slices, or peanuts

    6) If too soft, place in freezer for 15-20 minutes till firm


    Adapted from Vegan Heaven

  • Welcome!

    Welcome!

    Hello beautiful LYT Fam! Welcome to our newest initiative: Movement for Life, A LYT Yoga Blog! I am personally so excited about this blog because if these past 18 months have taught me anything, it is that I am SO grateful for this vibrant, beautiful, and strong LYT community. This community continues to fuel my purpose and lift my spirits, and we wanted to create a space where we can connect EVEN MORE and share stories, life hacks, recipes, movement fixes, and more! This is a space for not only the LYT Team and I to contribute content, but to offer community members a place to share their stories and connect as well. We have a lot of amazing things coming to the blog, so make sure to check back frequently so that we can all feel our brightest and most LYT UP in life.

    So much love to you all!

    Lara Signature

  • Hip Labral Tears

    Hip Labral Tears

    Many of our LYT Prime regulars and certified LYT Yoga Teachers who’ve taken my Sequencing Lab Modules are well acquainted with my husband, Tim. He’s the 6’2” 210 lb super yogi who could always be found sweating his butt off next to me in Lara’s classes, heard grunting and panting off camera while I taught my 6:00 am T/Th class virtually, or seen practicing as my student in the Labs! Ever since I started teaching (and made him come with me to my first class so at least ONE person showed up), he fell head over heels in love with LYT Yoga and rarely missed class. Then roughly three years ago, we went to another studio while on vacation and the teacher took us into Lizard lunge in the first 10 minutes of class. I remember at the time thinking yikes, this is really early to be going into such a relatively deep pose. Tim felt and heard a pop in his right hip. Over the years, the pain has come and gone, and progressively gotten worse. He hasn’t been able to tolerate a class since February 2021 and a recent MRI revealed a tear of the anterior labrum and advanced arthritis.


    Although previously thought to be a relatively uncommon injury, acetabular labral tears are being diagnosed with increased frequency due to improvements in diagnostic imaging. The prevalence of labral tears in people with anterior hip or groin pain is thought to be between 22-55%. The labrum is a rim of cartilage that outlines the socket of the hip joint, called the acetabulum. The thickness of the labrum varies between 2-3 mm thick. It is wider and thinner in the anterior portion and thicker posteriorly. It functions as a shock absorber, joint lubricator, and pressure distributor in the hip joint. It also provides stability to the hip by deepening the acetabulum by 21% and increasing the surface area of the acetabulum by 28%. This helps to distribute the load across the joint surfaces. Creating a seal for the joint, it helps keep the head of the femur (the ball of the joint) away from the acetabulum by maintaining the synovial joint fluid pressure within the joint. Not surprisingly, a compromise of the labrum has been associated with early joint degeneration. A study by McCarthy et al. found that 73% of patients with fraying or tearing of the acetabulum had damage to the joint cartilage and it was greater in those with the tears. They also found that in 94% of these patients, the joint damage was in the same area as the labral tear. They suggested that the risk of joint damage roughly doubles in the presence of a labral lesion. 


    More than 90% of people diagnosed with a hip labral tear complain of anterior hip or groin pain. Pain is also reported in the lateral region or deep in the posterior buttocks, albeit less often. People often describe a constant dull pain with intermittent episodes of sharp pain that worsens with activity. Walking, pivoting, bending over, prolonged sitting, and impact activities like running can aggravate symptoms. People often present with a limp, need a banister to climb stairs, and cannot walk long distances due to pain and weakness. Finally, the presence of clicking, locking, catching, or giving way is common as well.


    The most consistently positive finding in people with a labral tear is a positive Anterior Hip-Impingement Test. This test is performed with the person on their back and the hip and knee flexed to 90 degrees. The hip is internally rotated and adducted. The test is considered positive if the pain is reproduced in the anterolateral hip or groin.


    Although tears have been reported in all regions of the labrum, most tears found in the United States occurred in the anterior portion. Mintz et al. found 94% of the labral tears in their study were anterior. McCarthy et al. found 86% were anterior in theirs. Different reasons for the high prevalence of anterior tears have been suggested, including a relatively poor blood supply anteriorly as compared to the other regions and the fact that it’s thinner and therefore weaker. More than likely it’s also due to the fact that in Western civilization, this area is subjected to higher forces and greater stress during regular daily activities. Interestingly, in Japan the majority of tears occur in the posterior labrum, likely due to the frequent practice of squatting and sitting on the floor, which places more strain across the posterior region.


    Whether labral tears have the potential for healing is controversial. Some articles report no potential and others report some potential for healing. In my clinical experience, improving joint capsular range of motion with manual therapy and limiting painful movement patterns that increase forces across the labrum, particularly the anterior labrum, have been beneficial. I’ve created a 4 video LYT Yoga Hip Pathology Series for LYT Daily which modifies our traditional practice to accommodate just this. I have been interviewing my husband and former patients and friends who’ve had hip joint issues including labral tears to determine just what bothers them and what seems to help. So if you suffer from hip joint pain/pathologies or know someone who does, go give it a try! Until then, I’ll see you on the mat!


    Xoxo,

    Kristin

  • Barefoot Benefits

    Barefoot Benefits

    With rising temperatures and summer just around the corner, barefoot season is here! Now if you’re like me, you find yourself barefoot around the house all the time. We don’t have a “no shoes inside” rule, but it’s typically the first thing I do when I get home. It just feels better to be barefoot! Over the last ten years, barefoot walking/running has caused a stir in the scientific community and a controversial debate has arisen about the benefits and limitations of it. It all began in 2010 when evolutionary biologist and Harvard professor Daniel E. Lieberman published a paper showing that running in cushioned shoes encouraged people to hit the ground harder than running barefoot. He found that with cushioned sneakers, the stiffness of the sole slowed the rate at which the body hit the ground. So while this makes the impact more comfortable, the force through the body is the same. However, when a person runs (or walks) barefoot, they tend to adjust their gait pattern and land lighter. He found this was not true while running in cushioned shoes. His subjects hit the ground harder and the energy that shot up the leg was about three times greater than running barefoot. 


    Since he published this paper, the research on barefoot running has exploded. As with any controversial topic, the reviews remain mixed. When it comes to biomechanics, the evidence is clear that barefoot running influences how we run and likely has a significant impact on the amount of force through the body when the foot hits the ground. However, some people don’t change their gait pattern to run more lightly to start, so there’s a learning curve. In addition, the hypothesis that minimizing impact reduces the risk of injury has been challenged in the literature as being oversimplified and flawed. It has been proposed that neuromuscular adjustments, made in response to impact forces, regulate the amount of stress through the body and the degree of cushioning is largely irrelevant. So people who change their gait pattern to a less “heavy” style can decrease stress through the joints too, regardless of whether they’re in shoes or not. But what about walking barefoot?


    The general consensus in the literature is that habitually barefoot people have stronger feet and fewer foot deformities. Studies have shown that barefoot walking individuals tend to have a wider forefoot, higher arch, more pliable feet, and reduced bunions/hallux angle as compared to people who regularly wear shoes. Not surprisingly, people who walk barefoot more regularly have thicker calluses on the sole of their feet. In 2019, Lieberman and his colleagues at Harvard and in Germany and Kenya conducted another study on whether these calluses had a negative effect on sensation in the feet. His research compared the callus thickness and foot sensitivity of people in Western Africa who regularly went without footwear and people in Boston who regularly wore shoes. They found that although calluses thicken as people walk barefoot more often, there is no trade-off in sensation. The callus transmits mechanical force to sensory receptors deep inside the skin as well as a sole of a foot with thinner or no calluses. When we put an overly-supportive or overly-cushioned shoe on the foot, we significantly reduce the amount of sensory feedback from these receptors. This matters ultimately because of balance.


    As we age, we lose sensitivity in the feet. Coupling that with losing mobility by wearing restrictive shoes all the time can have a detrimental effect on balance and increase the risk of falling as we age. Being barefoot sharpens the connection between the sensory receptors of the foot and brain, giving us better and quicker information about where we are in space. If you don’t use it, you lose it. By using and stimulating the nerves in the feet more often, you encourage their physical growth, which improves sensitivity. It is even believed to improve circulation, as we use more of the fine motor muscle of the foot and ankle while barefoot, which moves the blood and lymph more efficiently. When we’re more sensitive to changes occurring under the feet, we’re more able to react when our balance shifts and therefore, reduce our chances of falling. Finally, there are some early studies on walking barefoot in contact with the earth, so think grass, dirt, or sand. It’s called “earthing”. Some studies allege that drawing electrons from the earth through the feet improves overall health. I haven’t looked at these studies in depth to verify their research quality, but it’s an interesting concept.


    So now that the weather is warming up (in this hemisphere of the globe anyway), slip off your shoes! We do it every time we get on our mat, which is just one of many different things I love about yoga in general. Try it around the house and around the yard. Free up those toes by checking out a pair of Correct Toes at our LYT Store! Here’s the link: https://shop.lytyoga.com/. Your body and your brain will thank you in the long run!


    Xoxo,

    Kristin

  • Core Container

    Core Container

    This week we opened up registration for our LYT Level 2 Core Module, which is part of our 300-hour LYT yoga teacher training program. The term “core” has been around forever and has morphed over the years into considerably more than it was 20+ years ago when I graduated from physical therapy school. For many years, we really only looked at the core from the standpoint of the abdominals and lower back musculature and their roles in supporting the spine. As our understanding of the core evolved, so did physical therapy, branching out into specialty areas including the pelvic floor and diaphragm. We began looking at injuries of the extremities and how they related to weakness in the core stabilizers, not only around the spine, but also around the proximal joints of the hips and shoulders. We began to describe the core as a container, encompassing the entire trunk or axial skeleton. However, for the purposes of this article, I’m only going to be talking about the muscles of the abdominal core.


    I love the concept of visualizing the abdominal core as a cylindrical container. Imagine an empty soda can…you could stack a solid amount of weight on top of it before it would collapse, right? Yet, if you put one little dent in the side of that can, it takes a LOT less force to make it crumple. Let’s put this into the perspective of the human body…the spine has been shown to buckle under compressive forces as low as 20 lbs in the absence of muscular contribution. I’m pretty sure my purse weighs more than that at times! Certainly my kids’ backpacks! It falls to the container of the core to stabilize the spine against any type of external compressive or shearing forces. 


    The container of the core has passive, active, and neurological components that contribute to its stability. The passive structures include the vertebrae, intervertebral discs, ligaments, and joint capsules, as well as the passive properties of muscles supporting the spine. These passive structures stabilize in the end ranges of motion and transmit load information to the nervous system. The active components are the muscles, which provide dynamic stability to the spine, as well as sending movement information to the nervous system. Finally, the neurological component is the brain or central nervous system, which is the center for incoming and outgoing signals. Continuous interaction between all three components is necessary to maintain core stability. Having a stable core requires instantaneous changes being made by the brain to elicit the appropriate muscle recruitment for stability and mobility in response to demands placed on the body. Yikes. No wonder it’s so hard!


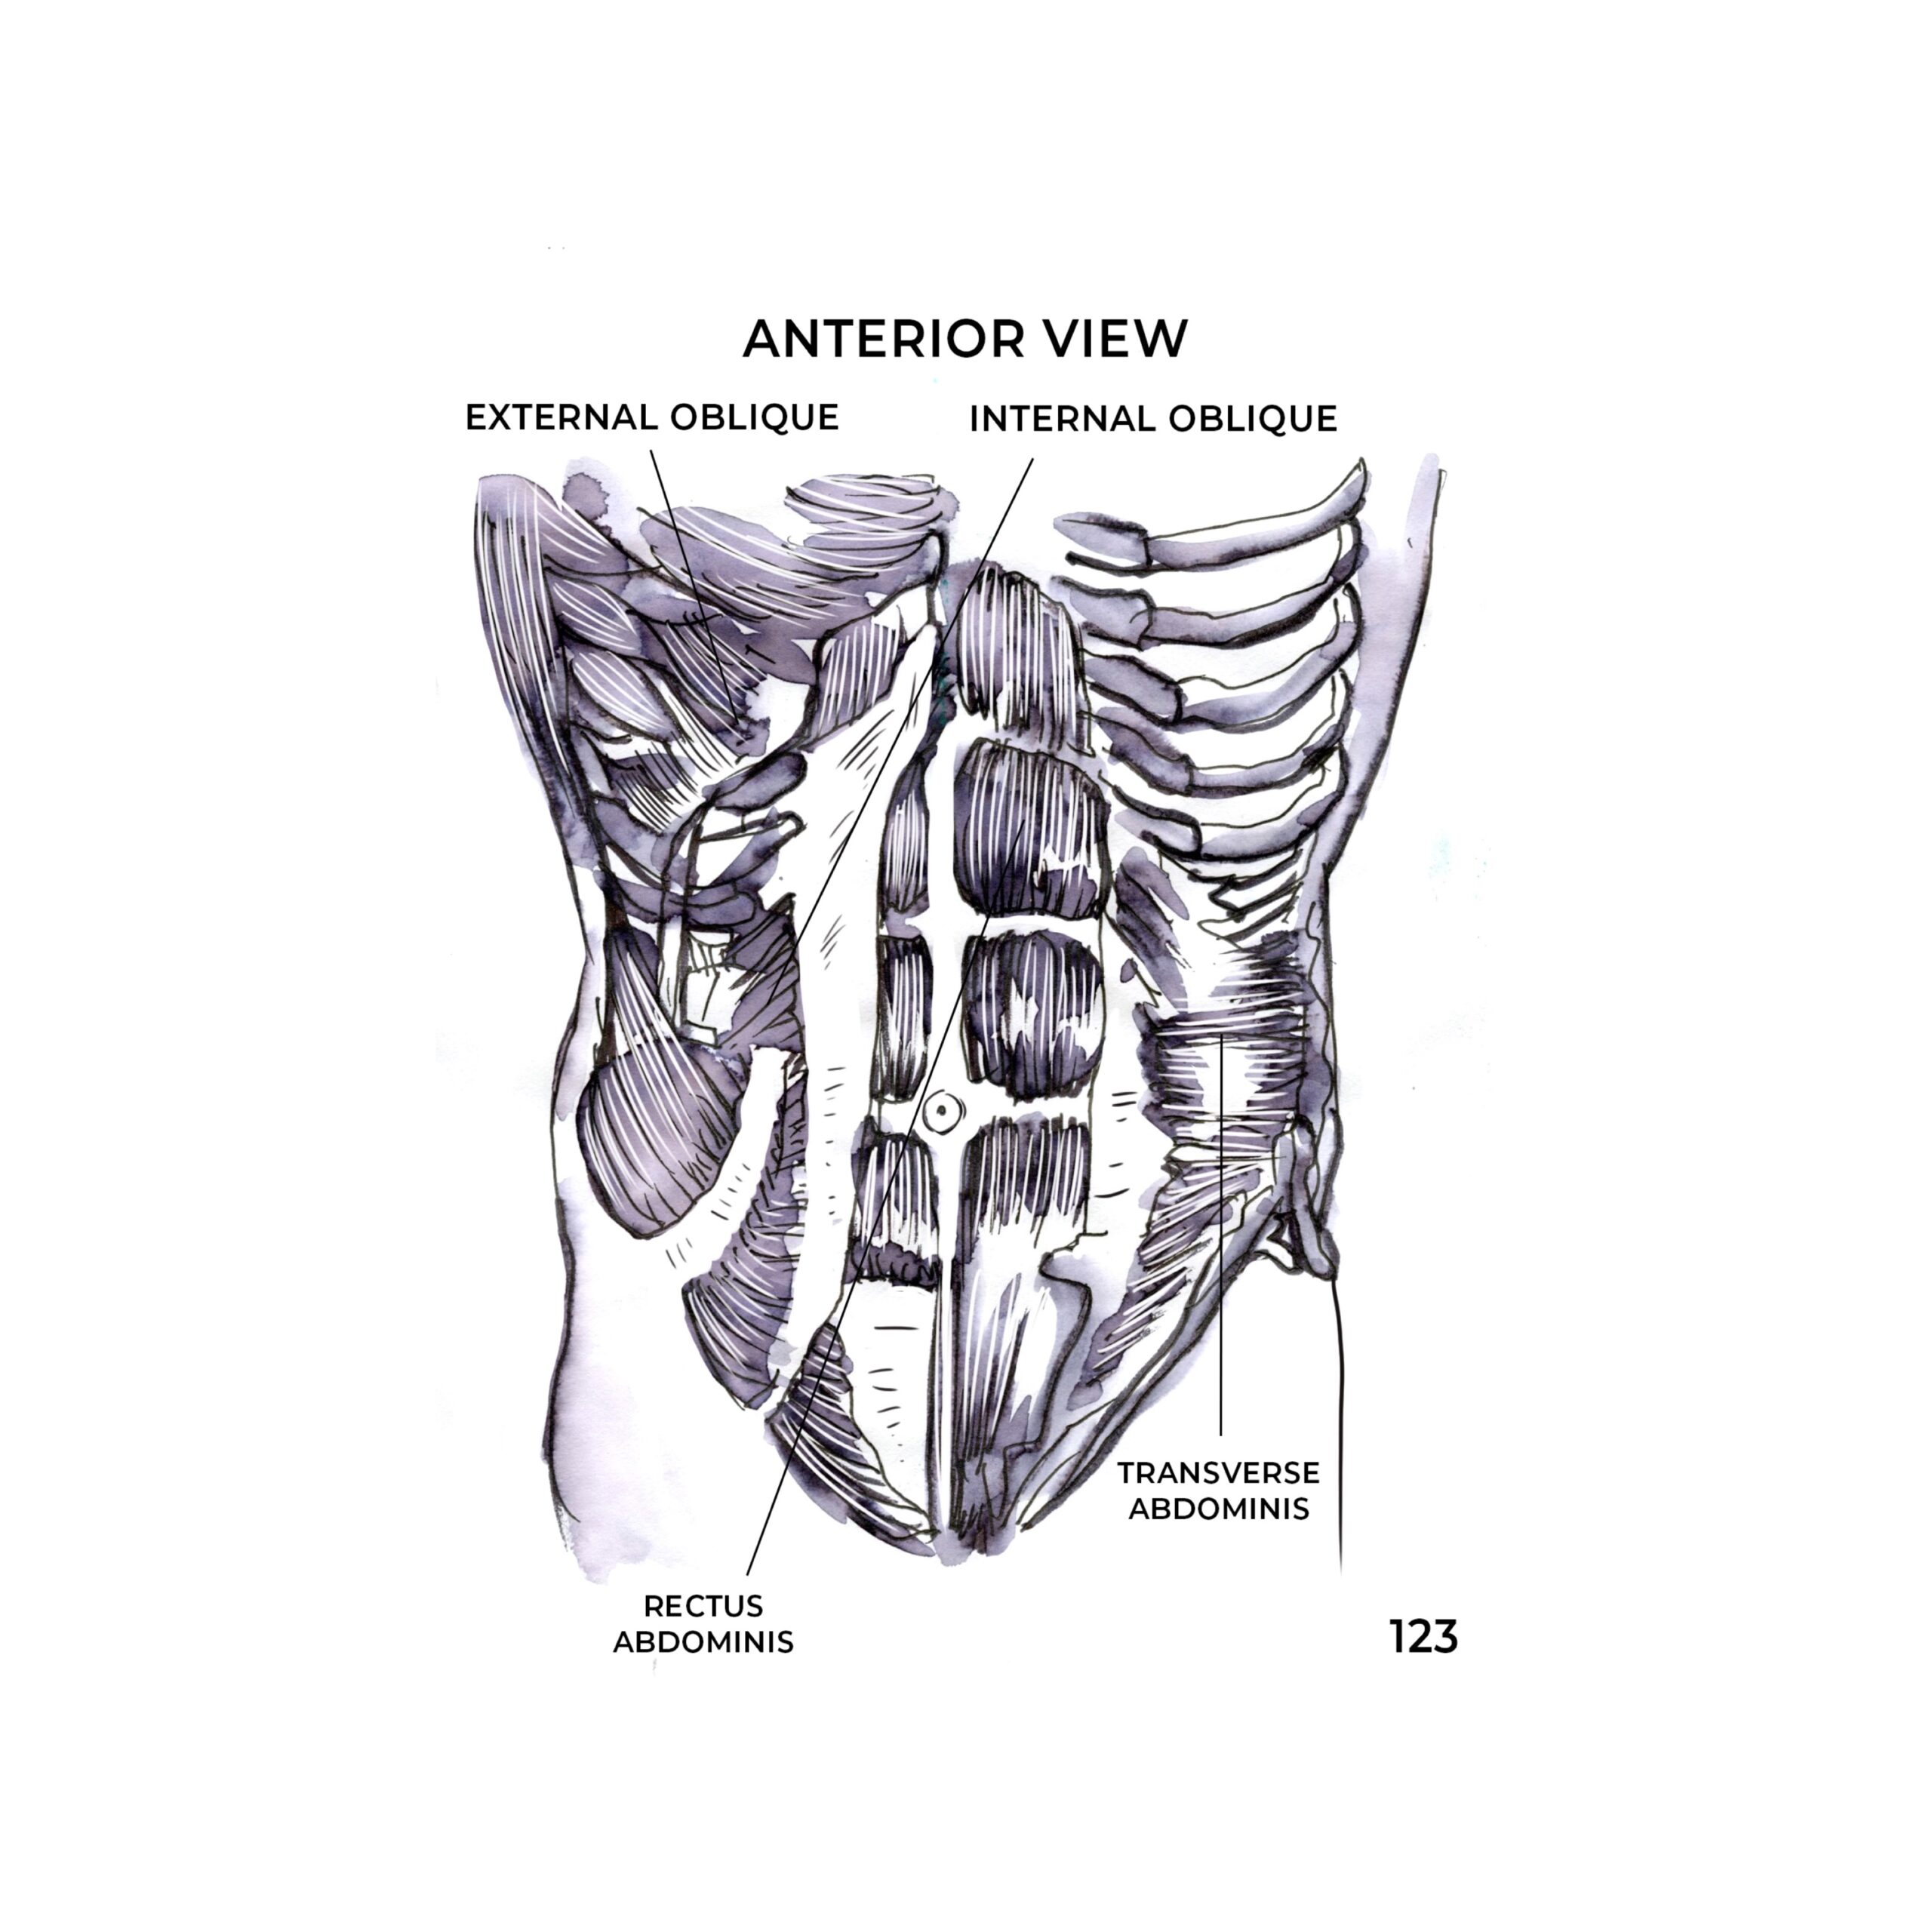
    When talking about the container of the core in terms of its musculature, it begins at the base, which is the pelvic floor. The floor of the pelvis is made up of layers of muscle and connective tissue, which stretch like a hammock from the pubic bone to the coccyx (tailbone) and from one ischial tuberosity (sit bone) to the other. Next, the trunk is supported by the anterior, lateral, and posterior abdominal walls, making up the sides of the core container. The anterior abdominal wall musculature includes the rectus abdominis and a small muscle called the pyramidalis, which is present in 80% of the population. The lateral abdominal wall musculature includes the external and internal obliques and transversus abdominis. The posterior abdominal wall musculature includes the psoas major, iliacus, quadratus lumborum, and psoas minor, which is present in only about 40% of the population. And then finally, we have the ceiling of the core container, which is the diaphragm. The diaphragm is a parachute-shaped muscle that runs between the chest and abdomen. Although its main function is for breathing, it works with the abdominal muscles to increase the intra-abdominal pressure in order to support the spine as needed.


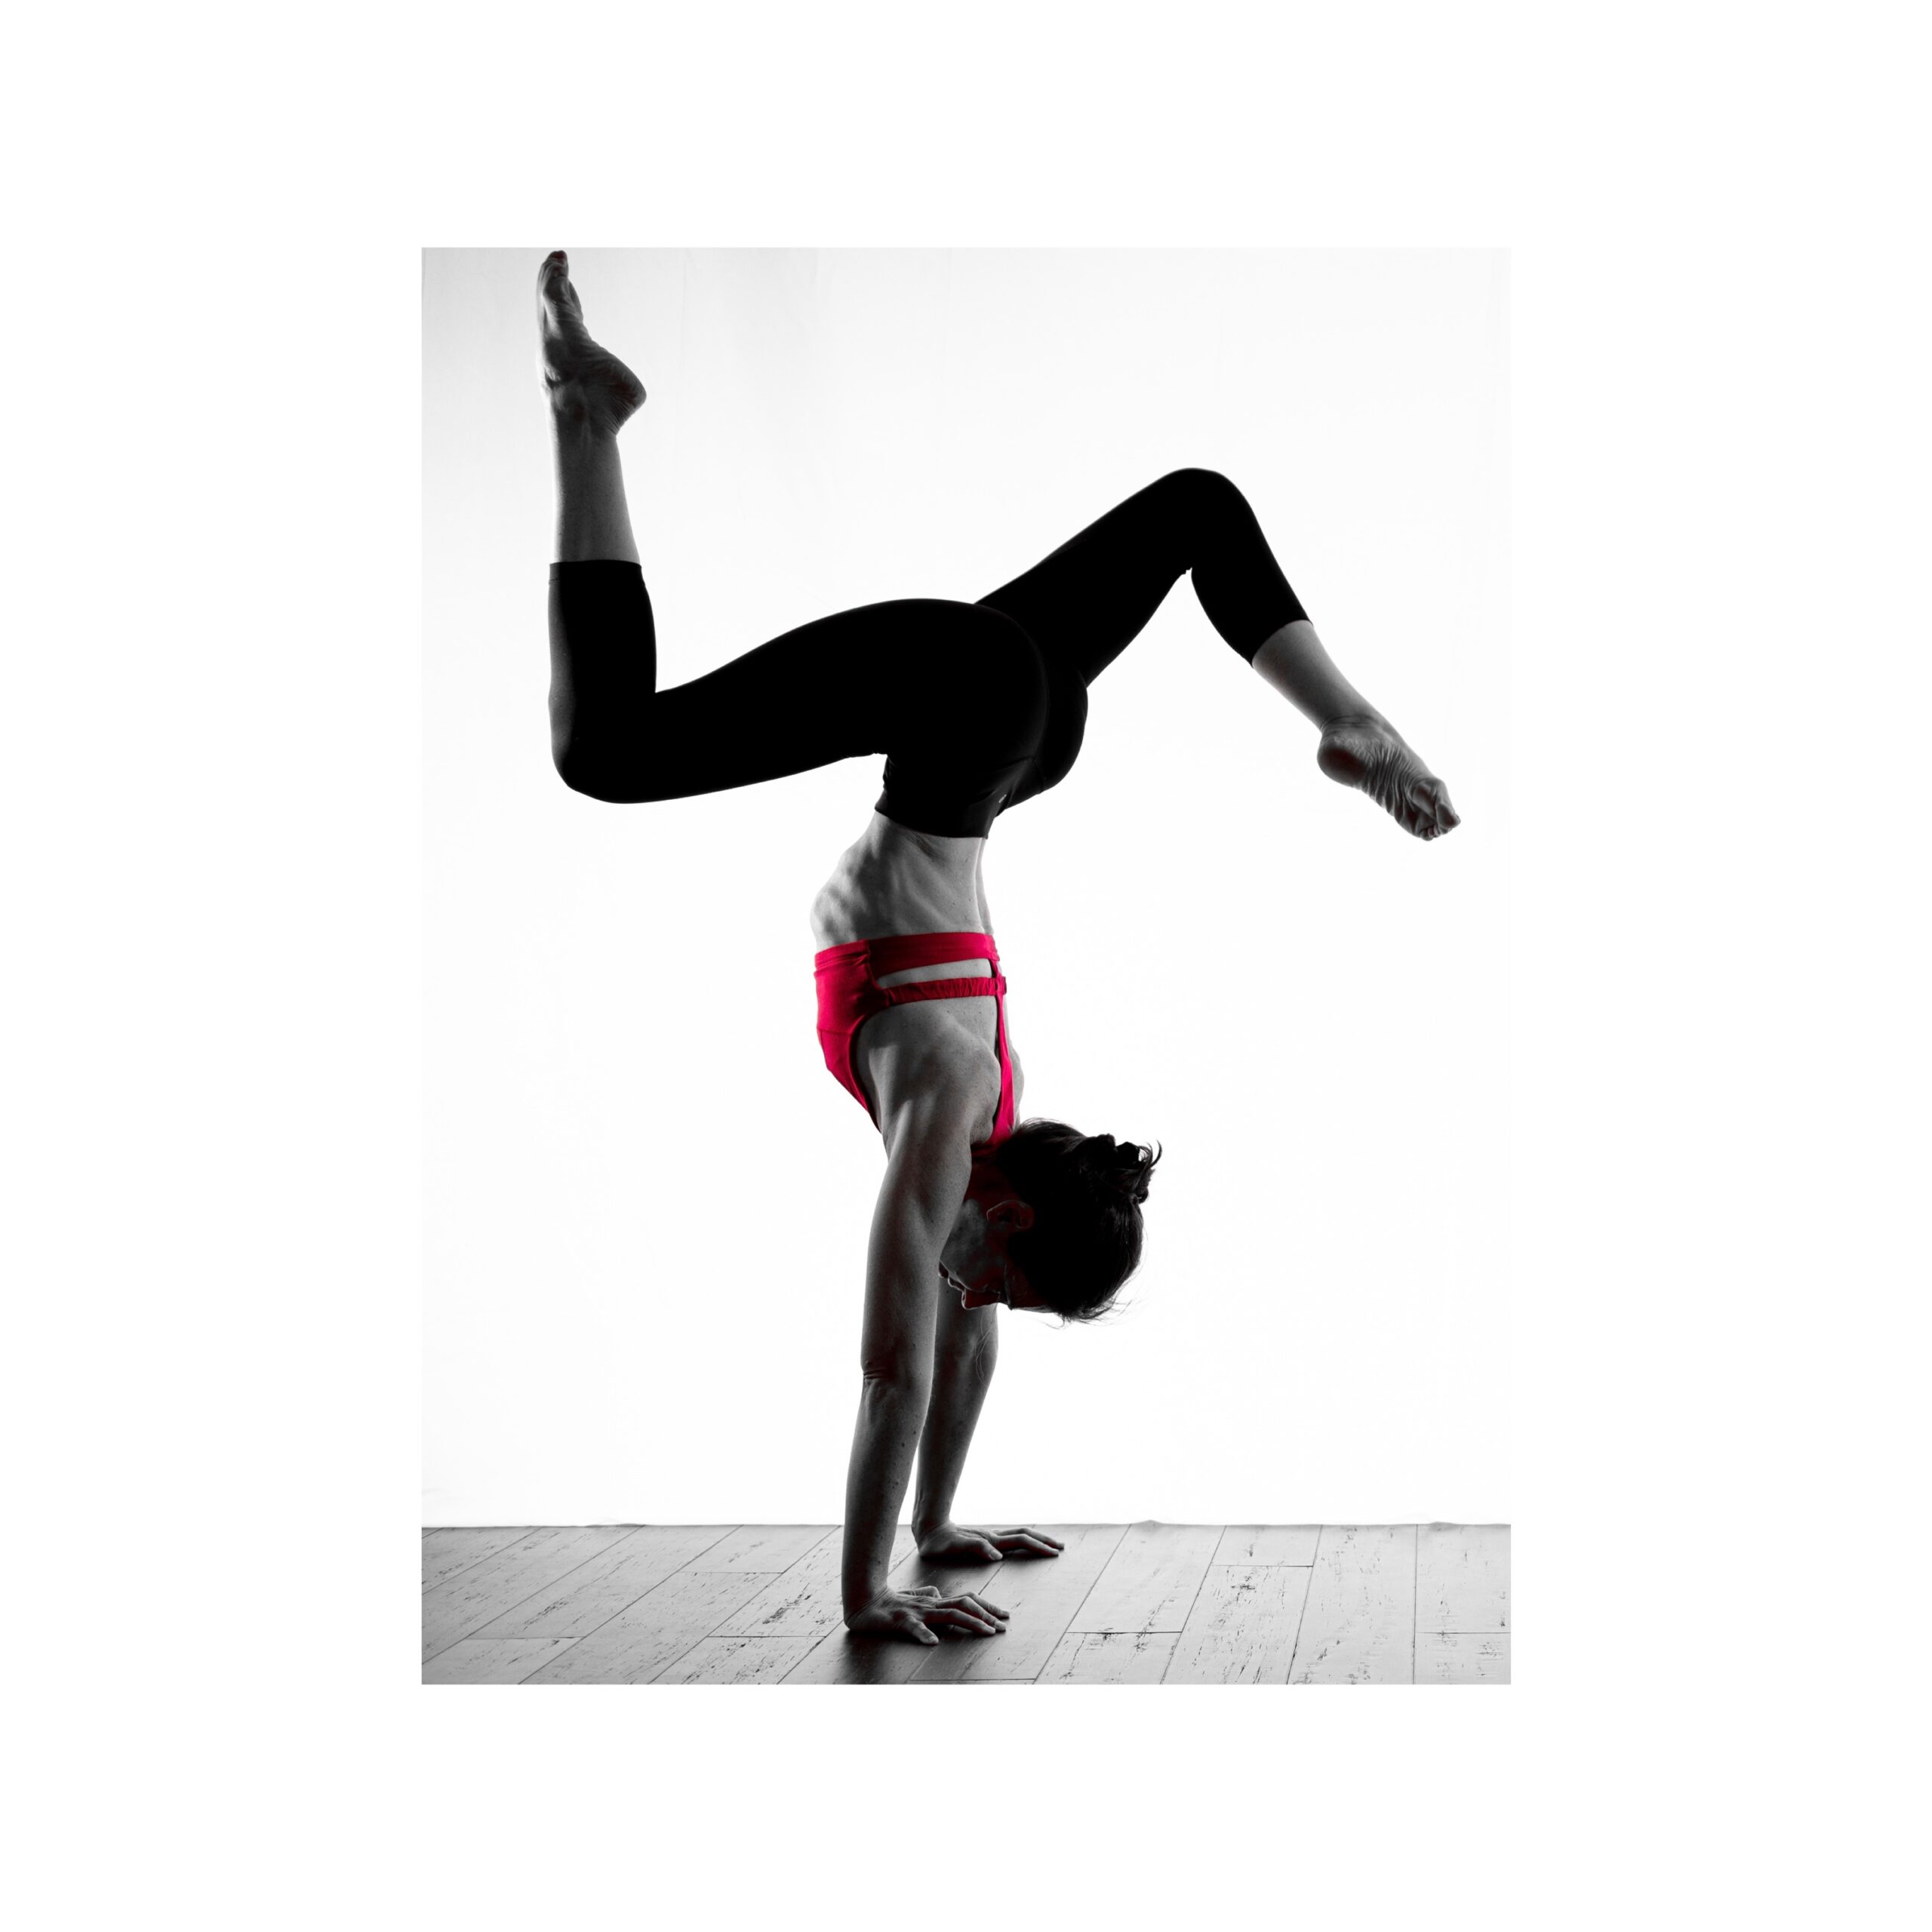
    The ability to tap into the strength of the container of the core takes practice. The inherent boundaries of these muscles create a corset-like effect to stabilize the trunk and spine. Any movement beyond a neutral spine and pelvis, into areas of hyper-flexibility for example, requires integration between the central nervous system and these stabilizing muscles. My favorite way to describe this core containment is by creating an abdominal brace…360 degrees around the spine. This ability to tense the core musculature is similar to what you would do if someone was going to poke you in the belly. You would tense your abdomen all around to keep the fingers from penetrating into the organs, right? You should be able to feel the muscles tighten in front, around the sides, and even into the back body. It’s more of a hug around the trunk than a hard contraction. So you can still move and breathe easily with an abdominal brace. If we can learn to move this way on the mat, it will translate off the mat as well. I like to think of it as an active koozie for our beer can of the core! 🙂 You can even hug in the pelvic floor and diaphragm from above and below at times of greater need, like those asymmetrical poses. You’ll feel the difference in your body, I promise. Your practice will feel like more work, but you’ll reap greater rewards. So give it a try next time! Until then, I’ll see you on the mat!


    Xoxo,

    Kristin

  • Handstand, Don’t Headstand

    Handstand, Don’t Headstand

    One of the first things that drew me to LYT Yoga (then YogaStream) was the inversion practice. I used to do gymnastics when I was middle school age and younger, so I grew up comfortable on my hands as a way to get from point A to point B (ie. with cartwheels, walkovers, and handsprings). But the idea of holding a handstand, let alone in the middle of a crowded room…umm NO. I had been to other yoga studios where handstands, shoulder stands, and plow pose were offered at the end of most classes. Did I do them? Yes. Could I do them well? Yes. Anyone who knows me, knows I’m naturally pretty strong. My job as a physical therapist is demanding and I’m very physically active, so doing crazy arm balances and advanced yoga poses was relatively easy for me at the very start. But not the elusive handstand. Getting that took discipline, work, video assessment, and a daily practice to finally achieve. But this article isn’t about the handstand. It’s about why to do it versus the headstand.


    When you think about it, it makes little physical sense for the headstand to be offered as the “beginner” inversion. In what alternative universe do we feel putting up to 40-48% of our body weight through our neck is a good idea? This is the axial load that studies have shown is being put through the head and neck in a headstand. Now people will argue that you’re supposed to be putting most of the weight through your shoulders and hands, not the head. However, I would argue that most people and especially beginner yogis don’t have the shoulder or scapular strength to do so. Which is why forearm stands are that much harder to do. You are taking close to TWICE as much weight through the shoulder girdle, without the head there to support the other 40-48% of the bodyweight.


    The cervical spine is not built to carry a load greater than the head. If you look at the structural difference between the lumbar and cervical vertebrae, you’ll see why. The lumbar vertebrae have evolved to carry the weight of the upper body or, for argument’s sake, half of the body weight. Its large vertebral body (the solid cylindrical part) allows for this. The vertebral body of the cervical vertebra is roughly ¼ the size of the lumbar vertebra. Which makes sense given how relatively small the head is in comparison to the rest of the body. So why would we still subject ourselves to a pose that puts almost half the body weight through it? No, thank you.

    Another consideration is posture. We spend so much time flexed at the neck while bent over our phones or laptops. This offloads and thereby weakens the posterior chain of the body. Most people have a flattened curve of the cervical spine as well, which essentially means we walk around in perpetual cervical flexion. Studies on axial compression forces required for failure of the cervical spine (in cadavers) was four times less in a flexed position than in neutral or an extended position. This means it takes a lot less compressive force (which is what a headstand is doing) to injure the cervical spine while it’s flexed than while it’s extended or in neutral. So unless you have a perfect curve in your cervical spine (which few people do) and are strong enough in not only the paraspinal musculature but also the shoulder girdle to offset the body weight, it’s just not worth the risk.


    Lastly, we have too many important structures at the craniovertebral junction (CVJ), or where the head meets the neck. The CVJ houses the transition from the brainstem to the spinal cord. It also is where the vertebral arteries (which provide blood flow ultimately to the brain and spinal column) and first cervical nerves (which innervate the head and neck) share a small groove on either side between the skull and the first cervical vertebra. I don’t know about you, but I don’t want to mess with any of that.


    So take the hard road and work towards your forearm balance or handstand. Keep weight off the head and neck! Handstand, don’t headstand. Or as I like to say, “Lift switch, swing it, or step it.” 🙂 Until then, I’ll see you on the mat!


    Xoxo,

    Kristin

  • Digestion

    Digestion

    The holiday season is upon us and you may be feeling heavier than usual following Thanksgiving Day and all the leftovers! Did you know there’s a strong connection between the gut microbiota and the immune system? Some scientists believe the gut can be considered a separate endocrine organ in fact. Changes in the composition and metabolic activity of the gut microbiota can, in turn, affect our health and different disease processes. Over the last five years, studies have suggested that exercise enhances the beneficial gut bacteria, enriches its diversity, and improves the development of it.


    For successful digestion to occur, we want the nervous system to be in a parasympathetic state, also conveniently known as “rest and digest”. The parasympathetic state lets the body know that it’s okay to slow down and focus on digestion, as opposed to being in a state of readiness for fight or flight. It’s during this rest and digest phase that the stomach makes its digestive enzymes and mucous for proper breakdown and absorption of food.


    The vagus nerve is one of our cranial nerves and exits the brainstem, running down to the neck, chest and abdomen. It’s actually the longest nerve in our body and forms a major part of the parasympathetic nervous system (PNS). In addition to the heart and lungs, it innervates the smooth muscle of the gut, which pushes the food through the entire digestive system. Here are some examples of ways to stimulate the vagus nerve and improve digestion:


    • Low intensity yoga – think restorative, gentle yoga, or Stretch class.
    • Deep breathing and meditative exercise – the idea is to breathe out more slowly than you breathe in, allowing the stimulation of the PNS.
    • Singing – perhaps that’s why I simply cannot help but break out into song during class? 🙂
    • Sleeping on your right side shows greater vagus nerve stimulation than the left; lying on the back is thought to decrease vagal stimulation.


    Finally is there anything more LYT than “more core”?? Core work such as abdominal exercises are believed to stimulate movement of the bowels through the digestive system, which promotes an overall improved healthy gut. Similarly, brisk walking helps speed up the time it takes food to move from the stomach to the small intestine.


    So don’t let eating too much at the holidays be an excuse not to exercise or get on your mat, but rather think of it as a reason to do so! Stimulate your vagus nerve with a gentle yoga, meditation, or stretch class on LYT Daily and get that parasympathetic nerve system going. Go with your gut, rest and digest your way to a healthier and happier you!


    Xoxo,

    Kristin

  • Plyometrics

    Plyometrics

    One of the hallmarks from the start that set the LYT Method apart from traditional yoga was Lara’s inclusion of plyometric exercise. As a physical therapist and lover of functional movement, it excited me when I first began taking classes with Lara back in 2012. While plyometrics is a term I use on a daily basis, I suspect it isn’t for most. In fact, many people may not understand the role of plyometrics in fitness and rehabilitation. Today, I’m going to fill you in on that little secret. 🙂


    According to Merriam-Webster, the definition of plyometrics is “exercise involving repeated rapid stretching and contracting of muscles to increase muscle power”. This type of exercise was originally used to enhance sports performance solely in athletics. Within the last 20 years however, we began using plyometric exercise in rehabilitation to facilitate both a quicker return to sport and, more importantly, improve biomechanical technique to prevent injuries from occurring.


    With plyometrics, there is a stretch-shortening cycle that occurs. The muscle-tendon unit is stretched and then immediately contracted (shortened) repeatedly. This improves its ability to produce the maximum amount of force in the shortest amount of time. In addition, plyometrics can be performed between a submaximal (low intensity) and maximal (high intensity) effort. There are three main phases of a plyometric movement:


    1. Loading Phase – also called the deceleration or eccentric phase, this is when the muscles are stretched in response to a load (body weight and gravity) that is placed upon them. Simply stated, this stretch increases the muscle’s potential to produce force and the tendon’s ability to store potential energy to be used later. In addition, there are reflex mechanisms triggered during this loading phase which have the potential to improve neuromuscular control between the brain and the body.
    2. Coupling Phase – as a transition phase, this phase is very short (15-25 milliseconds!) and within the moment where the joint changes from one direction to the other (ie, flexion to extension, up to down, left to right). It is the definitive phase of plyometric exercise, for without the quick transition, an exercise is no longer considered plyometric.
    3. Unloading Phase – also called the push-off or propulsion phase, this is when the muscle-tendon unit is shortened and the mechanisms elicited during the loading phase pay off in increased strength and performance.


    During our LYT practice, we are performing plyometrics at a submaximal or relatively low-intensity level and often in single planes of motion. The benefits of increased muscle recruitment, improved muscle strength, and increased muscular endurance are all present. Plyometrics have also been shown to correct neuromuscular imbalances that can predispose people to injury. They’ve also been shown in the literature to improve joint awareness (position sense) and postural control (single-leg balance).


    Contraindications for plyometric exercise exist, which is why we always give a low or no-impact option in class. They include acute joint pain or inflammation, joint instability, and immediate post-operative status (not usually seen in the studio). Some joint pathologies such as cartilage damage and arthritis are relative contraindications, but it really depends on the ability of the surrounding tissues to attenuate those forces and may be tolerated (and even recommended) at lower intensities. And obviously, acute muscle or tendon injury is a relative contraindication and should be progressed into slowly.


    There you have it friends! Plyometrics and why we do it in LYT!


    Xoxo,

    Kristin