Category: Blog Posts

  • What is a BLISS class?

    What is a BLISS class?

    Bliss means to “reach a state of great joy” and the BLISS class is structured to do just that, for the body and mind. The BLISS class follows the blueprint of a regular LYT class with a focus on repetitive mobility and myofascial stretching to leave you feeling more spacious and blissful. The pace is slowed down so that you can find the pauses and release any tissue (or issue) stickiness that can make us feel agitated and imbalanced. A BLISS class is themed like any LYT class, to hone in on a particular body area or physical and spiritual endeavor. By the close of class, both the body and nervous system will feel more balanced and receptive to relax in bliss.


    Take me to BLISS classes on LYT Daily!

  • What is a SET class?

    What is a SET class?

    When I was traveling about 10 years ago, I created the SET class idea in my own practice.  I found that when I was away from home and traveling with my family, I didn’t have as long of a time to practice so I wanted to make it a very efficient movement experience while helping to unwind any kinks of travel or holiday activities. I begin to share the SET class during a retreat I was leading, and everyone loved it and asked me to continue teaching more SET classes in my regular class line-up. I think many people appreciate the efficiency, repetition, and overall robust movement variability and sweat(!) that a SET class provides. With the blueprint, a SET class can be tailored to any level, intensity, or duration, offering lots of flexibility and accessibility.


    The blueprint starts the same as a regular LYT class, with a RESET to organize the pelvis and spine and activate the entire core musculature. It can include a Sun Sal 1 or go right into the first “set”, a series of movements that is similar to our STREAM in other classes. The set can be anywhere from 5-15 minutes, depending on the complexity and intended duration. It is repeated on both sides and then the class could be finished or another set can be added. The second set repeats the first with some changes, add-ons, or amplifications such as adding plyometrics. The second set is also repeated on both sides.


    The duration and complexity of each set can be adjusted to the level and duration of the class, but no matter what, a SET class will mobilize and rejuvenate the body and spirit and set you up to feel LYT UP.


    Take me to SET classes on LYT Daily!


  • Scapular Winging

    Scapular Winging

    Scapular winging…it’s one of those mysterious musculoskeletal diagnoses that you might never hear of until you get it…and then it seems like literally everyone you come across has it or knows someone who has it! As a physical therapist, if I had a dollar for every person who asked me to “fix” their winged scapula, I’d be rich. Ok, maybe not rich, but I think you get the picture. 🙂 So what is scapular winging and what can you do about it?


    Scapula is the anatomical term for the shoulder blade. Under normal conditions, the scapula should rest flush upon the thorax and move along the rib cage in conjunction with the upper extremity. Scapular winging is when the medial border, closest to the spine, pops off the ribs and “wings out”. So what causes it? In most cases, scapular winging is caused by damage to one of three nerves:


    • Long Thoracic Nerve – innervates the serratus anterior, which attaches to the medial border of the scapula from ribs underneath
    • Spinal Accessory Nerve – innervates the trapezius muscle, which attaches to the spine of the scapula
    • Dorsal Scapular Nerve – innervates the rhomboid muscles, which attach to the medial border of the scapula from the spine


    Various sports or blunt traumatic related injuries can cause injuries to the nerves and yield scapular winging. Surgeries can also damage the nerves, specifically those surgeries related to breast cancer. In many instances, people develop scapular winging as a result of repetitive upper extremity motion. Greater than 50% of medial scapular winging is caused by a traction nerve injury to the long thoracic nerve. So think of repetitive throwing, overhead volleyball serves, wearing a heavy backpack, or overhead weightlifting. Many cases of injuries to the long thoracic nerve which temporarily paralyze the serratus anterior will resolve on their own within 2 years, as long as the repetitive stretching stops.


    Rehabilitation following atrophy of the scapular stabilizers can be long and arduous. Depending on the severity of the scapular winging, a visit to your local physical therapist may be warranted. However, so much of what we do in LYT yoga addresses scapular stability and the serratus anterior in particular. Use of manual and visual cues to encourage forced use of the serratus on the side of the dysfunction can help to speed up recovery once the neural trauma is resolved. Maintaining optimal posture both on your mat and off also help to facilitate a neutral scapula and cervical spine, which facilitate healing and strengthening as well. So if your scapula wings, it’s not the end of the world. No need to “fly” off the handle! (Bad pun, but I couldn’t resist!) Take a hard look at what might have caused or be causing the issue and go from there. See a physical therapist for specific treatment. And as always, get on your mat and keep those scapulae neutral! Fly high friends!


    Xoxo,

    Kristin

  • Transversus Abdominis: The Abdominal Corset 

    Transversus Abdominis: The Abdominal Corset 

    by Ashley Newton PT, DPT


    “Draw the belly button into the back body”, “lift the abdominals up from the pubic bone”, “hold your core strong”, “stitch the belly in”. These cues for the abdominals can be confusing! Need some clarity on how to effectively utilize your abdominals in your yoga practice? Keep reading to get insight into how to optimize this part of your core! 


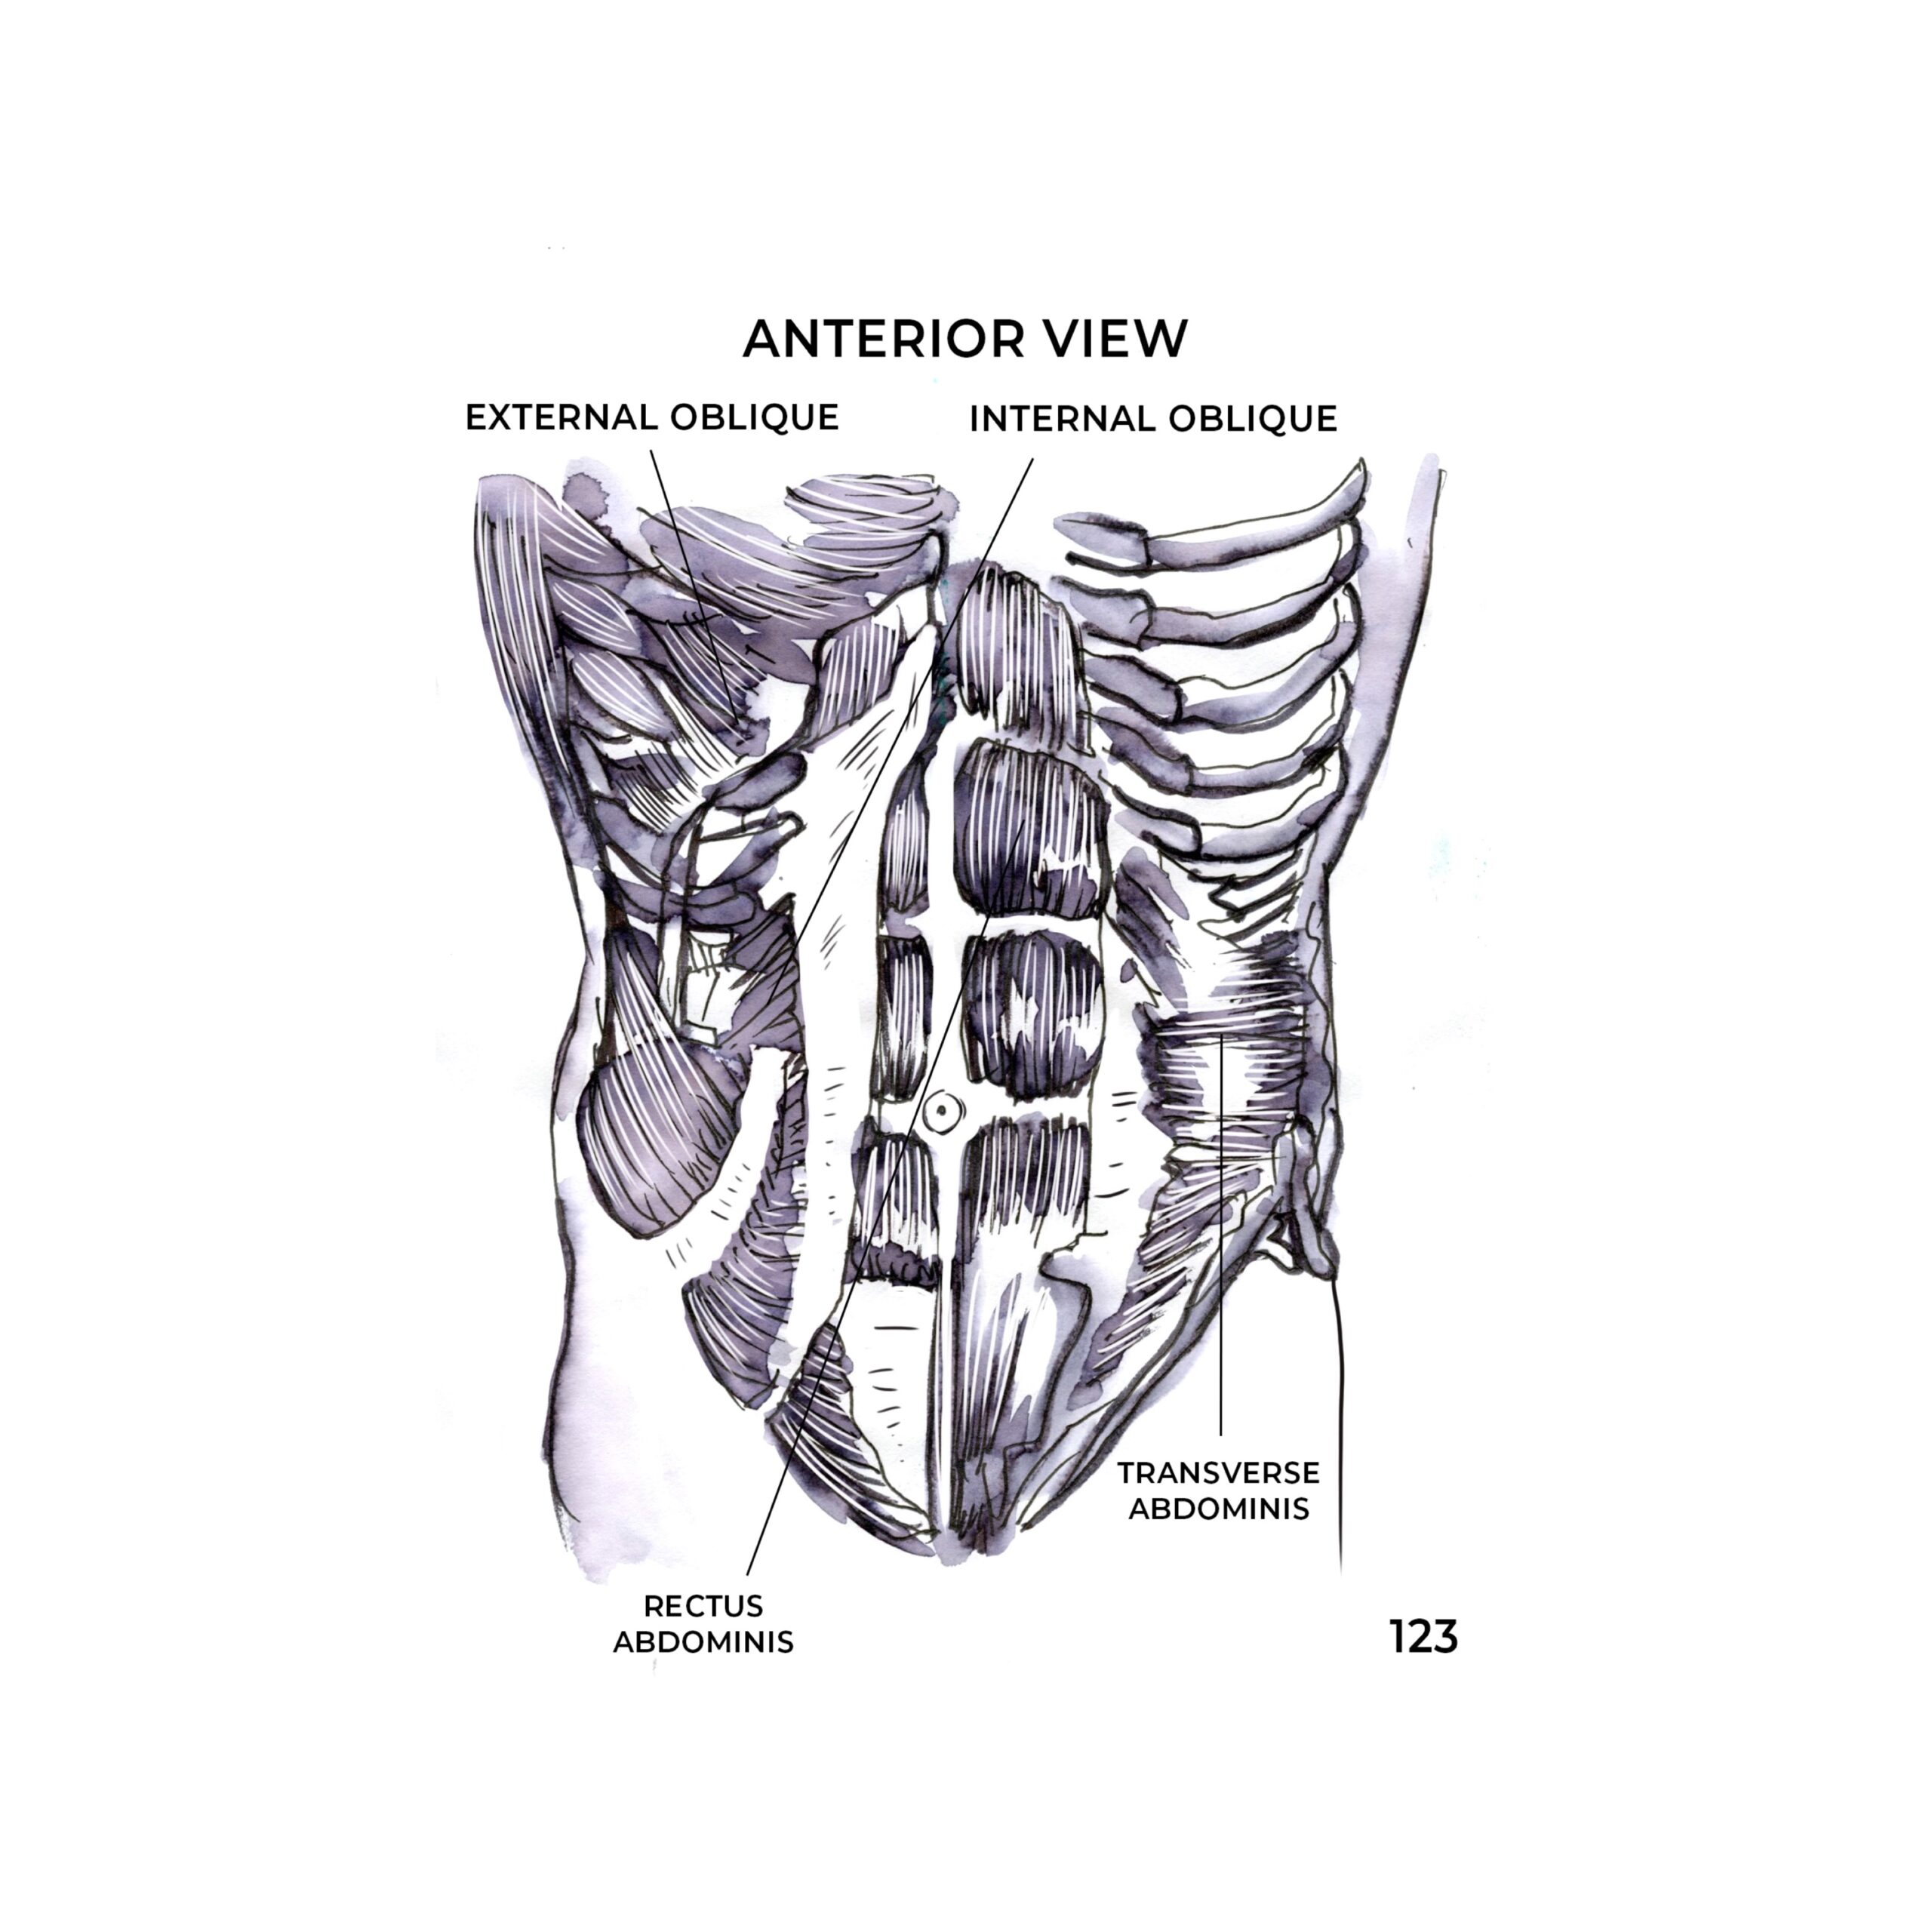
    Our abdominal wall is composed of layers of musculature. Some muscles are oriented closer to the surface (superficial) while others are deeper and attach to our spine. The deepest layer of musculature is the transversus abdominis. The fibers of transversus abdominis attach to the ribs, iliac crests (top of the hip bones), and pubic bone; they ultimately wrap around the abdomen to the back, creating a muscular ‘corset’. The transversus abdominis supports our abdominal contents, assists in expiration and defecation, and supports the lower back. Transversus abdominis has an important role in postural control where it contracts prior to a pre-planned movement. Meaning, if you are going to reach for a can on a shelf, the transversus abdominus will contract prior to that movement in order to stabilize the trunk. It has been established that in instances of pain, activation of transversus abdominis is delayed. When muscle firing is delayed, our body finds other ways to stabilize the trunk. However, these muscle substitutions are not designed to stabilize the trunk. Thus, the tissues can become overloaded by essentially having to do a job they were not designed to perform. This can play a role in future pain and dysfunctional movement. 


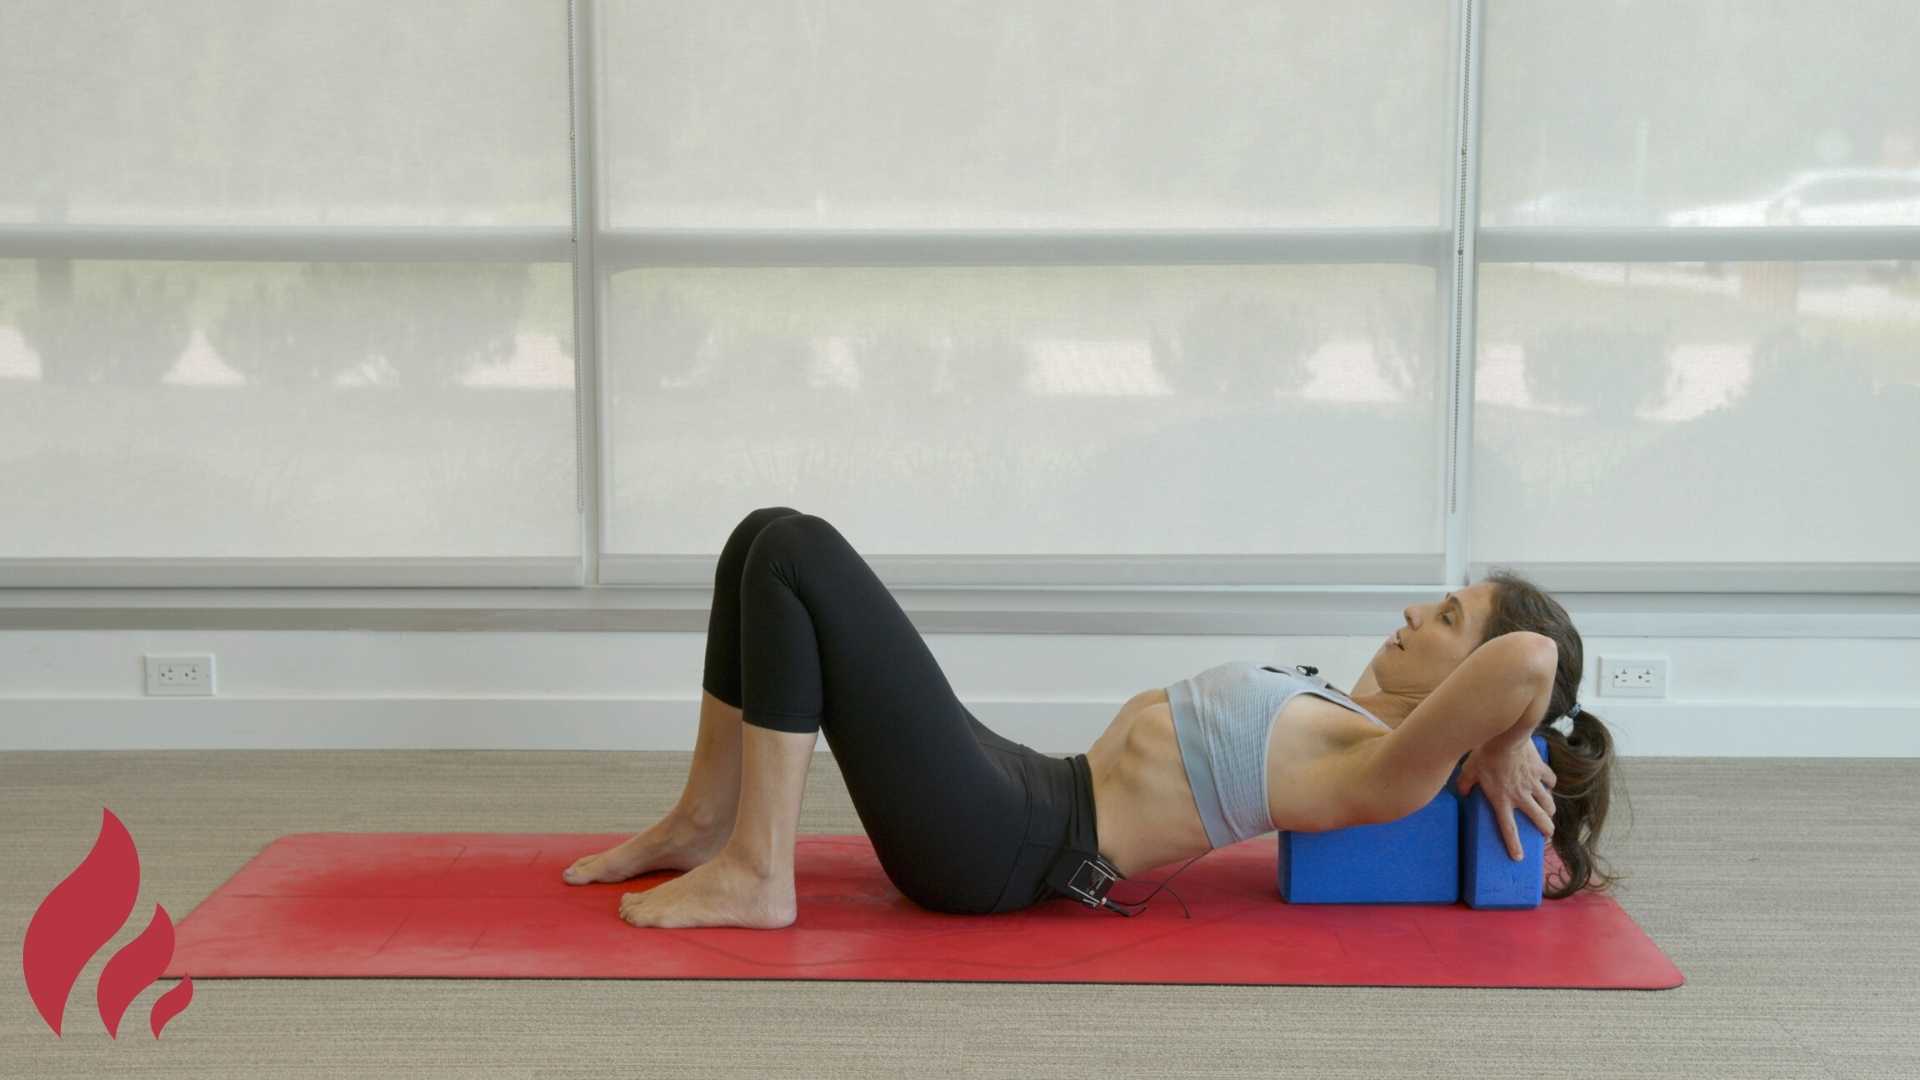
    When transversus abdominis is doing its job, there is a lifting and drawing in of the abdominal tissues. In this instance, we stand taller and our backs and pelvic organs are adequately supported. This is the “Triple S” posture we talk about in LYT! Sounds easy enough, but there are a couple things to look out for to ensure that the abdominals are contracting in harmony. 


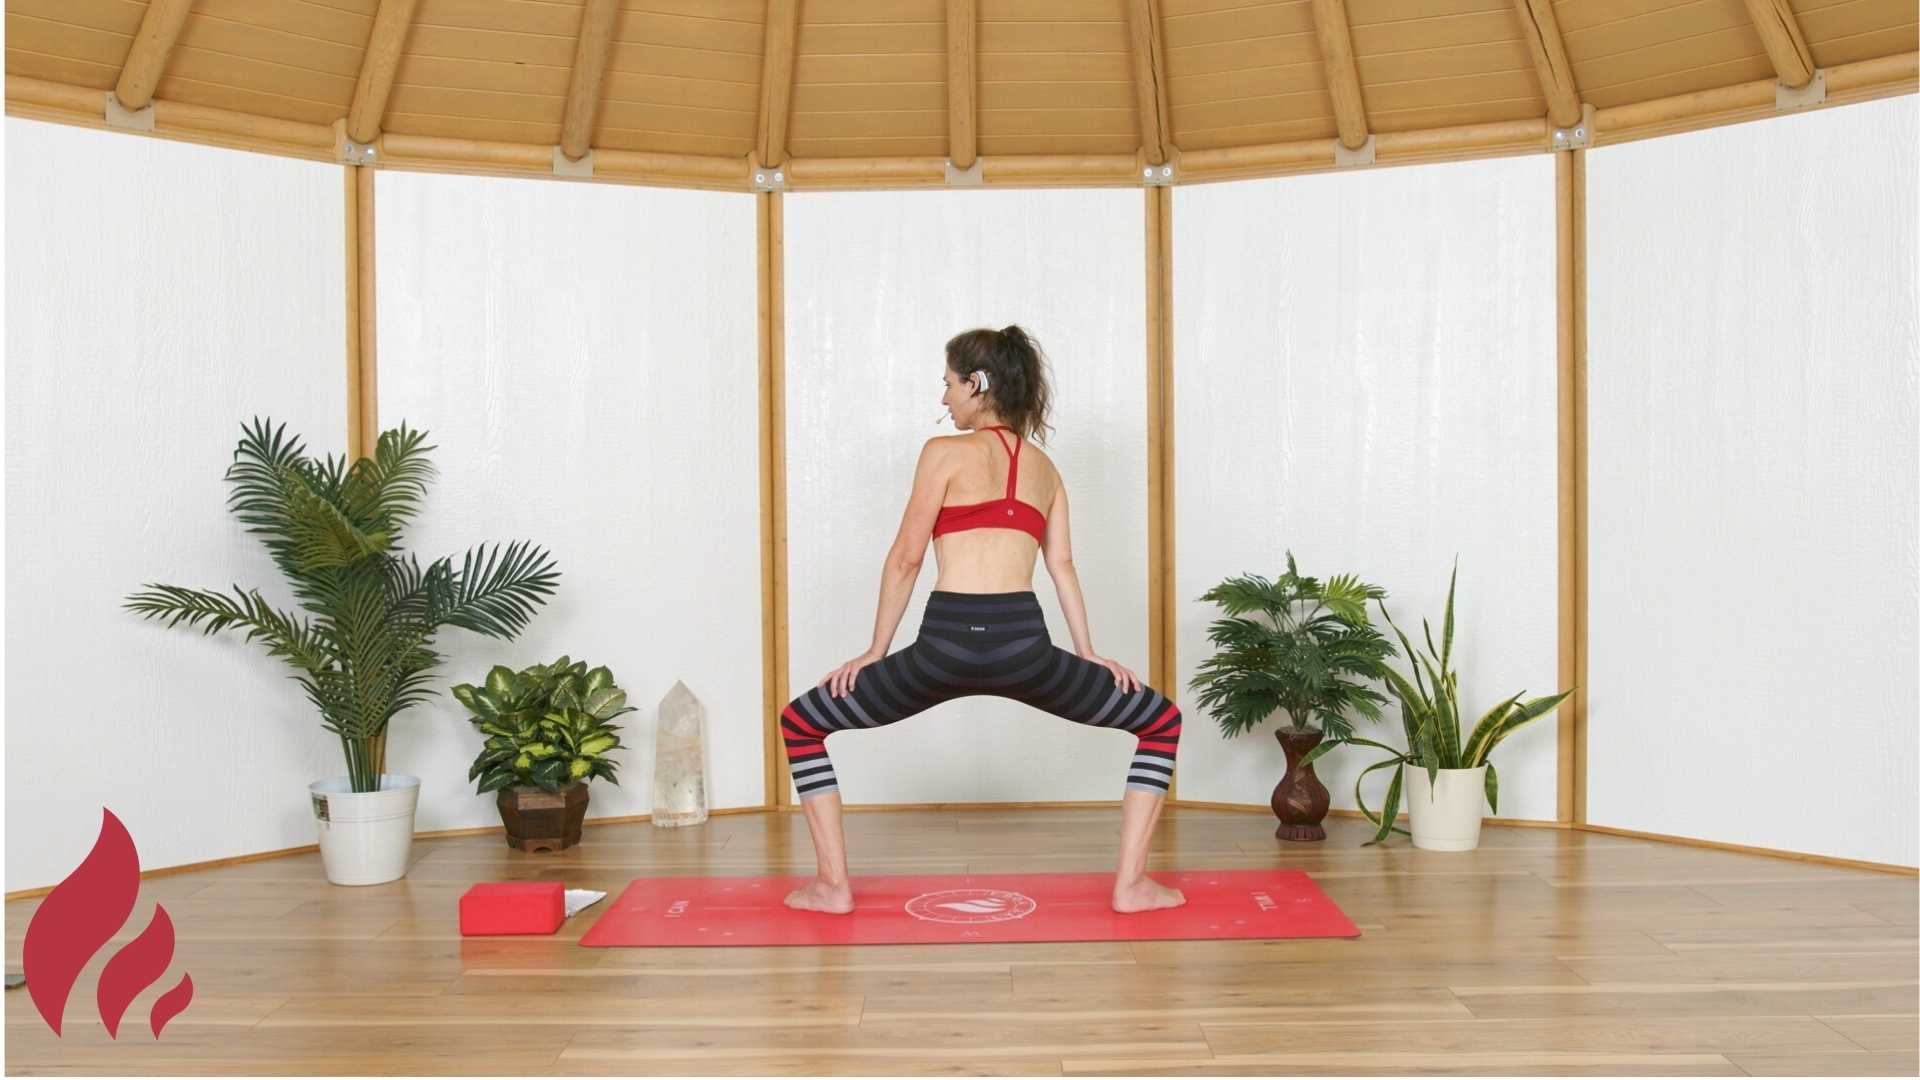
    One of the more common things I see as a PT is ‘abdominal coning’. Abdominal coning occurs when the rectus abdominis fires without co-activation of transversus abdominis. When the rectus abdominis is contracting without the stability provided by transversus abdominis, the abdomen will protrude down its center in a conical shape. We can think about coning as an energy leak where the pressure in the abdomen is not contained and supported by the deep core musculature. Thus, it leaves through the path of least resistance at the linea alba (a fibrous line that connects the rectus abdominis in the midline of the abdomen). 


    **PT TIP**: If you notice the midline of your abdomen coning in your yoga practice, focus on the following:

    1) Maintaining Triple S during Exercise: Skull aligns with Scapula that aligns with Sacrum.

    2)  Exhaling through the Mouth: As you move, think about the lower abdomen deflating as the belly button draws up into the rib cage. Exhaling through the mouth when you move will prevent breath holding and ultimately recruit the abdominals. 

    3) Avoid gripping in your low belly: When you maintain neutral posture and exhale with control, you generate tension in the lower abdomen. Maintain that tension as you move during yoga postures. Avoid gripping in the side waist or attempting to maximally contract the abdomen to stabilize yourself. Rather, think about the belly button gently scooping up toward the ribs to contract transversus abdominis. This creates a flattening of the low belly. Maintain that tension while continuing to breathe into the rib cage.  


    Another common abdominal substitution is external oblique over-utilization. The external oblique musculature is more superficial than the transversus abdominus. Its actions include trunk movements such as rotation and flexion as well as playing a role in breathing and defecation. If the external oblique is doing too much without the assistance of the transversus abdominis, the sides of the abdomen cinch in, and the tissues below the belly button dome upward. 


    **PT TIP**: To avoid abdominal doming in your yoga practice, try the following:

    1. When you exhale, place one hand on the low belly and lightly draw the tissues upward to feel the tension created by that lift. This helps you to orient the pelvis to neutral posture and ultimately the ‘Triple S’ posture. 
    2. Notice Belly Button Movement: The belly button draws up toward the rib cage and the lower portion of the abdomen deflates/flattens when you use transversus abdominis. Use a mirror to watch yourself breathe and gently draw the tissues up from the pubic bone to feel the transversus abdominis contract when exhaling. 


    The abdominal wall is truly multi-layered with the deepest of the musculature keeping us upright, breathing well, and supporting our organs. It is important to be able to use this muscle without overly tensing other muscles so that our bodies are able to move through space without pain or maladaptive movements that can lead to issues in the future! If you have issues such as pain, urinary leakage, constipation, abdominal scarring, and/or abdominal coning or doming, it may be useful to contact a pelvic floor physical therapist to assess the abdominals along with other muscles of the core to ensure they are working together for safe, pain-free movement! 


    I am excited to share tips and education with you in LYT newsletters to come! Follow me on Instagram @ashleynewton_dpt and @activcoreprinceton_pelvic for weekly content on the pelvic floor, nervous system, yoga, and wellness!


    <3 Ashley

  • Embodiment and the Role of Yoga

    Embodiment and the Role of Yoga

    by Svenja Borchers


    Have you ever asked yourself why you always mentally feel better after your yoga practice even when you mostly moved your body? As yogis, we know that body and mind are strongly connected. In fact, we are only able to feel and move our bodies because we have a brain. That feeling of our own body has developed over time tightly coupled to the active planning of movement and its feedback.


    When we feel sad or angry, chances are that we can feel this in our body. Maybe your chest feels tight, your throat feels like there is a lump in it, or your belly feels heavy or nervous. This is referred to as a somatic marker. Sometimes we are not even aware of our own emotions but might feel them in our body first. When you think about someone feeling sad, you’ll typically imagine a person with their head hanging down, shoulders heavily rounded forward… You can clearly differentiate the posture of someone being happy and confident or sad and insecure. And we all know how slouching will make our breathing shallower and faster. Knowing about this connection between our posture and our emotions enables us to use it to lift ourselves up. It has been shown that holding high-powered poses like V-arms (imagine crossing the finish line in a marathon) for only two minutes has a noticeable effect on how confident we are feeling. Moreover, when you feel down, you’ll recover more easily from your negative emotions when you support yourself through an upright posture. In turn, when we stand or sit upright, we can breathe freely, which signals to the brain that we are in a safe and relaxed state. 


    We LYT yogis know that posture matters. It doesn’t only make us feel ready-to-move from the position of our joints, but it also signals to our brain that we are safe and ready for new challenges. Making sure we are safe is the most important job of our brain. When this is secured, we have the energetic resources to strive for more.


    And it is not only about our body posture – but also movement patterns can have a direct influence on our belief system. You might have heard of affirmations (short positive phrases that you repeat over and over again like “I can and I will”). Studies have shown that the performance of athletes increased when they nodded while listening to their own affirmations before a specific exercise vs. when they were not moving or even shaking their heads while listening to the same phrase. Nodding is a movement pattern associated with agreement while shaking our heads is associated with disagreement. Our way of thinking is much more connected to how we feel and use our bodies than expected.


    There is a region in our brain that has been found to play a particular role in connecting information from our body to our emotions. This region is called the insular cortex. It lies just underneath the superficial cortical layer where the temporal, frontal, and parietal lobes intersect. Studies have shown that the volume of gray matter (this is where the nerve cells, synapses, and support cells are lying) of this region is increased in yogis and meditators compared to non-yogis and is positively correlated to the years of yoga experience. 


    Through yoga, we change our body awareness, which in turn changes how we feel and think. This, among other reasons, might explain why yoga practice has such a massive effect on our well-being.


    If you would like to read more on the connection between yoga and neuroscience AND if you speak German, you’ll find tons of fascinating information in my newly launched book “Der Yoga Effekt”.


    Der Yoga-Effekt von Svenja Borchers


    Order the book from Amazon here!

    Or, if you live in Germany, order it locally from any store.

    Find Svenja Borchers on Instagram @svenjaborchers & @yogaandthebrain.

  • Vibration Plate Exercise

    Vibration Plate Exercise

    Vibration Plate Exercise:
    Benefits, Risks, Implications

    by Sarah Kingsley


    Vibration Plate exercise and therapies are spreading throughout the nation due to the many benefits they provide to the body. Research has shown that the use of these plates can alleviate back and joint pain by improving core strength and circulation, boosting metabolism by encouraging your body to burn fat faster, and decreasing stress through increased serotonin production and decreased cortisol hormones. Using vibration plates can improve strength and flexibility with improved stability, encourage the development of stronger bones and increased bone density, and decrease fall risks. Studies have shown additional benefits to numerous conditions including restless leg syndrome, plantar fasciitis, arthritis, osteoporosis, lymphedema, and autoimmune conditions such as Fibromyalgia by making cellular level changes to the body.


    Muscles and bones tend to get both weaker and stronger TOGETHER. When your muscles are weak the bones become weak and brittle due to the lack of force to pull on them (called Wolff’s Law) which leads to conditions like osteopenia and osteoporosis. The forces going through your muscles, bones, blood, and body work like a key to turn different systems back on and get them working the way they did years ago, or perhaps in a way they never have before. Your levels of natural growth hormone dramatically increase and your bones get stronger. Naturally produced growth hormone (GH) maintains bodily functions such as tissue repair, muscle growth, brain function, bone density development, skin thickness, energy, and metabolism throughout life. The fast-paced, repeated skeletal muscle contractions produced by the vibration improves performance and functionality. On a cellular level, the mechanical stimulation from vibration can influence stem cell differentiation as needed, such as transferring stem cells to bone cells.


    The vibrations also stimulate the nerve receptors in your feet that become quiet when you are stuck in shoes and socks all day, which can contribute to conditions such as neuropathy. The vibrations help improve proprioceptive feedback through the feet (knowing where your body and joints are in space) to give you greater balance control and body awareness. Trials have shown positive improvements in balance and immediate pain relief for those with Parkinson’s Disease, Cerebral Palsy, and nerve pain related to Diabetes or spinal issues. Various settings also provide lymphatic stimuli aiding in the breakdown of adhesions to promote pain-free mobility. This is why it is normal to feel an itching/burning sensation in the skin during or after use as this sensation results from the body releasing toxins and fascial connective tissue which holds onto everything in our bodies, even our emotions! 


    The type of plate, direction of vibrational waves, and frequency or intensity each play a role. The rhythm tilting high vibration frequency setting is good for balance issues and trying to build muscle strength, while a lower level intensity is good for detoxification, autoimmune conditions, and lymphedema. For the latter population, even just 1-5 minutes can be of great benefit, and longer sessions could potentially be detrimental. An intermediate speed of 21-50 is best for fat burning, increasing metabolism, building muscle, and stress relief. The highest intensity from 41-60 is best for metabolism and especially for breaking down adhesions in fascia and soft tissues that may be contributing to chronic pain such as plantar fasciitis and many tendonitis or fibrosis conditions. The plate has been proven to be effective in healing and repairing tissues and conditions that may not have benefited from typical physical therapy interventions such as chronic soft tissue injuries, muscle atrophy, bone loss, peripheral neuropathy, and some hard-to-diagnose or hard-to-treat diseases that are often related to poor microcirculation. It is possible that vibration-induced muscle contraction force, at a certain magnitude, can gradually break the fibrosis and allow new living tenocytes and fibrocytes cells to grow back, restoring the original tendon/ligament performance and functionality.


    Similar to the LYT method, the vibration frequencies allow you to tap into deeper core muscles that may typically lie dormant or inactive throughout your day-to-day activities. The vibrational components with variations in frequencies differing from anterior/posterior, medial/lateral, spiral, and quadruple rotational forces aid in bone density gains by providing activation of these muscles and greater stimulation for increased work and a bigger calorie burn in a much shorter amount of time. If you thought Lara’s core drills were hard, try them on a vibration plate to really feel those muscles light up! As always with increased workload, it is necessary to give your body rest breaks in between exercises and periods of activity, and increased water intake is recommended to rehydrate and further the detoxification process. If you are in the Charlotte, NC area, come try out my plate and feel the changes in your body and tissues!


    References:

    https://www.vibrationtherapeutic.com/vibration-plate-therapy-benefits.html


    Sarah Kingsley

    @mywinphysicaltherapy 23 on Instagram

  • Wrist Stretches

    Wrist Stretches

    It’s not uncommon for some people who practice yoga regularly to develop wrist pain, especially if they have spent the majority of their life working at a desk. Decreased range of motion, strength, and flexibility of the wrists combined with an increase in the demand placed upon these delicate joints through regular weight-bearing in a yoga class can be the perfect recipe for injury. LYT yoga is the only method offering wrist stretches at the beginning of every class, but even in some cases, that’s not enough. If you’re having trouble with your wrists, a little extra warm-up before class could be just the thing you need. Try this out about 5-minutes before class starts and see if, over time, it helps!


    1. Make fists and roll the wrists clockwise and counterclockwise for 15-20 seconds in each direction. Do this once with the thumbs outside the fists and once with them inside.
    2. Open and close the hands quickly for 20-30 seconds, warming up the hand and forearm musculature.
    3. In Quadruped (all fours):
      •   Rock forward/back 5x and then side-to-side 5x. This range of motion should be pain-free, so you may not get your shoulders fully over the wrists to start. 
      •   Circle the shoulders around the wrists, 5x in each direction. Again, you might not be able to get the shoulders fully over the wrists to start.  
      •   Repeat the 2 steps immediately above with the fingers pointing out to the sides of your mat.
      •   Flip the palms to face up, fingers pointing towards each other, and rock from side-to-side 5x, stretching the wrists into flexion. You will most likely have the majority of your weight in the hips and not over the wrists.


    You can also catch my series on LYT Daily, “Weightless in the Wrists,” which includes six traditional LYT classes with little to no weight-bearing through the upper extremities, specifically for people with current pain and/or wrist dysfunction.

    weightless in the wrists KB


    And check out my 4-minute wrist warm-up video on the LYT Yoga YouTube channel. Take care of your wrists so you can stay on your mat practicing as much as you want!


    Xoxo,

    Kristin


  • Lower Extremity Nerve Glides

    Lower Extremity Nerve Glides

    In my last PT Corner, I discussed upper extremity nerve glides, so today I want to piggyback onto how we can also perform nerve glides in the lower extremity. If you recall, nerves need freedom to move and glide, with just enough slack to allow the neural impulses to travel from the brain to the body and back. As I said before, it’s not uncommon to have areas of entrapment along these nerves, which can cause a whole host of issues including sensory changes, weakness, and pain. Normally, the nerves in our body glide and move as the rest of our body moves. This nerve movement is referred to as neurodynamics. When it is free and unlimited, the nerves slide and slide in a protective sheath, without being pulled taught. However, nerves can become caught up or compressed anywhere along these lines, including those that extend into the lower extremities.


    Neural impingement in the lower extremities is typically secondary to tension on the sciatic nerve or one of its branches. The sciatic nerve comes from the L4-S2 nerve roots, which exit the spine to join at the pelvis and form the nerve. It’s the largest nerve in the body, measuring about the size of your pinkie finger as compared to most other nerves which are the size of spaghetti or linguine. The sciatic nerve exits the pelvis under and through the gluteal muscles, entering the posterior thigh. It courses down the leg, just underneath the lateral hamstring (biceps femoris) where it officially ends right above the posterior knee, bifurcating to become the tibial and common fibular (peroneal) nerves.


    The tibial nerve first gives rise to the sural nerve, which innervates the posterolateral lower leg, and then courses down behind the knee into the lower leg, running just behind the tibia. At the foot, it curves behind the medial ankle (malleolus) and terminates in the foot. The common fibular (peroneal) nerve runs more laterally alongside the distal lateral hamstring, over the lateral head of the calf (gastrocnemius) muscle, wrapping around the neck of the fibula and terminating in the lateral leg.


    Mobilization of the sciatic nerve and its lower branches can alleviate pain, increase range of motion, and heighten the adaptability of the nervous system, allowing people to move with less resistance. There are some simple nerve gliding techniques that can be done to restore normal or improved neurodynamics to the lower extremities, specifically targeting the sciatic nerve and its branches:


    1. Sciatic Nerve Glide – lying supine, bend one knee into your chest and grab behind the thigh with both hands. Slowly straighten the knee to where you first start to feel symptoms or tension, and then rebend the knee. Repeat 20-25 times without going into pain. You can also extend the knee to the point of minimal tension and then point/flex the ankle, gliding the nerves from below. 
    2. Tibial Nerve Glide – lying supine, bend one knee into your chest and grab behind the thigh with both hands. Slowly straighten the knee to that point of tension and then dorsiflex and evert the foot (pull the toes back and turn the toes out). Repeat the motion at the ankle 20-25 times, without going into pain.
    3. Common Fibular (Peroneal) Nerve Glide – lying supine, bend one knee into your chest and grab behind the thigh with both hands. Bring the leg slightly across midline, adducting at the hip. Slowly straighten the knee to that point of tension and then plantarflex and invert the ankle (point the foot and turn the toes in). Repeat the motion at the ankle 20-25 times, without going into pain.


    Many of these can be done in a seated position as well, which can serve to further glide the lower extremity nerves by slouching at the spine and/or involving the head and neck from above. Remembering that our neural network extends all the way from the brain and surrounding dural tissue allows us to effectively mobilize our peripheral nerves in multiple planes and various positions. Beginning in the supine position as stated above is the gentlest way to start, as the spine is supported throughout.


    You can find a demonstration of these glides on our YouTube channel by clicking the link below! As always, seek the help of a physical therapist or other healthcare professional if symptoms progress or do not improve. Let’s keep those nerves moving and grooving so I can keep seeing you on the mat! 


    Xoxo,

    Kristin