Category: Friday with Friends

  • 123 | Shoulders | with John Frank, PT

    123 | Shoulders | with John Frank, PT


    In this episode, my brother, John Frank, joins me to discuss the shoulder complex. John is a physical therapist, athlete, and fellow lover of movement. So often, we think that the shoulder is simple, but the shoulder is, in fact, quite complicated! 


    When you see people, what are the main complaints people have in their shoulders?


    The complaint usually comes from the front and / or top of the shoulder, so your bicep or your rotator cuff. There is never a blanket diagnosis, because the shoulder is so intricate. When you have pain when reaching overhead, you have to look at the whole complex of the shoulder, not just one place. 


    What is a good exercise that would help people re-educate their range of shoulder motions between the different parts?


    Face a wall and put your arms overhead, and move the arms slightly out to the sides. Relax the arms completely, and pretend as though someone took their fingers on the lower part of your shoulder blade, moving it upwards. Be sure to keep your neck neutral in this position. 


    What do you see in the shoulder when people have a sloped shoulder? Is this something that can be helped? 


    Even though there are a lot of genetic features, a sloped shoulder is mostly acquired. The top of the shoulder blade and the bottom of the shoulder blade should be pointing straight down as vertical, parallel to the spine. People with sloped shoulders tend to have pain in their necks as well as tingling down the arm. 


    What can people with sloped shoulders, or conditions like that, do?


    Definitely do the wall exercise described above, but also look at your posture. Shrugging the shoulders, and even raising the arms above the head periodically can help as well. 


    Resources:

  • 122 | Seated Forward Folds

    122 | Seated Forward Folds

    Today’s episode is about why I don’t teach or practice seated forward folds. I’m not saying they’re bad, but there’s a lot of reasons I don’t do them. Primarily I want to make sure that people get the most bang for their buck out of any movement they do, and this is particularly important for people who don’t spend a lot of their day in movement. 


    Why do people practice seated forward folds?


    1. Traditionally, nearing the end of a yoga class, this movement can be seen as a way to calm the nervous system, as a way to prepare for savasana. 
    2. People want a deep stretch, and feel as though this move will stretch the areas they need. 
    3. I feel that sometimes yoga teachers do it as a filler because they run out of ideas.


    Why do I not teach or use this in my practice?


    When I stopped doing and teaching seated forward folds, I noticed more flexibility and mobility in myself and my students.


    In vinyasa classes you’re already doing a lot of forward folds in standing positions. So it’s so redundant to get on the floor and do more of them, we need a variety of movement. Also people who are sitting at desks most of the day already have half of the seated forward fold going, they don’t need to sit and do it more.


    I really want to encourage yoga teachers to think outside the box a little bit. We don’t have to do the same thing over and over just because it’s been done before. So think for yourself and test different things out.


    Resources:

  • 121 | Neutral Pelvis

    121 | Neutral Pelvis

    The position of the pelvis is fundamentally important for the alignment of the spine, all the way up into the skull. It forms the basis for our movement patterns and for our energy levels, and that’s why today’s episode is all about creating and maintaining a neutral pelvis. 


    What does “pelvis” mean? Where is the pelvis?


    In Latin, pelvis translates to “acetabulum” meaning, basin. 


    The pelvis is where your lower limbs come up and meet at the hip joint. The illium, the pubic bone, the sacrum, and the tailbone all meet to create the pelvis. The tailbone actually serves as an attachment point for the lower muscular system.


     What is a neutral pelvis? 


    The pelvis provides the foundation for the spine. When thinking about energy exchange and how we hold onto energy within the body, a neutral pelvis is fundamental for that. If you go against a wall and find your sacrum, pushing that against the wall will help you see where your pelvis aligns. If you find that it’s difficult, this probably means the front of your hip is tight and you have an anterior tilt. 


    Why is a neutral pelvis important?


    A neutral pelvis is important in supporting the spine, this way no excessive strain is placed on your spinal cord. It is also important for proper joint movement, and fundamental for taking big, deep breaths. 


    Helpful Acronym:


    • N: neck in line
    • E: elongate 
    • U: un-clench your jaw
    • T: tailbone down
    • R: ribs broaden
    • A: abdominals drawn together
    • L: line between the pubic bone and tailbone


    Resources:

  • 118 | Overactive Muscles | with Lara Heimann

    118 | Overactive Muscles | with Lara Heimann

    Today’s episode is what to do about over-developed or, as I like to think of them, over activated muscles. I get a lot of questions, particularly about the upper trapezius and the latissimus dorsi, otherwise known as the traps and the lats.  As always, share this with friends, especially anyone who has been complaining about neck or shoulder tightness.


    If the upper trapezius is over developed or overly activated, it’s often due to the weakness of the serratus anterior and the lower trapezius below it. More commonly I see that it’s because of the serratus.


    You can learn how to activate the serratus. One way to activate it is to stand facing a wall, a little bit away from it. Bring your arms up on the wall and place your hands on it or you can have your thumbs facing upward. Your arms are probably not straight out in front of you, but they’re up in a V. Then you can lightly slide the scapula up more, meaning the arm is going to slide up the wall, and you’re pressing a little bit into the wall as you’re doing this.

    Another way of working the serratus is to get yourself in a quadruped position where your wrists are under your shoulders and your knees are under your hips. Walk your hands forward a little bit so they’re not directly under your shoulders. And in that position, attempt to press the floor away like you were doing to the wall. 


    Shoulder shrugs can help you develop better and newer motor patterns and release some of that constricted tissue in the traps or the lats. There are two ways to do them. The first way I like to do in a low lunge but you can also do this if you’re sitting at your desk. You just lift one head of the humerus up, so the ball of the humerus, you just lift it  up, and then bring it back and then bring it down. So I would do my right side and then my left side, then repeat. As you’re doing it, feel the shoulder moving, but also get a sense of the scapula moving a little bit. This exercise is training that upper trapezius to not just grab and hold, but to kind of lift and release. 


    The other way of doing some of that shrugging is in down dog. Think about pushing the floor away and shrugging the shoulder blades up by the ears, and then releasing down. Doing that over and over again will help you retrain some of these movement patterns.


    Resources:

  • 117 | Private Sessions | with Lara Heimann

    117 | Private Sessions | with Lara Heimann

    Private yoga or other movement sessions can be a game changer for people because it offers an opportunity to dramatically improve their practice. In this episode I offer some tips for working with private students.


    To start with, I gather information that is relevant to whatever the student wants to work on. This includes asking about how they’re spending their time, for example, if they’re sitting at a computer all day. Then I observe posture. Posture tells a lot, because how you stand is how you move. And how you move is going to either dial up the muscle activity that’s needed or it will dial it down. The goal is to educate the student about how they can bring more attention to their resting posture in their daily lives, not just during the yoga or  movement practice.


    For new teachers, it’s great to practice your skills on private students. The more bodies you look at, the more you’ll develop a good sense of alignment and optimal movement patterns. Just remember to be aware of your capacity and your knowledge base. It’s important to have a mentor or someone that you can ask questions when needed.


    Also, join me tomorrow, August 3, in New York City to break a world record together for the most handstands done simultaneously. The current record is 399, and I hope to see you and hug you all after we make history together. 


    Resources:

  • 116 | Where to Put Your Scapula | with Lara Heimann

    116 | Where to Put Your Scapula | with Lara Heimann

    Today’s episode is all about the scapula, otherwise known as the shoulder blade. A lot of people have problems with their shoulders, but 90% of these can be solved if you understand where to put your shoulder blades, how to move them and how to strengthen the muscles that control them.


    So how do you find the ideal position of the shoulder blades? The first thing I would say is go against a wall. Feel your shoulder blades press against the wall and then lightly pull your front ribs back more so that you really are trying to stamp the shoulder blades on the wall.


    For a lot of people the head will want to stay away from the wall so don’t strain to get the head back, just work on getting your ribs back to meet the shoulder blades. Pull your front ribs back, press your shoulder blades into the wall and you should feel quite upright. Also work to slide your shoulder blades together.


    For a floor exercise, you can get on your knees and have your wrists lined up underneath your shoulders with your fingers spread and the knees pulled in a little bit underneath your hips. Then let your chest soften toward the ground until you feel your shoulder blades do the same action they did on the wall. Now hold that feeling but lift your belly up because usually when you let the ribs soften, you let your belly go as well.


    Resources:

  • 115 | Hiring a Yoga Teacher | with Lara Heimann

    Today’s episode is all about what to look for when hiring a yoga teacher. It’s important to have some kind of standards when you’re hiring, and especially for yoga studio owners. Because when we hire yoga teachers, those teachers are branches of us, they’re representing the studio motto and studio ethos.

    The most important qualities for me are passion, curiosity and presentation.


    In terms of passion, I’m talking passion for movement, passion for yoga and passion for inquiry. I have a passion for everything that involves movement because I know that, without movement, life is static. So I want to hire someone who has passion. 


    I love to be around people who are curious because I think without curiosity, again, it’s kind of like passion, life is static. And so I want someone who I can sense that they’re curious and that they have this thirst for knowledge and they’re not thinking that they know it all. Curiosity keeps people humble, it keeps people excited, it keeps people eager. Those are such great qualities for a yoga teacher.

    Then I would start to look at things like presentation, meaning how comfortable is someone in a room with people? How are they engaging with people? How comfortable are they with helping someone who is needing assistance? I just want someone who has that genuine desire to get in there, and help people and be of service.


    Finally, this is the last big plug to join us on August 3 in New York City to break a world record for the most amount of handstands done simultaneously. Remember, you do not need to know how to do a handstand. I will take you through the steps. To help us break this world record, all you need to do is get your hands down and your feet off the floor for a few seconds. This is just a great opportunity to get together to do something that’s empowering and that will make your spirit sing. 


    Resources:

  • 114 | Forward Folds | with Lara Heimann

    In today’s episode I cover what to do instead of a seated forward fold. I get this question a lot. When I say I never do it, I’m not saying it’s wrong. If it feels good, I’m not telling you not to do it. But I’m offering you some other ways to get that same feel-good sensation from a forward fold. When people do a seated four fold, and they really love it, what they love is the feeling of that pull. Because the back part of the body, if we’re flexing a lot during the day, meaning we’re just compressed, that back part of the body wants to do the opposite. So we want to open that up and extend it.


    So then what we do is sit on the floor, and we lie on our legs, or attempt to do that, so we’re getting that pull and feeling it in the hamstrings, and maybe in the back. And there’s nothing with that, there’s just more effective ways of stretching the flexibility around the joints and affecting the pliability of the fascia without sitting more because we do sit a lot. A lot of people, they sink forward, or they’ll sink back into their pelvis and tip the pelvis and that will overly stretch the lumbar spine and the lumbar area.

    Here are a few alternative poses that will give you a better, safer stretch.


    Alternative pose 1
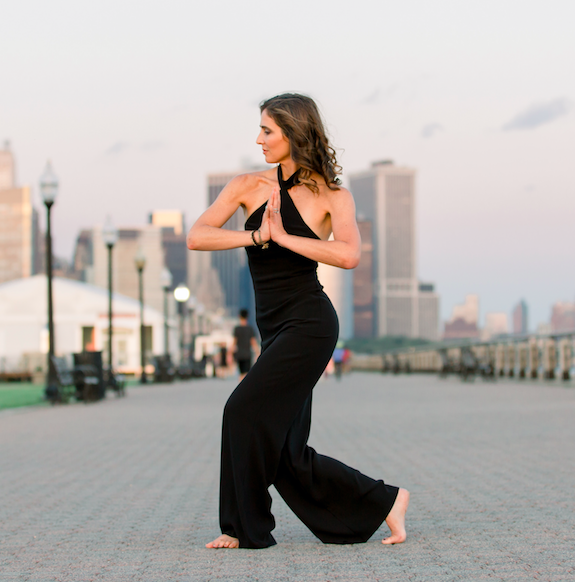
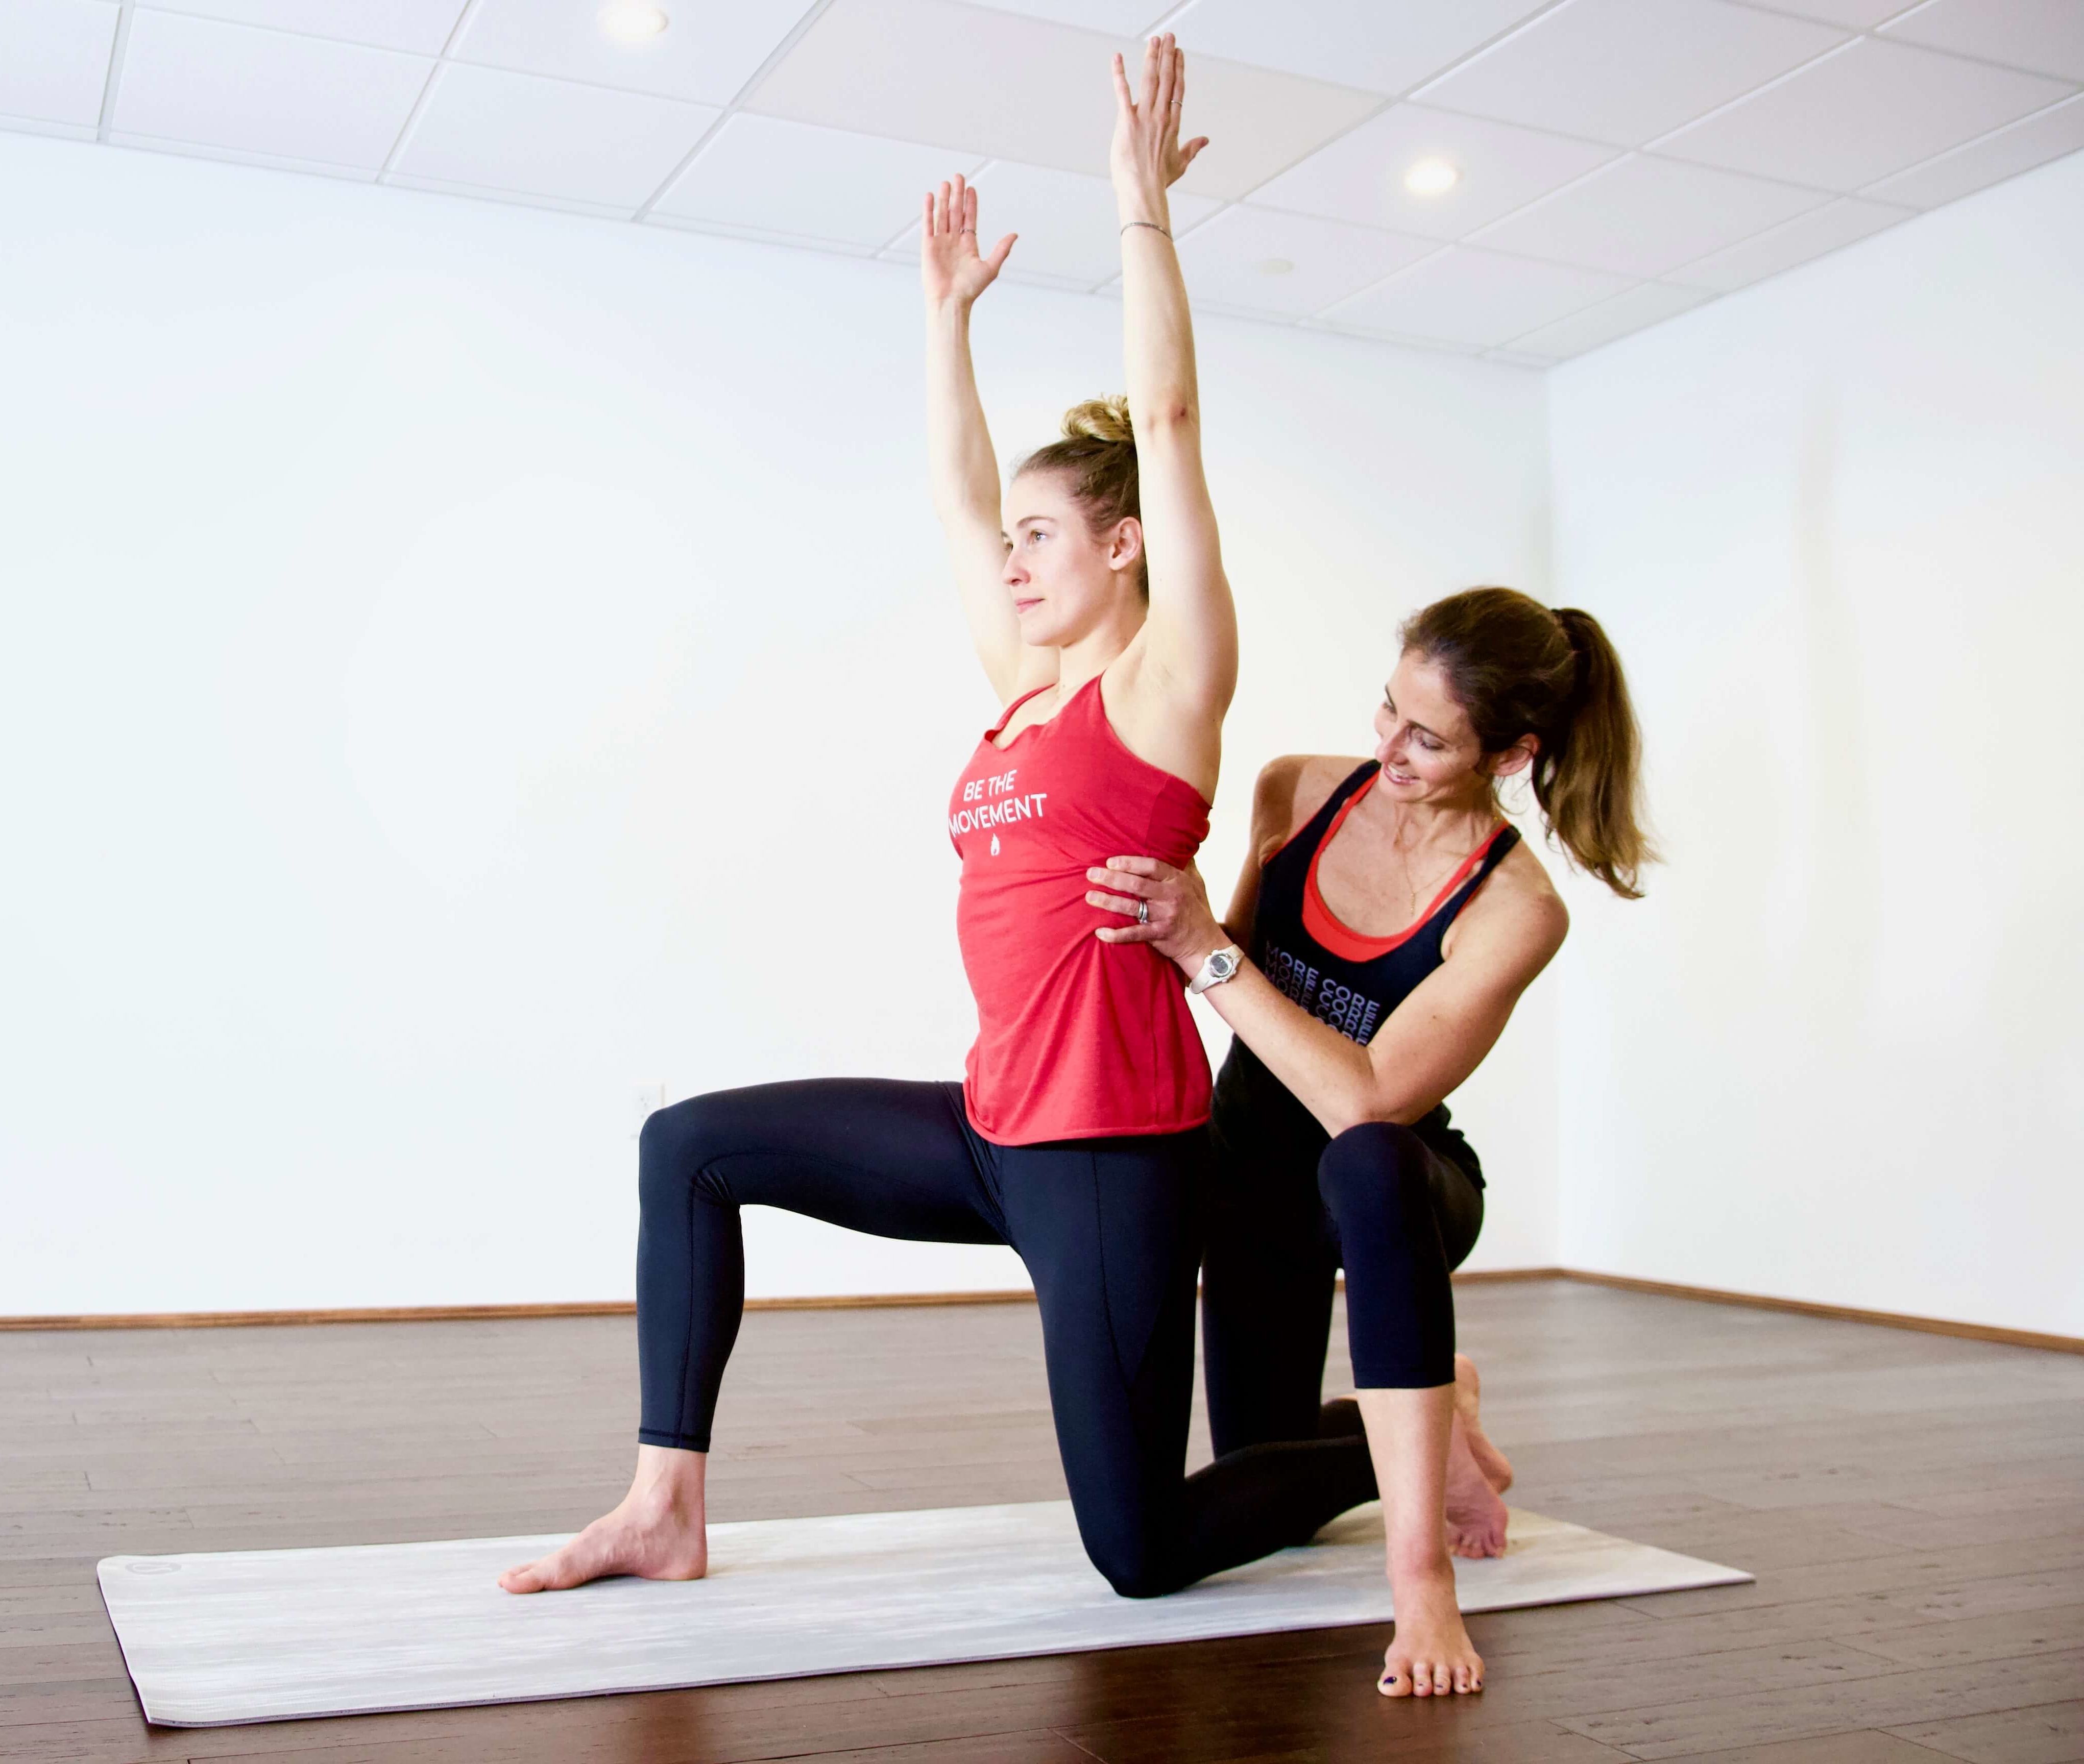
    The first thing you’ll do is stand and get really lengthened up through the spine. So imagine you just came from a seated position and just unfold your hips so that you’re lengthening and getting that extension in your hips. Slide your hands down your thighs, bend your knees, slide your hands down the front of your legs on your shins and all the way down, possibly to your ankles. Bend your knees as you do this with the goal of getting your belly on your thighs.


    And then when you get to that position, let your head release so almost like you’re going to look so you are folding forward and just stay like that. You’re not going to add any over pressure or you’re not going to add anything else. You’re just going to keep a small amount of engagement, at least in the abdominals, and your weight bearing down through the feet.

    Now if you want to straighten your knees more, that’s fine. With one caveat, your belly has to stay connected to the upper thighs. Once you start to pick the belly up away from it, that means you’re rounding in your back. So it’s way better to keep the knees bent. You can stay in this position for as long as you like, you can stay there for 15 seconds, you can stay there for two or three minutes. At some point your, the blood is going to want to return back out of your head. So you’re going to need to rise back up, and do that carefully. But you need to keep some engagement in the abdominals to help that lengthening.


    Alternative pose 2
    The next stage of this is to do the exact same thing, but facing a wall. You don’t want to like bonk your head against the wall so you’ll walk a few feet away from the wall, slide your hands down your legs and then start to walk toward the wall until some part of your back ribs connects to the wall. Now this is a big step up because now you’ve got weight bearing in your feet, and you’re getting some additional pressure from the wall into the ribs and it makes you feel like you’ve just been sandwiched. 


    It’ll feel like you’re really close to the wall because you’re leaning into the wall and your head is really close to your shins. Your knees can be bent a lot and your heels need to be on the floor. Stay there and breathe. Really exhale out because it’s a very compressed state. When you’re ready to exit, walk away from the wall first and then slowly come up. 


    Alternative pose 3

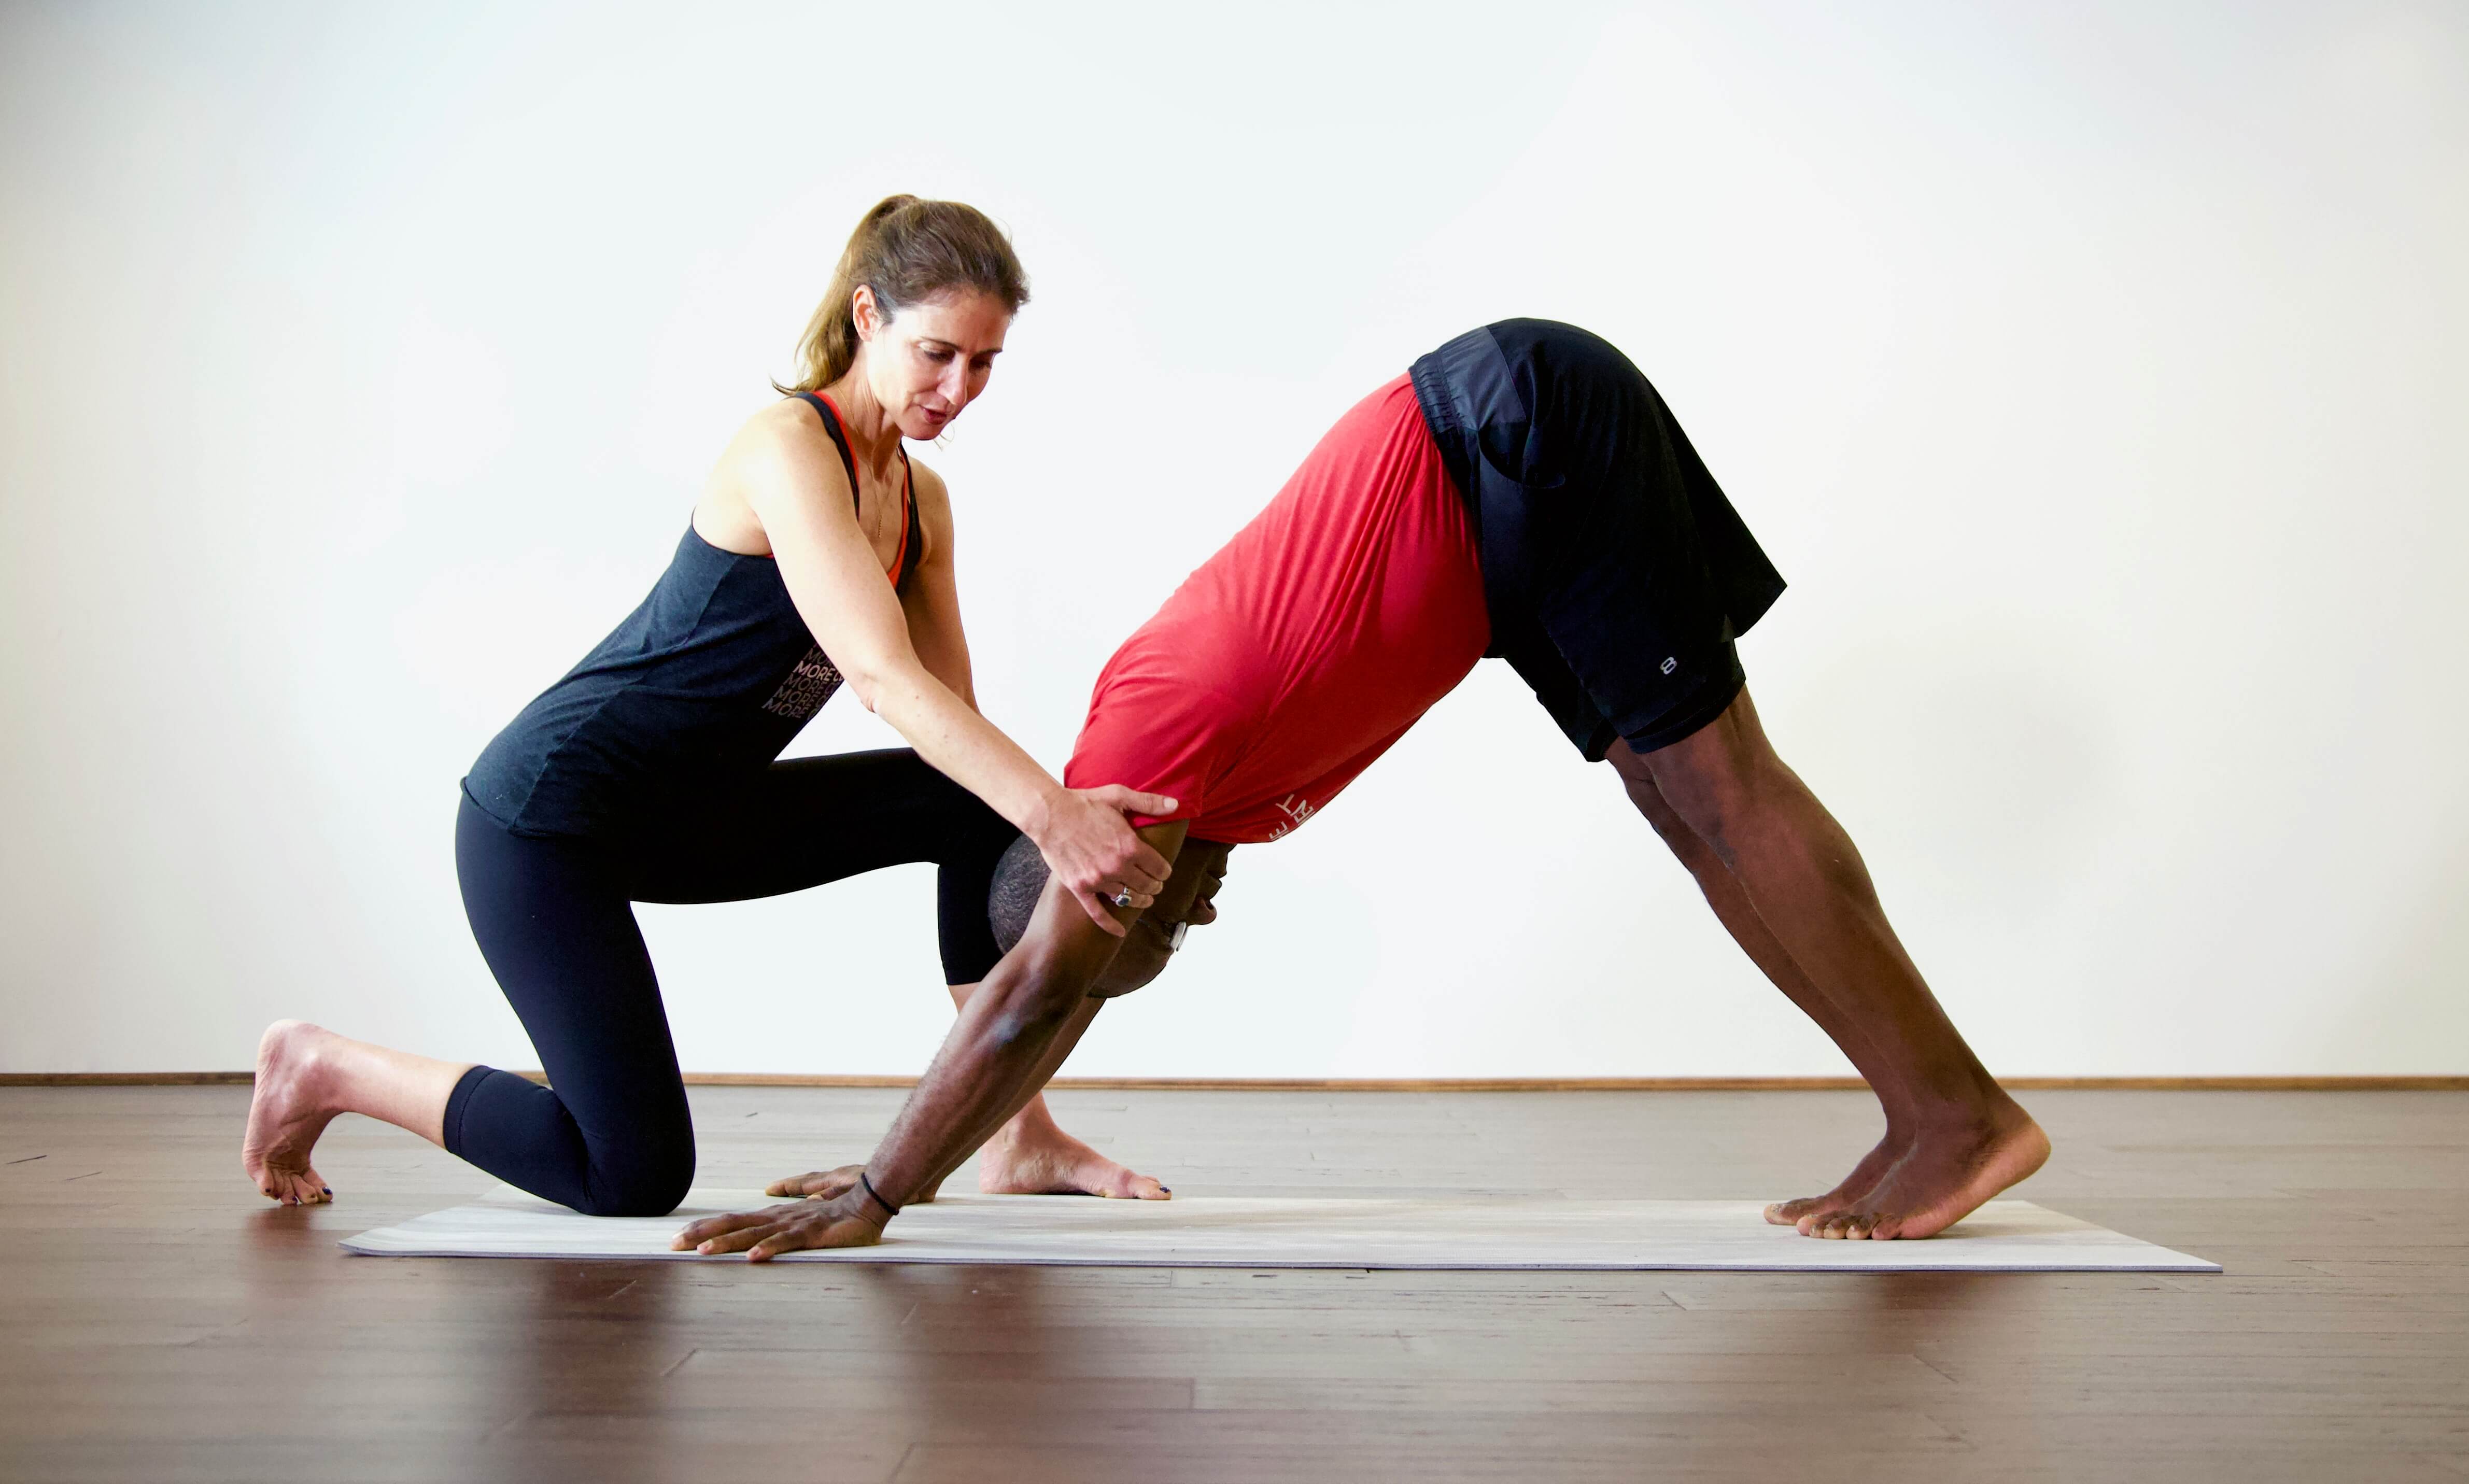
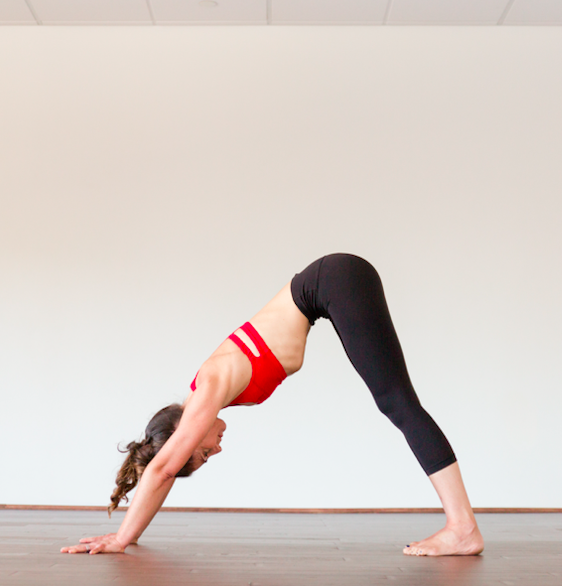
    Another great option for not stretching in seated forward fold is just a simple down dog on the wall. So come into a down dog, where your hands and feet are on the floor and your pelvis is up. And if you’re not familiar with yoga, you can start with your knees on the ground, your hands on the ground, and then just tuck your toes and lift your knees off the ground and pike up in the pelvis. Don’t let the ribs go toward the thighs, but instead pull the front ribs up into the back body.


    Then what you can do is walk your feet up a wall, so you would take your down dog, with your heels touching the wall, walk your hands back as close as you feel like you can you know that you feel like you’re going to be able to maintain, and then step one foot up at a time. So you’re at a 90 degree angle, essentially. Your hands are on the ground, your feet are on the wall. And you’re using gravity to help you. But also you’re countering gravity with your abdominal wall and lifting up. This is more advanced, strength wise and stretch wise. So if it feels like too much, then stay in a down dog and work it there. But that’s essentially a forward fold of sorts, and you happen to be inverting.
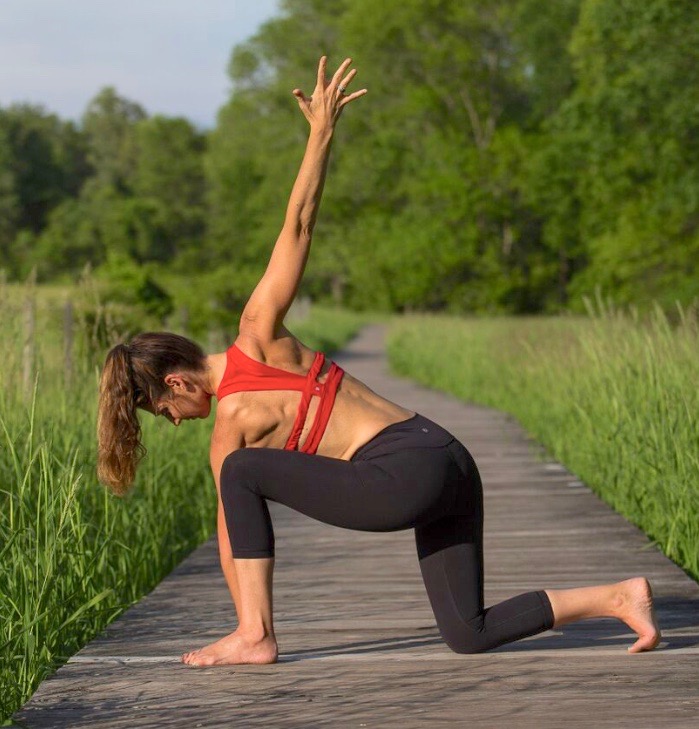
     

    Alternative pose 4
    The other option is to face the wall and bring one leg straight up and step your foot on the wall. So you’re forming, again, that kind of 90 degree angle between your top and bottom leg. Attempt to just stand there and get as tall as you can in your spine without letting your left knee bend and without letting your pelvis tuck under. 


    This is also a way of also retraining how you sit, because if you’re used to sitting and kind of rocking back into the pelvis and the lower back, this will help you form that pathway in your brain of how to keep your pelvis neutral. And the leg from the foot that’s on the wall is getting a wonderful hamstring and calf and foot stretch. 


    And you can keep it like that. You don’t even have to bend over like you would in a forward fold. If you can keep your spine long, you can start to reach your hand toward the wall. But notice if you round in the spine or the pelvis dips or something. What’s most important is that uprightness of the spine and then, if you have the flexibility, you can add the hands toward the wall. 


    Resources: