Category: PT Corner with Friends

  • The Psoas: Unraveling the Emotional Tapestry of Your Core

    The Psoas: Unraveling the Emotional Tapestry of Your Core

    In the intricate dance between mind and body, certain muscles play a crucial role not only in physical well-being but also in the realm of emotions. One such hidden gem nestled deep within our core is the psoas muscle. Often overlooked, the psoas is more than just a physical connector—it’s an emotional muscle that weaves the tapestry of our feelings and experiences.


    The Anatomy of the Psoas:


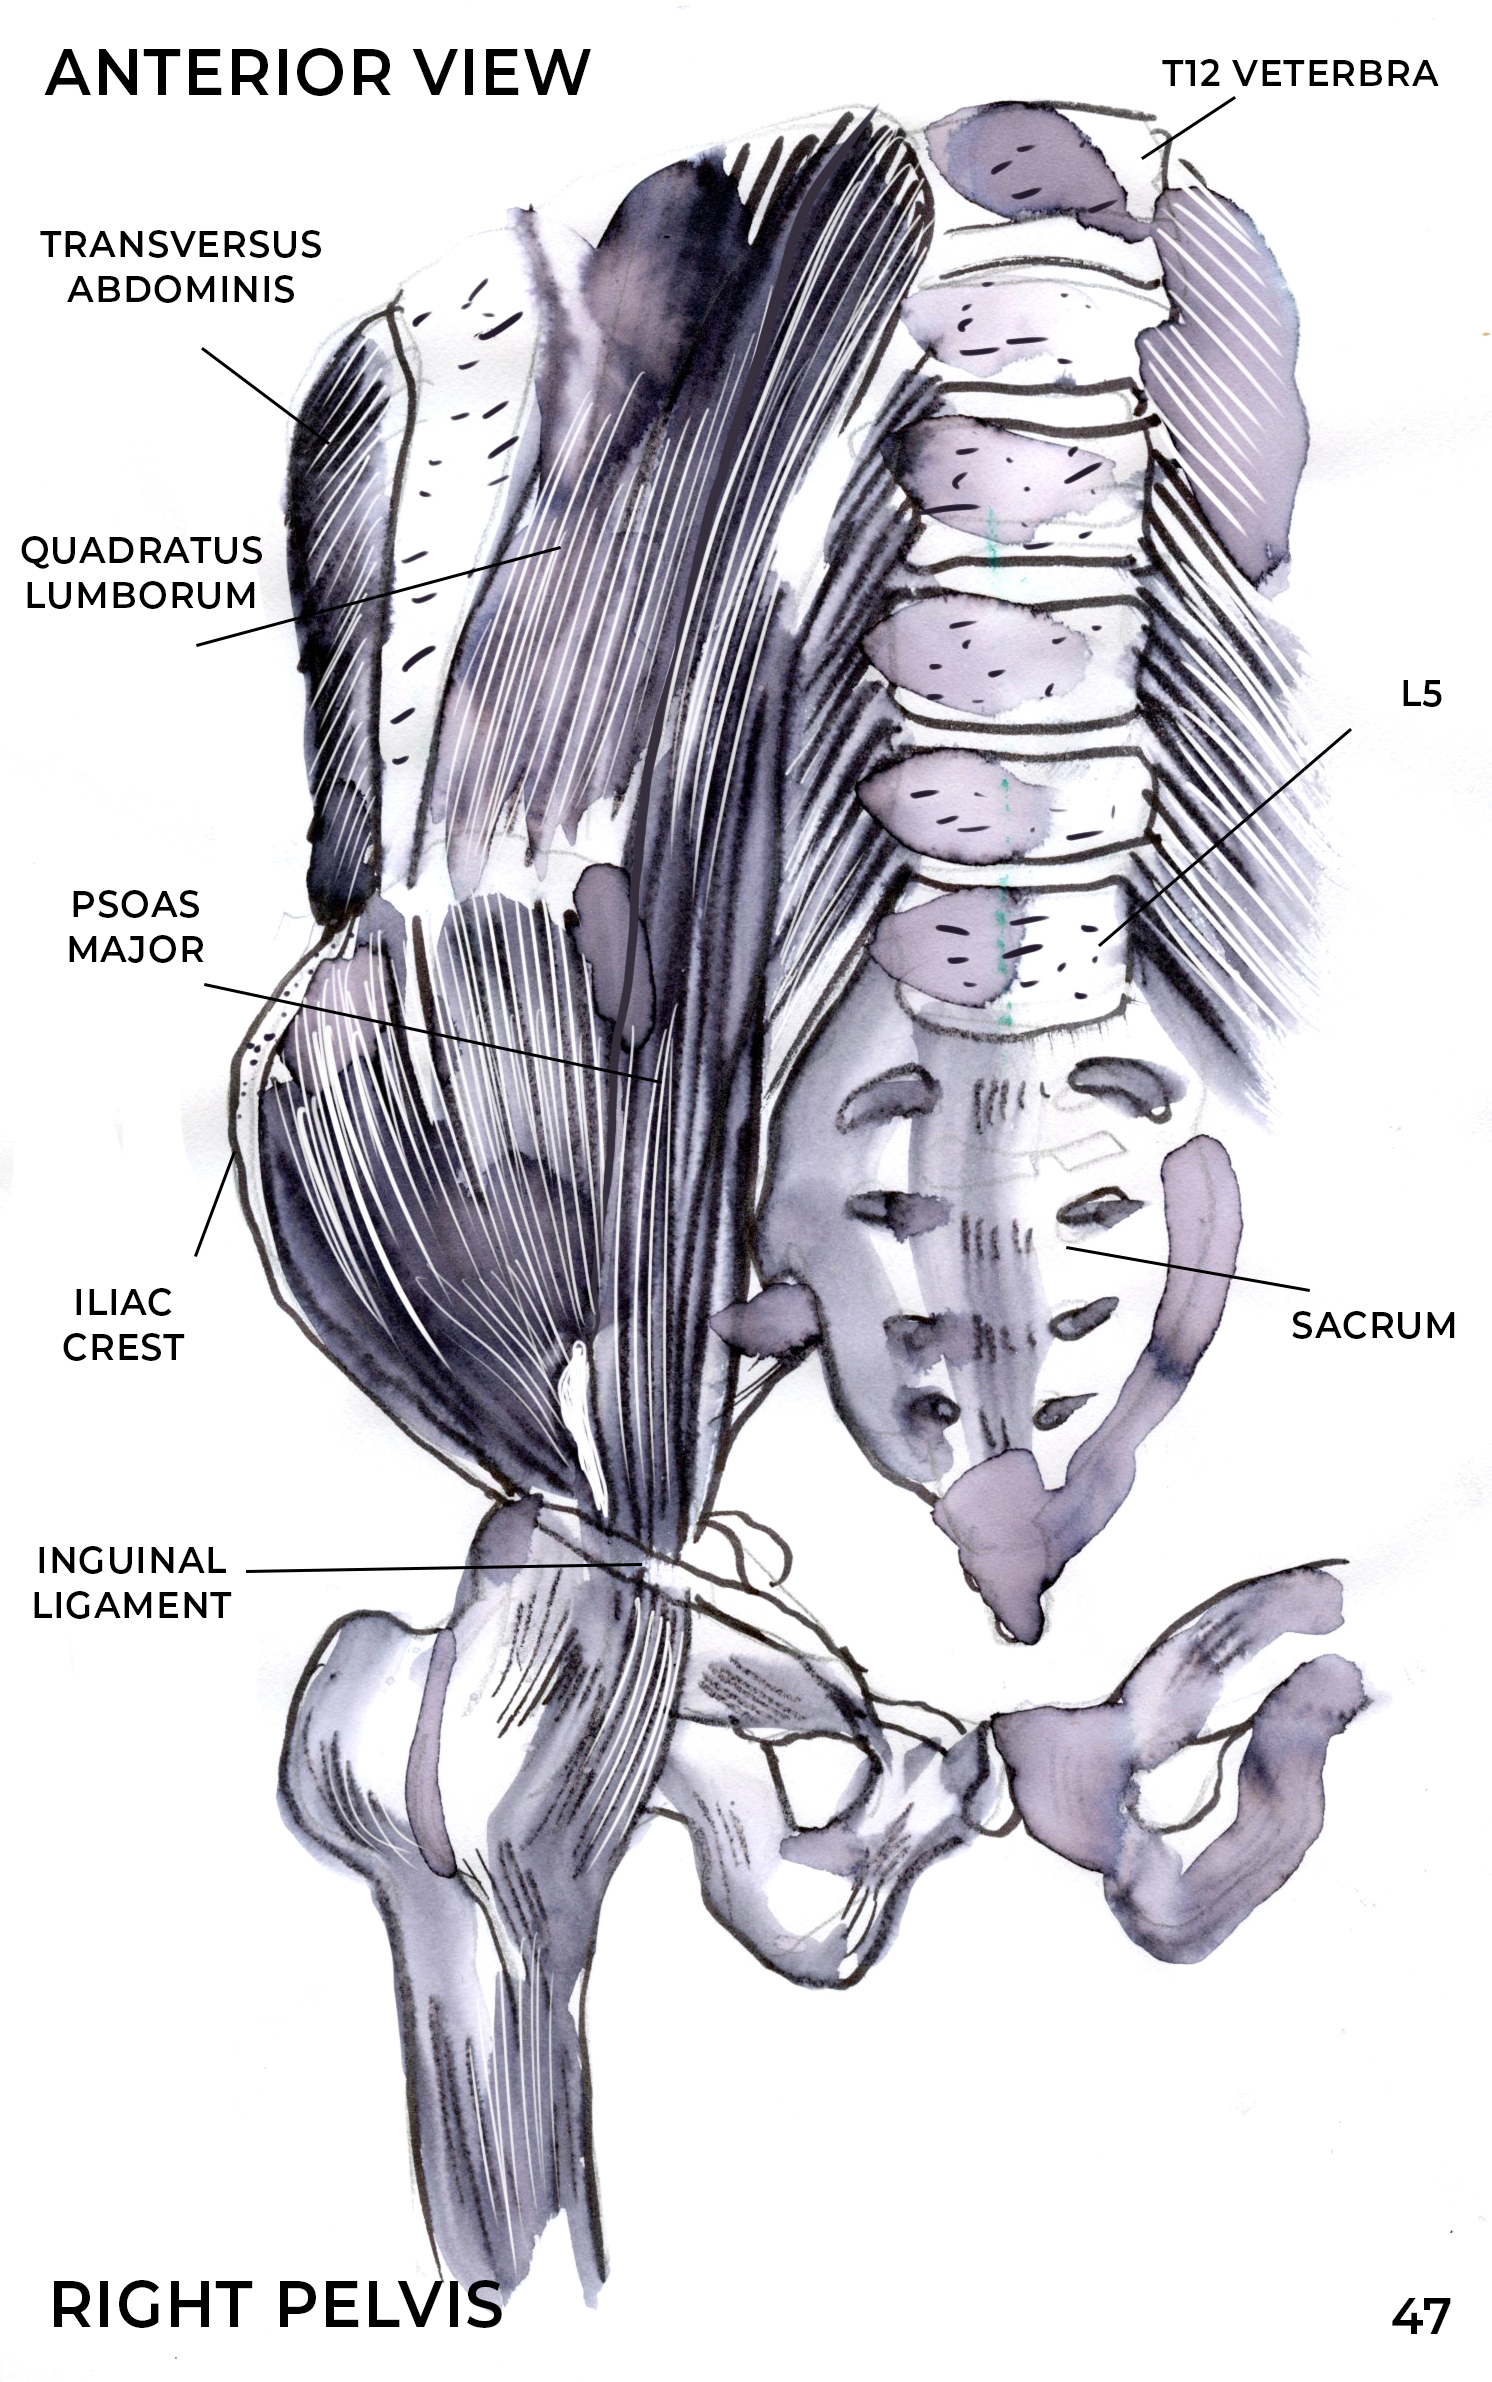
    The psoas major, or simply the psoas, is a long muscle located on either side of the spine, connecting the lumbar vertebrae to the femur. Its primary function is to flex the hip joint, as well as stabilizing the lumbar spine, but its influence extends far beyond mere movement. This muscle is intricately linked to our emotional well-being.


    The Psoas as a Storehouse of Emotions:


    The Seat of the Soul: Often referred to as the “muscle of the soul” or the “emotional muscle,” the psoas is believed to store emotional trauma and stress. As we navigate life’s ups and downs, the psoas contracts and tightens, holding onto the emotional residue of our experiences.


    Fight or Flight Response: The psoas is closely tied to the body’s fight or flight response. When we encounter stress, whether physical or emotional, the psoas tightens as a protective mechanism. Unfortunately, in our modern lives, chronic stress can cause the psoas to remain in a constant state of tension. Tension in the jaw, chest, clenching of the fists, sharp gasps of inhale, they are all related to this state of hyperactive nervous system stress. Pain or trauma whether physical or emotional can cause our bodies to remain in the state of stress, far after the actual threat has passed. The constant prolonged restriction in this area can lead to hip, knee or low back pain later down the road. 


    Connection to the Nervous System: The psoas is intricately linked to the autonomic nervous system, which regulates involuntary bodily functions. As a result, the state of our psoas can influence our overall nervous system balance, impacting our emotional state and responses to stress.


    Releasing Emotional Tension:


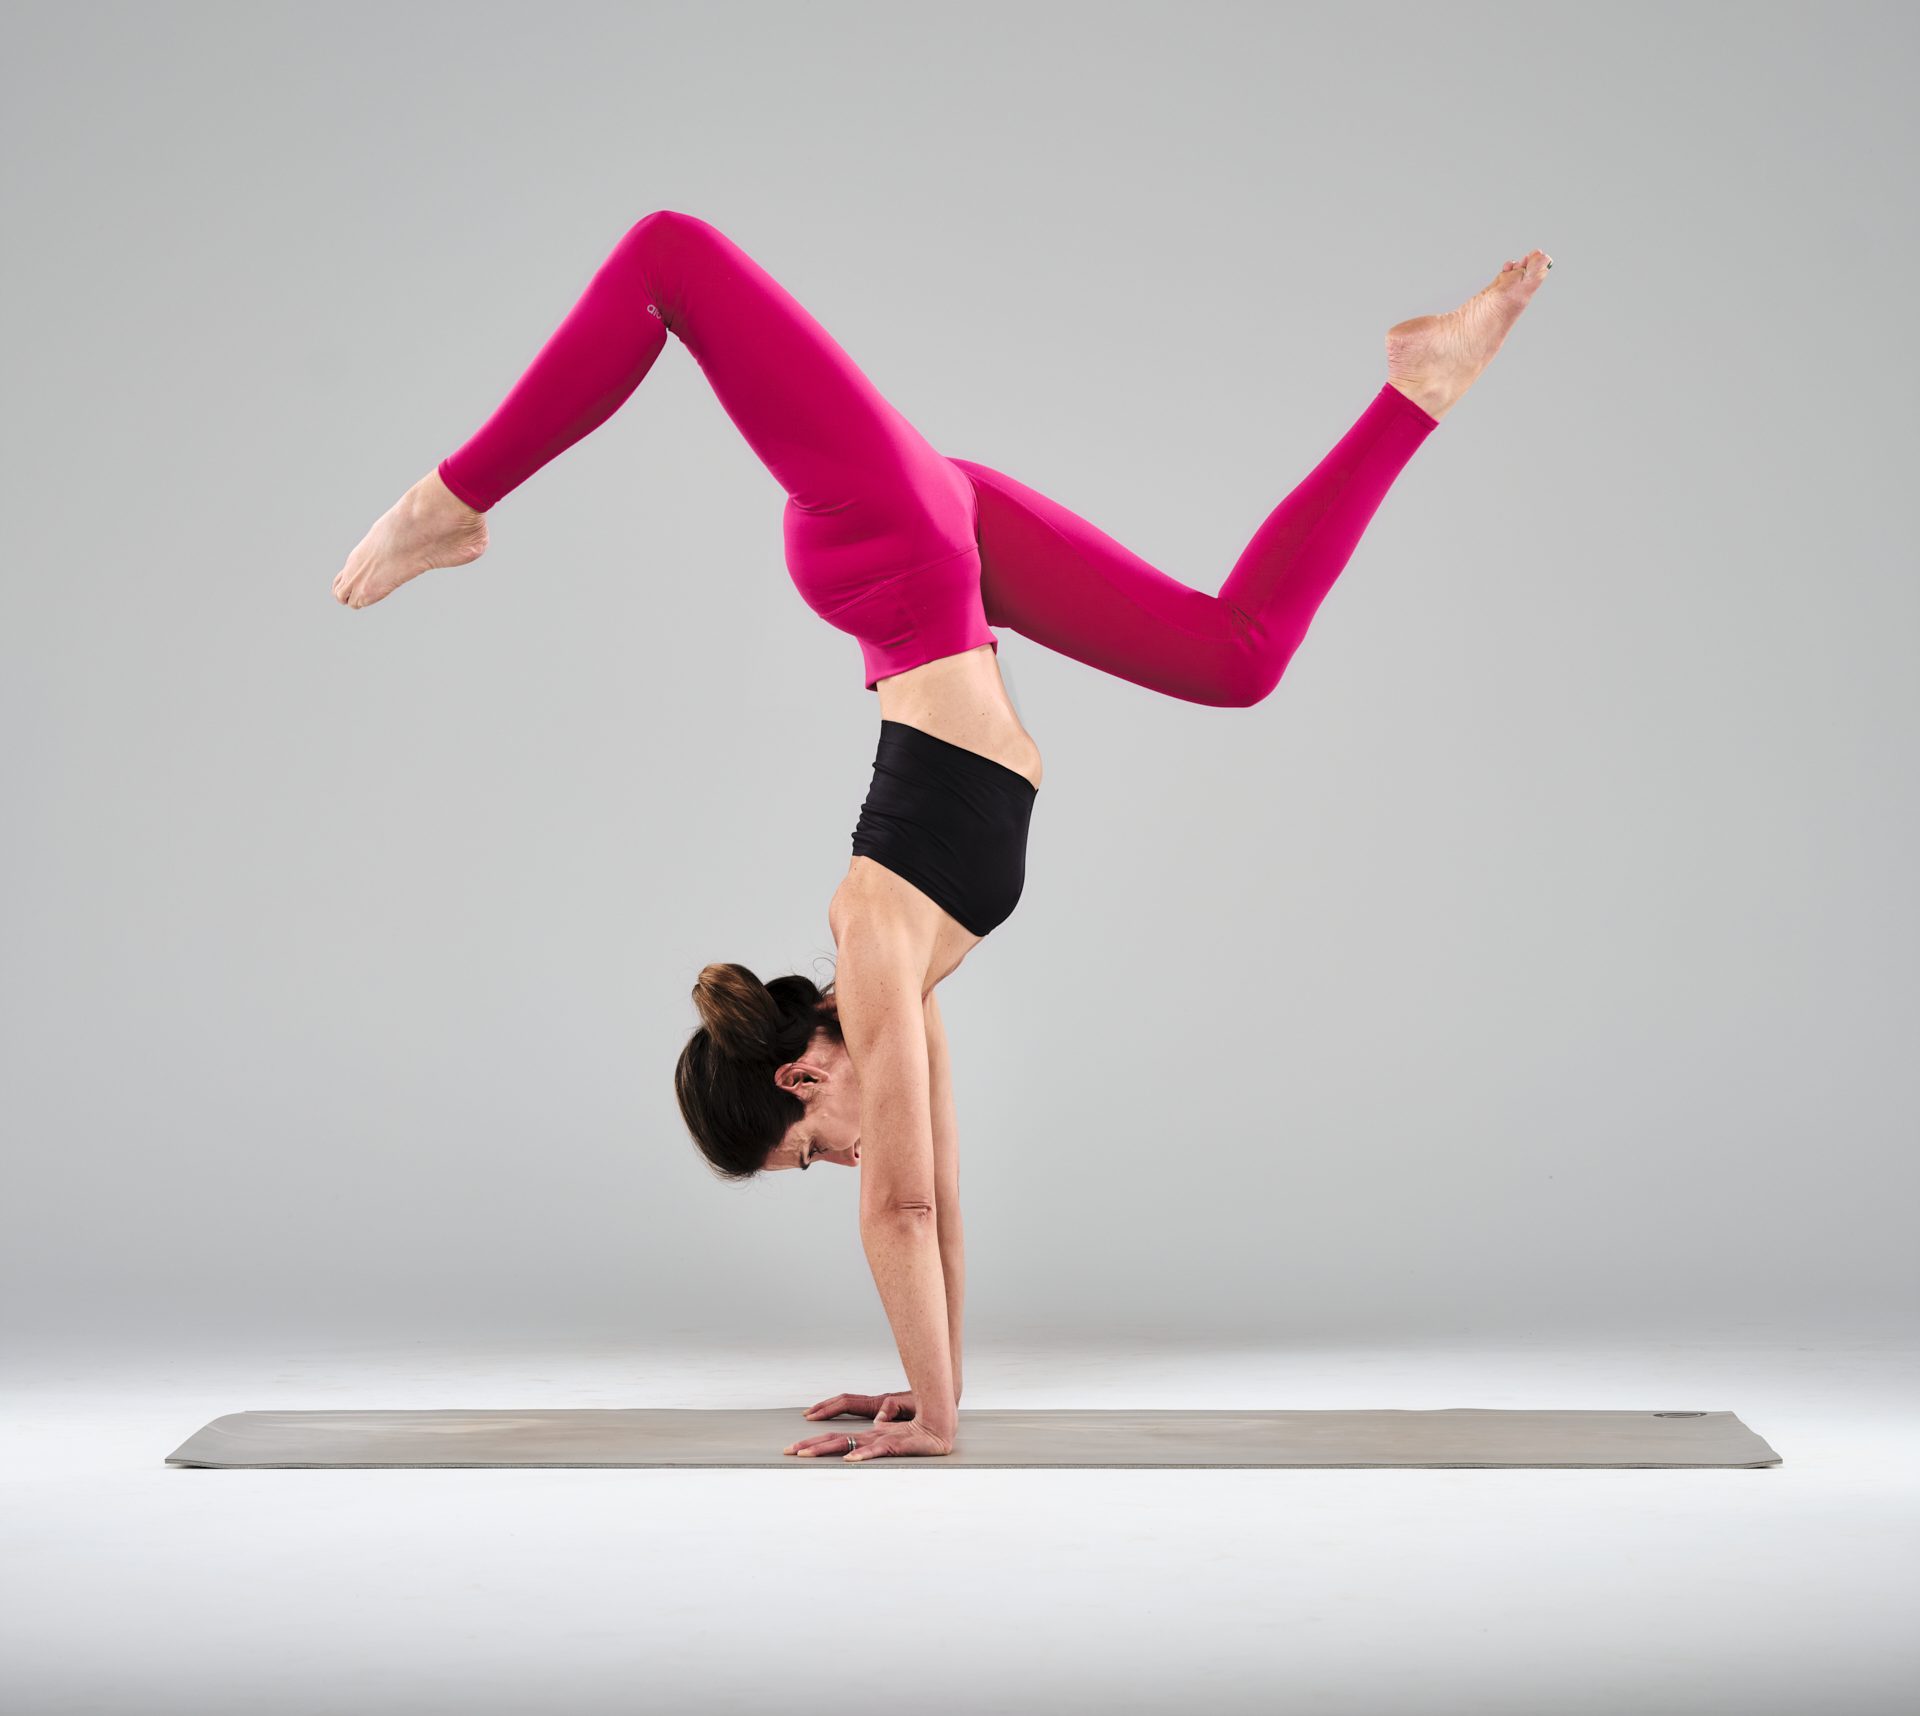
    Mindful Movement Practices: Incorporating mindful movement practices such as yoga or Pilates can help release tension stored in the psoas. Gentle stretches and poses that focus on the hip flexors can promote relaxation and emotional release. While the ability to relax is important, many muscles that are tight and tense, are also weak. Both strengthening and lengthening the psoas tissues to ensure optimal suppleness of the tissue is the true secret to release.


    Breathwork: The breath is a powerful tool for unlocking the psoas and releasing emotional tension. Mindful breathing exercises can help bring awareness to the core, allowing for a deeper connection to and release of stored emotions.


    Body-Mind Connection: Recognizing the emotional aspects of the psoas creates an opportunity for a holistic approach to well-being. Practices such as meditation and body awareness exercises can foster a deeper connection between the mind and the psoas, promoting emotional release and balance.


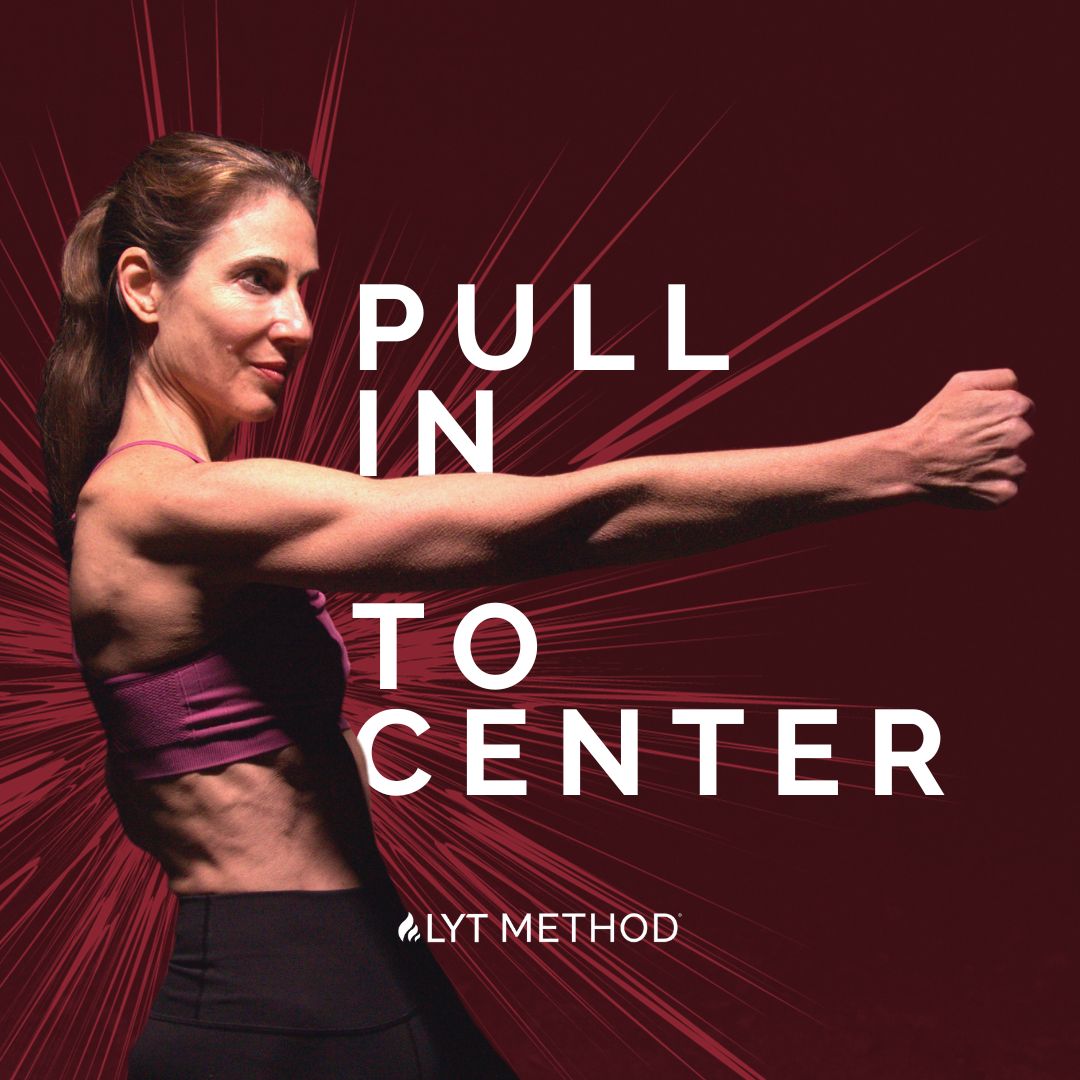
    The great news is that we incorporate all of these elements into our LYT practice. I like to describe it as a moving meditation, where we pay special attention to each and every movement throughout the practice. We focus on what is holding, what is mobilizing, creating that mind-body connection. We use the breath to create space and promote proper core engagement and contraction. We work the psoas both to strengthen and to stretch and lengthen. Some classes even include one of my favorite ways to provide deep release—lying on your belly with a block underneath you, just above your two front hip points. This simulates a manual deep release, such as myofascial release, which I also practice and receive myself and find extremely beneficial for providing release to this area of the body.


    As we navigate the complex interplay of emotions and physicality, understanding the role of the psoas as an emotional muscle can be transformative. By cultivating awareness of this hidden gem within our core, we open the door to a deeper understanding of ourselves and the potential for emotional healing. So, let’s embark on a journey of self-discovery, unraveling the emotional tapestry woven within the intricate fibers of the psoas.

  • Your End-of-Year Health Audit From a Physical Therapist, Yoga Teacher and Wellness Coach

    Your End-of-Year Health Audit From a Physical Therapist, Yoga Teacher and Wellness Coach

    by thalia wynne, pt, dpt, at, ryt

    Happy end of the year, LYT Fam! 

    This is such a magical time of year WHEN we celebrate, come together, reflect on the year we’ve had, and create powerful visions for the new year ahead of us. 


    As you read this, I’d like to invite you to take a moment to reflect on your health this year. We only get this one physical life expressed in this particular physical form. So let’s make the most of it! 


    How did you spend it this year? How did your body evolve? What was hard and painful? How did you grow and change? What were the joyous moments in your body? With your health? And how do you want to manifest physical health and well-being in 2024? 


    Welcome to your 2023 health audit. 


    Get out a piece of paper, and follow along with the exercises below to get honest with where your physical health is now, where you want it to be, and what you want to do in 2024 to manifest your ideal health. 


    Part I: Categories


    We can break health down into three main categories: mental, physical, spiritual – in other words – mind, body, & soul. 


    Step 1: In each of these broad categories, list out the smaller categories that fit in each. Here is an example to go off of. You can use this list as is, add your own categories, or delete the ones that don’t resonate. 


    Keep the body systems categories in there. These are all the major organ systems that make up the human body. We want all these systems to be functioning seamlessly for our most optimal health. If you are unsure what a particular body system is, check out this link for a breakdown of each system. https://www.verywellhealth.com/organ-system-1298691#toc-endocrine-system

    Part II: Assessment 


    Next, assign one of the following three levels to each category. 


    • Green: mastered and/or totally aligned. Ideal health actualized. 
    • Yellow: I could improve this area of my health
    • Red: Active illness. I need help/support in this area. Not at all aligned. 


    Step 2: Take out some colored pens/pencils and circle each category as green, yellow, or red. Or just write G, Y, or R next to each category. 


    Be very honest with yourself here. Think about any lab testing you’ve had done, things your doctors have told you, symptoms you’ve experienced to help you make decisions. Trust your gut responses.

    Part III: Hierarchy of Needs 


    Next up, let me introduce you to Maslow’s hierarchy of needs. The idea here is that there are levels of needs we have as humans and that the lower needs most likely need to be met before the higher needs on the pyramid can be reached. 


    For example, if you feel unsafe at home, it is unlikely that you are going to fulfill your higher purpose in life, until safety is restored. This is all relative, not absolute. And it’s a psychological theory, so don’t take this as Law. But, I find that it demonstrates our basic human needs quite well, and so we will use it in your audit today. 

    Maslow's motivation model

    For more information on what each level means, check out this article for details: https://www.simplypsychology.org/maslow.html#Critical-Evaluation 


    Step 3: Answer the following questions: 


    In the context of this model, as it relates to your health in 2023

    1. What level(s) do you feel like you’ve spent most of your time, energy, and money on? 
    2. What level(s) do you want to feel fulfilled in? 
    3. What needs to change for these needs to be met? 


    Part IV: Reflection


    Step 4: Answer the following questions: 


    1. What didn’t go well in 2023 as it relates to my health? 
    2. What went well in my health in 2023? 
    3. In each yellow/red category, what exactly do I want to improve? List 1 thing per category. 
    4. Are you satisfied with your current trajectory in the hierarchy of needs? If not, what did you identify in part lll that could potentially be a focus of yours in 2024? 
    5. Now, let’s narrow this all down into one focus. Based on what you’ve learned from this exercise, what is the one thing you can do for your health in 2024 such that by doing it, everything else becomes easier or unnecessary? 


    Part V: Setting the Vision 


    Now that you have your heading for 2024, it’s time to dream about what this one focus could look like as it’s played out over the next year. Turn on some meditative music if you haven’t yet, and get ready to free write, or just sit and dream about what the future has in store for you. 


    Step 5: In your mind or writing it all out on paper, just dream about how life will look like in 2024 as you focus on your one health goal throughout the year. Get deep into this vision by being your #1 cheerleader. Assume everything goes better than you even hoped for. Add details to this vision – what do you see, smell, taste, hear? What environment are you in? Who is with you? Supporting you? Let your imagination run wild as you set the tone for your health in 2024. 


    Now, take action right this moment! What is the first step you can take towards actualizing this vision? 


    Keep this momentum going! 

    I hope you enjoyed this health audit and that it illuminated something powerful for you. 


    For me, in 2024 I will embody a way of living (eating, moving, sleeping, working, restoring/relaxing, and communing with the Divine, my Self, & others) that supports vibrant energy, peace in my mind, and love in my heart so that I may live a fulfilling, purposeful, and joyous life. 


    I will be filtering all of my decisions next year through this focus and building habits around it to support this beautiful dream of mine. My first action was scheduling a Neurodynamic Breathwork session this weekend. I’m also digging into the work of functional medicine MD, Dr. Hyman. Next book on my read list is this free resource on regulating blood sugar to give some love to my gut health after the holiday season. Check it out! https://10daydetox.com/wp-content/themes/tendd/downloads/resources/10-Day-Detox-PDF.pdf 


    If you’d like, I’d love to hear what your focus is for 2024 and your first action step. Send me a DM on instagram. I’d love to hear from you! 


    Thalia Wynne Dorsten, PT, DPT, AT, RYT

    IG: @thalialovee

    Wellnessbythalia.com


  • Mastering the Art of Habit Formation: A Blueprint for Lasting Change

    Mastering the Art of Habit Formation: A Blueprint for Lasting Change

    by Lara Heimann, PT


    In the journey of personal development, the power of habit formation cannot be overstated. Whether you’re aiming for improved health, increased productivity, or a more positive mindset, cultivating effective habits is the key to sustained success. If the word ‘habit’ feels uninteresting, daunting, or intimidating, let’s first delve into the science and strategies behind habit formation, offering you a practical blueprint for lasting change and fueling the spark for growth and change!


    Habits are the building blocks of our daily lives, often operating on autopilot. Charles Duhigg, in his book “The Power of Habit,” breaks down habits into three components: cue, routine, and reward. Recognizing these elements is crucial for understanding and reshaping our behaviors.

    The Habit Loop consists of three parts:


    1. Cue: Identify the trigger that initiates the habit. It could be a specific time of day, an emotional state, or a particular environment. A cue could be your LYT yoga mat lying out on the floor! The mat can send an immediate cue that will spark some response in your nervous system.
    2. Routine: This is the behavior or action prompted by the cue. It’s the habitual part of the habit loop. For example, the LYT mat is the place where you practice your movement routine. Even if it’s not yet as consistent as you want, the cue will help foster a more regular routine and ignite a stronger feedback loop that fuels your habit.  And your practice as part of your routine will further strengthen the loop.
    3. Reward: The positive outcome or satisfaction derived from completing the routine. Rewards reinforce the habit loop. When you practice on your mat with more regularity, just looking at the mat will prompt a positive feeling; the reward center of the brain is activated before you even begin moving because the habit loop is forged, leading to a craving for that wonderful feeling you get when you practice.


    Investing in creating more optimal habits will reap the most benefits when we implement these steps.


    First, start small! One reason many well-intentioned New Year’s resolutions don’t succeed is you might take a huge leap and attempt to do too much, too soon. When your intentions don’t manifest into habitual shifts, the feedback loop is short-circuited. For a greater possibility of success in habit formation, begin with manageable changes. Small habits are more sustainable and pave the way for larger transformations over time. For example, if you want to start being more active and consistent with your fitness/movement routine, begin with 5-10 minutes daily. If you are already doing that but want to ramp up the demand, start with 5-10 minutes of greater intensity and perform 3-4 days a week for the first month. Once you feel the benefit of that added movement or activity, you will naturally crave more time spent with that change.


    Second, be specific and clearly define your habit. Instead of a vague goal like “exercise more,” specify “take a 15-minute walk every morning” or “sign up for a 6-week program called ‘Build Your Capacity’ “(we happen to have created this habit-building program just for you!).


    Third, remember and write it down indelibly in your brain cells and even in a journal: ‘Consistency is Key’! Repetition is fundamental to habit formation so consistently practice the routine to reinforce the habit loop.


    Fourth, raise your accountability by sharing your goals with a friend or family member, or use tools like habit-tracking apps to stay accountable and motivated. Get your friend or loved one to join you in a fitness program to increase your motivation and consistency.


    Finally, celebrate progress! Acknowledge and celebrate small victories. Positive reinforcement strengthens the neural pathways associated with the habit.


    When working on habit formation, don’t be discouraged by occasional setbacks. Use them as opportunities to learn and refine your approach. In the pursuit of lasting change, mastering the art of habit formation is a transformative skill. By understanding the science behind habits and employing strategic approaches, you can cultivate positive behaviors that lead to a more fulfilling and successful life. Remember, it’s not about radical changes overnight but about consistent, intentional efforts that shape your habits and, in turn, shape your future.

    For more information about the LYT habit-building 6-week “Build Your Capacity” program that includes meditation, mobility, strength, high-intensity interval training (HIIT), LYT flows, and lifestyle tips, check out this link. We are pulling for you always!

  • Yoga and Neurological Rehabilitation: A Path to Functional Recovery

    Yoga and Neurological Rehabilitation: A Path to Functional Recovery

    by Sarah Apple Kingsley, pt, dpt


    The neurological system is a marvelously intricate network, and ongoing research continues to shed light on the profound connection between the brain and body. While we’ve long recognized the benefits of specific exercises for rehabilitation and the restoration of coordination lost due to injury or disease, the therapeutic value of yoga for this population has only recently come to the forefront.


    Currently, I work part-time at a neurology office, where we focus extensively on conditions such as Parkinson’s Disease, Dementia, post-Stroke, and Cerebral Palsy. The integration of yoga poses and techniques has proven to be exceptionally beneficial, fostering improved flexibility, motor coordination, and body awareness among our neurological patients.


    In the realm of Parkinson’s rehabilitation, one well-researched exercise program, LSVT BIG movements, has demonstrated its effectiveness in enhancing functional mobility and reducing fall risk. Interestingly, many of the movements within this program bear striking similarities to existing yoga poses, such as Warrior 2, High Crescent Lunge, and Runner’s Stretch—stances that we regularly incorporate into our LYT practices. Another set of movements, the PWR! moves, align closely with the BIG method, featuring quadruped (hands and knees) poses like Thread the Needle and stepping the foot outside of the hand. These exercises aim to stimulate trunk rotation, hip and ankle mobility, reciprocal movement patterns, and weight shifting—all elements integral to yoga practice.


    One crucial aspect, particularly for individuals with Parkinson’s or other neurological deficits, is the prevalence of tight fascia resulting from trauma or disease. Unlike many physical therapy exercises that target specific muscles or joints, yoga movements address entire fascial lines, providing a comprehensive approach to stretching and mobilization. The result? A more significant impact on overall flexibility and mobility—a true “greater bang for your buck.”


    Mobilizing the fascia plays a pivotal role in reducing rigidity, enabling access to muscles, and facilitating ease of movement previously inaccessible to patients. However, not all yoga practices are equally effective. The specificity and sequence of movements in our LYT yoga classes are tailored to resonate with neurological populations. Drawing inspiration from the developmental movement patterns of infancy—starting on the back, progressing to all fours, and eventually standing—we guide our students through a process of relearning movement and coordination.


    For individuals grappling with neurological injuries or diseases, this process is akin to rewiring the brain and motor patterns. By returning to the fundamental movements learned in infancy—often overlooked in modern life and many exercise classes—we can retrain the brain and body to coordinate effectively. Weight-bearing exercises, especially on all fours, stimulate proprioceptors in the shoulders, hips, and knees, fostering proper engagement and support for broader ranges of motion.


    As we progress to limb movement and opposite arm-and-leg motions, we not only encourage coordination between the right and left brain hemispheres but also simulate a natural walking cycle. The foundational principles and movements of the LYT Method have yielded remarkable results in patients, including higher levels of function, improved quality of life, reduced caregiver burden, significantly decreased fall risk, and enhanced fall recovery strategies. Equally noteworthy is the positive impact on mood, with decreased depression and anxiety—a common challenge in populations that have undergone significant physical and emotional stress.


    In conclusion, witnessing the transformative outcomes achieved through the principles and movements of the LYT Method has been truly inspiring. As we navigate the realm of neurological rehabilitation, our focus remains on fostering not only physical recovery but also an improved overall well-being for our patients, clients, family and friends!

  • Striking Harmony: The Crucial Art of Balancing Personal, Physical, Mental, and Professional Well-Being

    Striking Harmony: The Crucial Art of Balancing Personal, Physical, Mental, and Professional Well-Being

    by Lara Heimann, PT


    In the hustle and bustle of our daily lives, finding balance has become a coveted art. The delicate equilibrium between personal life, physical health, mental well-being, and professional pursuits is not just a lofty ideal but a fundamental necessity for a fulfilling and sustainable life. Let’s explore the importance of weaving this intricate tapestry of balance and I will share some tips that help me maintain harmony in my life.
    Personal Life: Nurturing Connections and Passions
    In the quest for success, it’s easy to sideline personal life. However, neglecting relationships and personal passions can lead to a sense of emptiness. Taking time for family, friends, and hobbies provides a source of joy, support, and rejuvenation. Whether it’s a quiet dinner with loved ones or indulging in a favorite hobby, these moments contribute significantly to overall well-being. Double the impact by sharing your passions with others. For example, we have our LYT community from around the world practice together online and meet up during travel!
    Physical Body: The Home That Requires Care
    Our bodies are resilient, but they demand care and attention. Regular exercise, a balanced diet, and adequate sleep are not just luxuries but essential components of a healthy lifestyle. Physical well-being is not only about looking good but feeling good, fostering energy, and preventing long-term health issues. Strive for activities that bring you joy, making physical fitness an integral part of your routine. Bring more core into your life to organize your body’s home and keep your energy flowing!
    Mental State: Cultivating Mindfulness and Resilience
    In the fast-paced world, mental health can take a back seat, yet it is the cornerstone of overall well-being. Stress, anxiety, and burnout can chip away at our mental fortitude. Incorporating mindfulness practices, such as movement or still meditation, and including practices that improve our breath capacity and nervous system can foster deep resilience. Check out our “Soothe” series for specific tools to nurture your nervous system. Always remember that seeking professional support when needed is a courageous step toward maintaining a healthy mental state.
    Professional Life: Achieving Fulfillment, Not Just Success
    The pursuit of professional success is commendable, but it should not come at the cost of well-being. Striking a balance between ambition and personal fulfillment is key. Establishing boundaries, managing workloads effectively, and fostering a positive work environment contribute to sustained professional growth without sacrificing personal happiness. The more connected you are to your core values, the clearer you will feel when establishing parameters that promote balance.
    If we envision life as a tapestry, where the personal, physical, mental, and professional elements are woven intricately together, we can see how each plays a role in the balanced product. When one thread is neglected, the entire fabric is affected. Recognizing the interconnectedness of these aspects allows for a more holistic and sustainable approach to well-being.
    Here are some tips to keep your tapestry balanced and bright!
    1. Prioritize Self-Care: Schedule time for self-care activities that nourish your mind, body, and soul.
      Look at your movement practice as an important meeting that can’t be easily canceled; I have known many LYT Studio members block out their calendars to attend the live Zoom classes. The action for accountability goes a long way to prioritize balance!
    2. Set Boundaries: Clearly define boundaries between work and personal life to avoid burnout. Create a schedule that better delineates your personal and professional time.
    3. Stay Present: Embrace mindfulness to fully engage in each moment, whether personal or professional. We practice focused attention in our LYT classes to train the brain to remain focused; remember the body is always in the present moment and moving your body is the most effective way to clear the clutter in the mind.
    4. Regular Reflection: Take time to reflect on your life, goals, and well-being regularly. Setting goals, scheduling time for yourself, and checking in with your commitments will keep you balanced and motivated.
    5. Seek Support: Don’t hesitate to seek support from loved ones or professionals when navigating challenges.
    Finding balance is not a one-size-fits-all endeavor; it’s a personal journey that evolves over time. By recognizing the importance of personal, physical, mental, and professional equilibrium, we embark on a path toward a more fulfilling and harmonious life. Strive for a balance that resonates with your values, nourishes your spirit, and allows you to thrive in every facet of your existence to feel fully LYT up!
  • Pull into Center BUT Open Your Rib Cage First

    Pull into Center BUT Open Your Rib Cage First

    by Ashley Newton, PT, DPT


    The lower ribs are attachment points for our abdominal musculature. We can actually self assess the health of our core by palpating the lower rib cage.


    The ribs articulate in the center of our body at the sternum. The sternum terminates in the cup hood bone. The space below the xyphoid is known as the infrasternal angle. This angle is important when assessing our ability to stabilize the trunk. Ideally, this angle should be 90 degrees. This tells us that our body is not compensating to try to stabilize itself at the level of the trunk. However, more often than not, the angle is greater or less than 90 degrees and believe it or not, this can tell you a lot about your body.


    If the infrasternal angle falls below 90 degrees, it is likely that you use your external oblique musculature a little too much. The external oblique stabilizes our trunk, but can oftentimes become the sole player in this action when in fact it requires the coordination of the two diaphragms and the rest of the abdominal musculature. 


    So why is this an issue? Well, if the external oblique is working overtime without the other abdominal muscles, this can lead to excessive pressure down into the pelvic floor and make one more at risk of pelvic organ prolapse, aesthetically it can create the lower abdominal “pooch”, and negatively affects our posture. 


    So what do I do?! First off, let go of your grip. Let go of your lower belly. More often than not, folks who have this tightness are walking around sucking in their belly. When we walk around, we want to think about our ribs drawing into our back body WHILE we grow tall through the back of the skull. 


    Most folks when told they need to correct their posture, brace their abdomen but this can lead to tightness and restriction in the abdomen and rib cage that can work against them and create different postural issues. 


    Instead, we need to grow tall and work on scapular strength, respiratory strength, and diaphragm length to balance the rib cage over the pelvis. Does the abdomen need to work, absolutely. But I think that you will find that by getting more length in the diaphragm and strength in the scapular musculature, it will require less effort to correct your posture and generate tension in the deepest layer of the abdomen that stabilizes the spine.


    If you have this tightness in your abdomen, give one of the following exercises a try!

    • Diaphragm release: in lying, bring the fingertips under the ribs and follow the ribs down as you scoop the fingers under the rib angle. Use lotion if available. This area should not be tender and should be mobile enough to fit up to your 2nd knuckle underneath the ribs. 
    • ILU massage 
    • Thoracic rotations/open books
    • Uddiyana bandha in lying, seated and standing 
    • Jaw release 
  • Yoga for Back Pain: Core Strengthening Poses to Support the Spine in Physical Therapy

    Yoga for Back Pain: Core Strengthening Poses to Support the Spine in Physical Therapy

    by Sarah Apple Kingsley, pt, dpt


    While working as a physical therapist for many years, the number one complaint that people will come into clinic for is BACK PAIN! It seems like nearly everyone these days (or someone very close to them) can claim to have suffered from episodes of back soreness. Most recurrent episodes stem from the amount of time spent seated in a chair or in the same static positions, usually with poor posture.


    When we don’t move for periods of time or move in the same habitual patterns, our muscles and joints become very stiff. Oftentimes it manifests as a global stiffness throughout the body, for which many typical yoga poses and stretches can be very beneficial. Other times one set of muscle groups will become very short and tight while the opposing muscle group will conversely become elongated. In this case, over-stretching the elongated tissues can lead to further pain and injury. This is why core strengthening for back pain is so crucial for a complete recovery. Yes, stretching is wonderful and necessary, but it needs to be coupled with postural training for the body to support the spine in a neutral position, preventing muscles from getting overly stretched or shortened. In order to do this, we need to WORK THE CORE!


    Many of the physical therapy exercises we give to our patients in the clinic actually originate from yoga poses. Here are some top examples of core-strengthening yoga poses to support the spine:


    1. Bridge Pose – Particularly great for strengthening the gluteals (butt muscles), which have major connections to our deepest abdominal muscles.
      To perform: Begin lying on your back with your knees bent and feet flat on the floor. Root your tailbone towards your heels, engage the gluteals and the lower abdominals as you press into your feet and lift your bottom up into a low bridge position. Focus on staying low to ensure you are activating your gluteals to avoid overactive spinal extensor use.
    2. Table Top/Bird Dog – Just being in tabletop (on all fours or quadruped position) is a great way to get in touch with your core as it involves weight-bearing through all the limbs.
      To perform: Come into a hands and knees position with the hands directly under your shoulders and knees directly under your hips or slightly closer in to ensure a neutral pelvis. Pull your low belly up and in and energetically dial your hands out towards your pinkies to secure your shoulder in the socket. You can remain here for 5-10 breaths OR as a progression and very commonly prescribed PT exercise you can try bird dog. Begin first by lifting just one hand up in line with your ear, returning back to start and then reaching the other hand out in front. Then try reaching one leg back behind you, returning to start, and performing with the other side. If you can perform each of these movements separately without ANYTHING else changing in the spine, try lifting one arm out in front of you and the opposite leg back behind you. Return to the starting position and repeat with the opposite arm and leg. A good test is to put a block or dowel on your back to ensure good spinal alignment throughout and best core activation.
    3. Plank and Forearm Plank – This pose takes table top/quadruped up a level by lifting the knees, putting an added demand on the core.
      Begin on all fours with your hands directly under your shoulders. Step one foot straight back behind you, followed by the other. Attempt to maintain your body in a straight line, lifting in your low belly and reaching back through your heels, engaging the gluteals as well. Coming down onto your forearms with elbows bent is an alternative that also works the core muscles with an added demand on the forearm and more proximal shoulder stabilizing muscles.
    4. Side Plank and Modified Side Plank (with a twist) – This pose works your obliques and side abdominal muscles much more than a regular plank. Think of the plank described above, but tilted on your side. Only one arm is down on the floor directly under the shoulder, the legs are extended with the top foot stacked on top of the other. Pull your shoulder blade back on the ribcage and stay lifted, not sinking. Modified side plank is the same, however with your bottom knee down. This pose puts slightly less demand on the obliques, however it adds demand to your gluteus medius muscle to stabilize. Adding a twist is a way to amp up both poses by reaching your top arm down towards the floor, and then back up towards the ceiling. The rotation action helps to further engage the oblique muscles especially.
    5. Boat Pose – Most people think of this pose in yoga immediately when referring to “core work.” Boat pose definitely engages the hip flexors and the rectus abdominus. However, for those with back pain it can be a big strain on the core and failure can lead to more discomfort and pulling in the low back. I recommend a modified variation beginning in an upright sitting position with knees bent and feet down on the floor. Keep your low belly lifted and spine and torso long as you begin to lean your upper torso back towards floor but only as far as you can lean without rounding or lifting your feet from the floor. Then use your core to pull yourself back up to start.
    6. Chair Pose with a Twist – This pose involves full body core and gluteal engagement as you perfect your squatting position. Begin with feet shoulder-width apart, toes facing forwards. Hinge back from your hips keeping your spine long into a squat or chair position, knees do not track forwards beyond your toes. Raising your arms up overhead with thumbs pointing up adds further demand to your upper and lower trapezius and gluteals to stabilize. Adding a twist will also engage your obliques by reaching one hand down towards the floor and the other up towards the ceiling, think lifting up more than back. You can also perform a twist with your elbows bent and hands in a prayer position. Exhale as you perform the twist to engage the abdominals, inhale as you return to start.
    7. Twisted Crescent or Modified Twisted Crescent – Sticking with our “twisting theme” to activate those obliques, twisted crescent or modified with the knee down also engages the glutes and rotator cuff while giving a stretch to the posterior fascia of the hip that is in front, and an anterior stretch to the hip that is behind. The restrictions in these two areas often contribute to back pain complaints. Begin standing, hinge back from your hips and step your right foot back, lowering the knee directly underneath the hip. Hinge your upper torso forwards to plant your right hand down directly underneath your shoulder. Energetically dial your hand out to the side and pull back slightly to secure the scapula on the ribcage and activate the rotator cuff and serratus anterior. Lean into this shoulder as you reach your left arm up towards the ceiling. Relaxing your ear to shoulder will help release the neck which can often contribute to low back pain. For full twisted crescent you would then lift the back knee, reaching back through the heel to keep the gluteal engaged. Hold for 2-5 breaths and repeat on the other side.


    These are just a few examples of some great poses to work the core, strengthen the spine and help improve your back pain complaints. Each LYT class utilizes some or most of these poses and more to help you feel strong, stable and more freedom in your movement!

  • Uddiyana Bandha: the secret to core health?

    Uddiyana Bandha: the secret to core health?

    By Ashley Newton, PT, DPT


    So much of yoga as it presents itself online and in our day to day life takes the form of meditation or physical practice. We digest info online in a mere 30 seconds and then move on. Although this helps with the equity and transmission of information, foundational concepts are often lost in translation. So enters one of my favorite practices: uddiyana bandha 


    Bandha literally means ‘lock’ in Sanskrit and refers to how one can direct energy in body while counteracting the downward force of gravity. Uddiyana bandha is also known as the ‘false breath’. In other schools of movement and thought, it is known as an ‘abdominal vacuum’, ‘hypopressive’, or ‘apnea’. This technique can be done in static postures and meditation but can be incorporated into asanas in more advanced practices. 


    To perform the bandha, following an exhale, the practitioner will take a ‘false breath’ or swallow. The rib cage will open, the belly button will lift and the abdomen will hollow. More often than not, this practice is performed incorrectly as folks will try to hollow the belly by engaging their external obliques. However, this strategy winds up pressurizing down into the pelvic floor and energy is ultimately lost – thus counteracting the intention of the bandha itself. 


    So, why is this helpful and how does it impact my core health?


    The Three Diaphragms

    Think about the triple ‘S’ in LYT – skull, scapular, and sacral alignment. We know that this alignment is upright posture. In order to perform uddiyana bandha correctly, the vocal, thoracic, and pelvic diaphragms need to be aligned. If they are not, abnormal tensioning in the trunk will inhibit the upward flow of energy. This will result in other areas of the body being tensioned that can contribute to abnormal movement patterns and strategies. 


    Moreover, uddiyana bandha is a diaphragm stretch. The diaphragm is a dome-shaped muscle and cannot be stretched across a joint because it does not have one! It can only be stretched by a change in pressure. The diaphragm gets tight when the body is demanding it work as a postural muscle. This occurs when the body is unable to manage pressure across the three diaphragms and adapts by loading the diaphragm abnormally to control spinal movement. 


    Fascial mobilization

    Uddiyana bandha creates an upward lift of the abdominal and pelvic fascia, effecting a fascial mobilization unto the tissue. This is helpful if there is tightness and/or scarring in the abdomen. The more the tissues in the abdomen can move, the better able they will be to stabilize the spine and coordinate together to provide structure and stability to the trunk. 


    Are there safety concerns with uddiyana bandha?

    People with the below conditions/statuses should not do the uddiyana bandha:

    • Pregnant and recently postpartum clients
    • Recent abdominal surgery 
    • Hiatal hernia 
    • Uncontrolled blood pressure
    • Cardiovascular issues
    • Respiratory syndromes