Tag: movement

  • Pes Planus (Flat Feet)

    Pes Planus (Flat Feet)

    If I had a dollar for every person who told me during their past medical history interview that they have “flat feet”, I’d have a small nest egg in the bank. Most of the time when I do my examination however, I see nothing of the sort. Especially nowadays when shoe manufacturers have capitalized on “over-pronation”, many people are under the impression that they have flat feet when they really don’t. In fact, truly flat feet are rare.

    flat foot

    Pes planus, or flat feet, can be either congenital or acquired and is defined by the loss of the medial longitudinal arch of the foot. The arch of the foot is a tough, yet elastic combination of ligaments, tendons, and fascia connecting the forefoot to the hindfoot. It acts as an adaptable and flexible base of support for the entire body, dissipating the forces of weight-bearing and storing mechanical energy during the gait cycle. Dysfunction of any portion of the medial longitudinal arch can result in an acquired pes planus. Risk factors for developing flat feet include excessive tension on the gastroc-soleus complex (the calf muscles), obesity, ligamentous laxity, or posterior tibialis tendon dysfunction. The function of the posterior tibialis tendon is to support the arch as well as invert and point the foot. A failure or dysfunction of the tendon can contribute to a fallen arch in weight bearing. Posterior tibialis dysfunction is most common in females over the age of 40 who have other chronic health issues such as diabetes and obesity. It can also occur in people who have congenital pes planus who participate in repetitive high impact sports.


    It’s not uncommon for toddlers and young children to have flat feet due to ligamentous laxity and a lack of neuromuscular control. However, most children develop normal arches by age 5 or 6. It is a small percentage of children who fail to develop a normal arch by adulthood, making the percentage of people with truly collapsed arches, or rigid pes planus, relatively small. It is estimated that between <1-28% of the population has some degree of pes planus, but a majority of these cases are flexible pes planus. With flexible pes planus, the arch is present in non-weight bearing, but absent or decreased in weight bearing. Rigid pes planus is rare. There is a strong genetic component of pes planus, so it typically runs in families. People with congenital ligamentous laxity secondary to Down syndrome, Marfan, or Ehlers Danos can present with flat feet. The ligamentous laxity associated with pregnancy can also cause flat feet, but typically corrects itself postpartum. 


    The main symptom of pes planus is foot pain due to strained muscles and connective tissues. People may have pain along the posterior tibialis tendon or with a single leg heel raise. If the collapse of the arch is severe, the ankle may turn inwards and the bulk of the body weight is placed through the medial border of the foot. Such a distortion of weight bearing often results in abnormal biomechanics of the lower extremities and can cause calf, knee, hip, or low back pain.


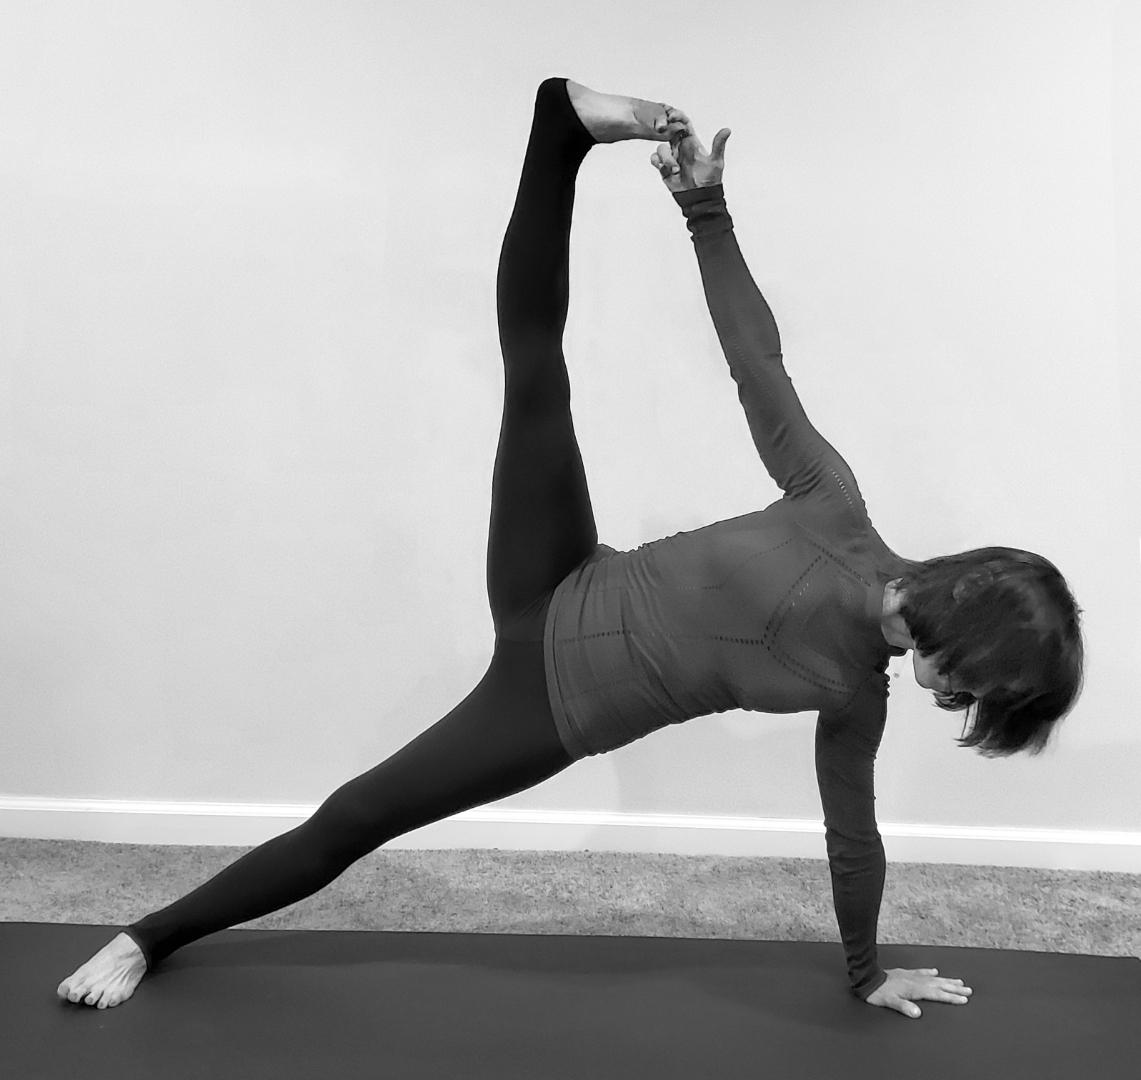
    Treatment of pes planus includes increasing the flexibility of the feet and lower legs, strengthening the small muscles of the foot, lower legs, hips, and core, training proprioception, and patient education. LYT Yoga® certainly ticks all of these boxes! In fact, if you want to learn about all things feet, Lara has an upcoming workshop entitled “Foundations of the Foot” on October 30 that you won’t want to miss! Check out the link below! Until then, I’ll see you on the mat!


    https://lytyoga.uscreen.io


    Xoxo,

    Kristin

  • Shoulder Labral Tear

    Shoulder Labral Tear

    Many of you who practice with me regularly know that I have a cranky right shoulder. Several years ago, I was working on a fellow physical therapist who is around 6’2” and roughly 250 lbs. His back was bothering him so I wanted to help him out. It had been a long morning of treating patients. I began to manipulate his sacroiliac joint, a maneuver that requires me to thread my arm through his. In this maneuver, my right shoulder was flexed and internally rotated.


    I’ve done this technique thousands of times without any issue, but this time when I leaned away and used my body weight to roll him, I felt and heard a tearing in my shoulder. He heard it too.  He looked at me, I looked at him, and we simultaneously muttered, “Uh-oh.” I never had any diagnostic tests done and rehabbed it myself, but I suspect I tore my labrum.


    The labrum of the shoulder is a fibrocartilaginous rubbery rim attached around the margin of the socket. It cushions the joint called the glenoid fossa, which is part of the scapula (shoulder blade). The socket is quite shallow and small, covering at most only a third of the ball (the head of the humerus). 


    One function of the labrum is to deepen the socket. It increases the contact area between the ball and socket by 2 mm at the front and back and 4.5 mm at the top and bottom. If you took a cross-section of the labrum, it would look like a triangle, where the wide base attaches to the edge of the socket, leaving the edge of the labrum thin and sharp at the point. This shape allows it to almost act like a washer, sealing the ball and socket together. 


    This is called a “viscoelastic piston effect” and maintains a negative pressure within the joint. It’s especially effective against traction or pulling stresses and, to a lesser extent, against shearing stresses. Finally, the labrum provides an insertion point for stabilizing structures, including the joint capsule ligaments and the tendon of the long head of the bicep muscle.


    The labrum is often compared to the face of a clock, with 12 o’clock being at the top (superior), 3 o’clock at the front (anterior), 6 o’clock at the bottom (inferior), and 9 o’clock at the back (posterior). Most instabilities in the shoulder are associated with injuries to or changes within the glenoid labrum, particularly where the long head of the biceps tendon inserts at the superior (12 o’clock) portion. They are commonly called SLAP tears, as they involve a Superior Lesion from Anterior to Posterior, usually between 10 and 2 o’clock.


    Different types of SLAP tears typically involve different mechanisms of injury.  A common mechanism is falling on an outstretched arm or pulling suddenly when lifting a heavy object, as I did with my fellow PT. Other mechanisms include repetitive shoulder abduction and external rotation, like the movements that many throwers, overhead athletes, or manual laborers perform over and over.  A direct blow to the shoulder, as with tackling in football can also be a cause. SLAP tears can occur in a degenerative manner for the aging population as well.


    Treatment for SLAP tears includes both nonoperative and operative measures. Both have proven successful among certain populations. Previous studies indicate that nonoperative management is successful for anywhere from 22 to 85% of patients. Operative repair in adults is reported to be successful for between 80 and 97% of patients. It often helps alleviate the pain and return of range of motion.  


    Among overhead athletes, many patients are unable to return to their prior level of performance.  Results vary widely in this population, with between 7 and 84% demonstrating a return to their prior level of performance. As patients age beyond 40 years old, surgeons typically opt to perform a biceps tenodesis. In this surgical procedure, the tendon of the long head of the bicep is detached from the labrum and anchored to the proximal humerus. Repair success rates are lower among older populations, so this is the most effective treatment of choice.


    I continue to address my shoulder issue with home exercises and activity modifications and so far, so good! As I say all the time in Stretch class, the shoulder joint is our most mobile, but also our most unstable. For all the parts to work in harmony, it requires a high quality of movement.  Paying attention to how we move on our mats and keeping the ball centered in the socket is important for many reasons, but especially to avoid placing repetitive undue strain on the labrum.


    Continue using your LYT Yoga® practice to build strength and good brain mapping in the shoulder joint complex. Until then, I’ll see you on the mat!


    Xoxo,


    Kristin

  • Groin Strain

    Groin Strain

    I always feel a little sick to my stomach when one of my kids texts me from their various sporting activities and it says, “Mom, I hurt my (fill in the blank)”. In my profession, I have seen some crazy injuries over the years and unfortunately, I am a worry wart by nature. Bad combo! So earlier this week, I got a text from Bailey towards the end of the competitive cheer practice, “Mom, I hurt my leg” and, of course, my mind went to the worst case scenario like ACL tear or fracture. When I asked what happened she replied, “I don’t know. I was doing jumps and then I pulled something where my thigh meets my pubic bone.” Of course she didn’t say “pubic bone”, so after I laughed out loud, I sighed in relief that it sounded like a groin strain and nothing more. 


    Muscle strains are the number one injury in athletes, accounting for up to 31% of doctor visits. A groin strain, which is a strain to the adductor muscle group, is common, especially among soccer and hockey players. Other sports where we might see them include football, basketball, tennis, figure skating, baseball, horseback riding, karate, softball, and yes, cheerleading. Suddenly accelerating while sprinting is the most common cause of a groin strain, but sudden changes in direction while running also put exaggerated strain on the tendon. Finally, jumping and overstretching the adductor tendon is less common, but can occur as well, as was the case with Bailey.

    groin_strain_1


    The adductor muscle complex includes three adductor muscles: longus, magnus, and brevis. When the leg is off the ground, the adductors bring the leg towards midline. They also have secondary roles in flexion, extension, and rotation. When the foot is planted, the adductors help stabilize the pelvis and leg during the stance phase of gait. Three other muscles assist with adduction, including the gracilis, obturator externus, and pectineus.


    Most adductor tendon strains occur while the muscle is being forcibly stretched while trying to contract and shorten. This is called eccentric tension. The greatest eccentric tension is placed on the groin when the leg is externally rotated and abducted, as when an athlete pushes off in the opposite direction. The adductor longus is the most commonly injured of the adductor muscles, as it adducts and internally rotates the leg. It accounts for 62-90% of all groin strain cases. The adductor longus also has a low tendon to muscle ratio at its origin on the pubic ramus, which increases the likelihood of injury. Most injuries occur at the musculotendinous junction, although strains can occur anywhere along the muscle. The adductor tendons have a small insertion zone with a poor blood, yet rich nerve supply, making the perceived pain greater with these injuries.


    Most people who sustain a groin injury will describe a sudden onset of pain as opposed to a more gradual one. The pain is often severe and in the groin or medial thigh. Activity increases the pain. There may be bruising or swelling in moderate to severe strains. Typically, there is localized tenderness and pain with resisted hip adduction or passive stretching. Strength may be decreased depending on the severity of the injury. Acute injuries can take days or weeks to recover, whereas chronic strains may take many months. Bailey had no bruising or swelling and felt fine the next day, indicating a very mild strain.


    As you would expect, there is an increased risk of groin strain if a person has injured the groin or the hip before. Other risk factors include age, weak adductors, muscle fatigue, and inadequate flexibility of the adductor muscles. Biomechanical issues such as increased pronation of the foot/ankle or issues at the pelvis can also contribute. We all know where to find the best prehab out there for the hip and pelvis…LYT Daily! 🙂 Maintaining proper mechanics, strength, and flexibility are key components to avoiding injury. In fact, click the link below for Lara’s class called “The Groin Dilemma”, where she helps you strengthen and mobilize this area to keep it more supple!


    https://lytyoga.uscreen.io/programs/the-groin-dilemma


    Until then, I’ll see you on the mat!


    Xoxo,

    Kristin

  • Five Exercises for Hip Flexor Strain/Tendinopathy

    Five Exercises for Hip Flexor Strain/Tendinopathy

    Hip flexor strains are common injuries in fitness and athletics. Often caused by overuse, they can quickly sideline you and be quite painful if left untreated! In the early stages of the injury, we don’t want to aggravate the issue. With both a strain and a tendinopathy, there is a tearing of either the muscle or the tendon and that tear needs to heal. Unfortunately, after we sustain a tear, the new fibers want to lie back down in a disorganized pattern as opposed to the nice, parallel orientation of normal tissue. So the goal in the early phase of healing is to lengthen the soft tissues without irritating them, so when the new healthy tissue is created, it’s longer and stronger. In this subacute phase, we aren’t ready to start jumping, running, or kicking, but we’re no longer in severe pain.


    We can use something called reciprocal inhibition to rehabilitate these tissues without irritating them. With reciprocal inhibition, we will fire the antagonist gluteus maximus muscle to relax and lengthen the hip flexor muscle and tendon. The hip flexors will have to work eccentrically to control the movement. With the following exercises, you do not want to push into pain! So listen to your body and go from there. Begin with the first exercise and work your way down as you’re able:


    1. Kneeling Hip Flexor “Stretch” – Kneel on a yoga block with the knee of the affected side and step the foot of the unaffected side forward, coming into a 90/90 Lunge. Contract the gluteus maximus and slightly posteriorly tilt the pelvis, drawing the tailbone down. Contract and relax to lengthen out the hip flexor. Repeat 15-20x.
    2. Kneeling Hip Extension “Stretch” – In the same position as above, begin to shift forward a bit with the contraction of the glute, allowing the hip to extend. Do not push into a painful range. Contract, shift forward, relax and return. Repeat 15-20x.
    3. Bridge – Lie supine with the knees bent and feet flat on the floor. Lift the hips, allowing the hips to come into a fuller range of motion. Do not push into any pain. Repeat 3×10. Option to use a block between the thighs or knees.
    4. Forearm Quadruped Donkey Kick – Come onto hands and knees and then lower to the forearms. Bring the knee into the chest and then press the foot back, extending the hip. Make sure you don’t dump into the lower back. Repeat 3×10.
    5. Supported Bridge Marching – Place a block under the sacrum in a supported bridge. Begin to march one leg and then the other, beginning to do some concentric hip flexion against gravity. Control the movement in both directions. If you have pain, you aren’t ready for this one! If it feels too easy, try it without the block. Repeat 3×10. 


    Click on the link to our YouTube channel below, where you can see me perform these exercises! From there, you can link to my class on LYT Daily, specifically designed for people recovering from a hip flexor strain. Let’s get that hip back in shape and get you back on the mat!


    Xoxo,

    Kristin

  • Pre-Yoga Wrist Warm Up

    Pre-Yoga Wrist Warm Up

    It’s not uncommon for some people who practice yoga regularly to develop wrist pain, especially if they have spent the majority of their life working at a desk. Decreased range of motion, strength, and flexibility of the wrists combined with an increase in the demand placed upon these delicate joints through regular weight bearing in a yoga class can be the perfect recipe for injury. LYT yoga is the only method offering wrist stretches at the beginning of every class, but even in some cases, that’s not enough. If you’re having trouble with your wrists, a little extra warm-up before class could be just the thing you need. Try this out about 5 minutes before class starts and see if, over time, it helps!


    1. Make fists and roll the wrists clockwise and counterclockwise for 15-20 seconds in each direction. Do this once with the thumbs outside the fists and once with them inside.
    2. Open and close the hands quickly for 20-30 seconds, warming up the hand and forearm musculature.
    3. In Quadruped (all fours):
      •   Rock forward/back 5x and then side-to-side 5x. This range of motion should be pain-free, so you may not get the shoulders fully over the wrists to start. 
      •   Circle the shoulders around the wrists, 5x in each direction. Again, you might not be able to get the shoulders fully over the wrists to start.
      •   Repeat steps a & b with the fingers pointing out to the sides of your mat.  
      •   Flip the palms to face up, fingers pointing towards each other, and rock from side-to-side 5x, stretching the wrists into flexion. You will most likely have the majority of your weight in the hips and not over the wrists.


    Click on the link to our YouTube channel below, where you can see me perform a simple wrist warm-up. You can also find out how to modify your yoga practice if you’re suffering from acute wrist pain. From there, you can link my series on LYT Daily, “Weightless in the Wrists,” which includes six traditional LYT classes with little to no weight-bearing through the upper extremities, specifically for people with current pain and/or wrist dysfunction. Take care of your wrists so you can stay on your mat all year long!


  • Pre-Labor Preparation

    Pre-Labor Preparation

    Kristin-Williams-pregnant

    We happen to be in the midst of covering Pre- and Postnatal populations in our LYT Yoga Level 2 teacher training, which has me thinking of a whole other form of labor itself…the labor and delivery of babies! Having had three children of my own, I’ve been lucky enough to experience relatively uneventful labors. And while labor itself may not be the most fun, the end result is priceless. Looking back, I realize that I probably ignored what was right for my body both before and after delivery, in the pursuit of trying to feel “normal” and function like I always had. After listening to lectures given by our friend and fellow LYT instructor, Kristen Boccumini, I wish I’d been privy to her information while I was pregnant with my first 20 years ago today!

    Kristin-Williams-baby

    So much is happening during the nine to 10 months of pregnancy, particularly in the second and third trimesters. The abdominals get stretched, the rib cage flares, and the diaphragm changes shape to accommodate the growing uterus and baby within. The ligaments all over the body get lax to prepare the body for this expansion and future delivery of the baby. Finally, our posture changes dramatically to support the weight of the belly. And yet, if you were me, you tried to keep running well into your second trimester (or longer), paying no heed to the effect this might have later on. Is there something we can be doing to prepare the body for Labor Day? Yes, there is.


    According to Kristen, the first place to begin is with the breath and the posture. Both key components of LYT Yoga®, performing 360-degree breathwork and maintaining a neutral pelvis are integral to maintaining our connection to core, providing room for a growing baby, comfort in a growing body, and minimizing the risk of injury both pre- and post-delivery. Oftentimes, pregnant women will breathe only into the upper ribs, so the core musculature becomes dysfunctional and weak. The 360-degree breath, which includes breathing down into the lower lobes of the lungs and back body, helps to work the diaphragm down. This then helps fire the deep intrinsic core muscles clear down to the pelvic floor, getting it all to work in tandem and helping to prevent certain areas of the back from over-clenching. Maintaining good posture creates a balance and symmetry of the pelvis, which will, in turn, provide comfort for the pregnant mother, create space for the growing baby, and may increase the chances for better labor outcomes.


    So what are a couple of things to look for as your pregnancy progresses through each trimester and what can you avoid? During the first trimester, a lot is left up to the comfort of the mother. While there is no evidence that exercise of any type predisposes a person to a miscarriage, the first trimester is when the risk is highest so it is up to the discretion of the mother as to what feels right. Towards the end, lying on the belly may no longer be comfortable and should therefore be avoided. 


    During the second trimester, quadruped is the better option as opposed to anything on the belly, like cobra or locust. You should watch for doming of the abdomen during any type of lumbar flexion, whether it be ab curls or getting up from lying down. Doming of the abdomen is a sign of too much pressure across the linea alba, which is the long line of connective tissue between the abdominals. So if this occurs, back off the abdominal work and begin rolling to your side to come up from a lying position. A wider stance in forward folds may be more comfortable to accommodate for the belly. Avoid deep backbends, which we don’t promote in LYT Yoga® anyway, as the abdominals are already stretched and don’t need any help in this area! Twists may also become difficult due to the belly and may place undue stress on the abdominals as well, so keeping rotation to the upper thoracic spine is key.


    For the third trimester, continue the recommendations from the first and the second, but now we have to allow for the weight of the growing baby. So be careful with asymmetrical poses, which can put undue strain on the lower body ligaments. You’ll want to substitute with double leg postures and shorten the stance in order to keep the strain across the pelvis minimal and equal. During twists, a hand placed on the belly to keep it centered and encourage the twist from above is an option as well. Props such as the wall, blocks, bolsters, chairs, and blankets can be excellent ways to help modify your practice and keep you on your mat longer. 


    Finally, just remember mamas, LABOR IS UNPREDICTABLE. However, your baby arrives on your Labor Day, accept it with love. There should be no expectations with regards to labor, as a baby may have its own plans! So on this upcoming Labor Day holiday, celebrate our working classes and mamas alike. Feel free to check out either our Pre- or Post-Natal Series on LYT Daily for classes to help you through and past your own labor and delivery. Your body and your baby will thank you! Until then, I’ll see you on the mat!


    Xoxo,

    Kristin

  • Best advice for women with joint pain

    Best advice for women with joint pain

    In the fitness world, we hear about joints, but what exactly are they? A joint is the area where two bones come together and create movement. The way in which joints are positioned habitually and moved habitually can create imbalances and discomfort. Sub-optimal posture can lead to joint troubles and myofascial tightness (think of the layer of tissue around the muscle getting compressed like dirty laundry in the bottom of the hamper). Joint pain will often occur when the surrounding muscles are not offering enough support to the joint or are creating compression. The two ends of the bones that make up the joint don’t actually touch but have space between them filled with synovial fluid or cartilage or both. Maintaining this space and fluidity is key for happy and healthy joints.


    If you are experiencing pain in the joints, here are some ideas for how to improve your joint movement and get rid of the discomfort.

    1. Pay attention to your posture! How are you stand directly impacts how you move. And movement occurs at the joints. We want our joints to start off in their best “resting position “in the most optimal way which happens more consistently with good posture. An added benefit- paying attention to your posture will ultimately help you pay better attention to your movement patterns.
    2. Mobilize your joints. Joints rely on motion to feel happy and fluid. The big ball and socket joints of the hip and shoulder specifically need to be moved in a variety of ways. Our more sedentary lifestyle places us in a more flexed position in the body, reducing our full range of motion. Work on moving in a variety of ways to keep these joints pain-free!
    3. Strengthen your core! Your core is not just the “six pack” that is often displayed on fitness covers. It is the entire cylinder of the center of the body and when it is weakened, the joints suffer. The core muscles surrounding the pelvis, ribs, and shoulders give integrity to the joints. The areas that I always focus on my yoga-movement classes are the gluteus maximus and medius, the obliques and transverse abdominals, the scapular stabilizers, and the deep back muscles like multifidus and quadratus lumborum.


    An example of a sequence to work on all three of the above tips:

    Start off on all fours, with your knees under your hips and your wrists under your shoulders. Imagine a front line of the body from the center of your forehead to your pubic bone and draw that line tight by aligning your skull and firming your front body. Bring your left hand behind your skull and as you breathe in, turn your ribs to the left so that the left elbow points up to the ceiling and as you breathe out, move the elbow back to point toward the floor. Repeat this movement, rotating through the ribs for 15 to 20 times on each side of the body.

    Lara-joint-pain-1

    Next, from quadruped, step your left foot back and then right foot back into a plank position. Hold the front body firm, resisting the downward action of gravity. Tighten your gluteal muscles! Then walk your feet as far forward as you can without picking up your hands, and then walk your feet back so you’re in plank again. Repeat this action for up to one minute. You are mobilizing your hips and strengthening your entire core!

    Lara-joint-pain-2

    The last time you walk your feet forward, stay forward and slide your hands up your legs to stand upright. Bring your hands on either side of your pelvis and lean your weight into your left foot. Tighten the left gluteals and lift your right knee up toward your belly. Hold in that position while keeping your abdominals strong and then windhshield wiper your right hip joint so that your right thigh swivels in and out (does not have to be a big movement to get a big feeling). While you are working on your right hip mobility, your left hip is getting stronger. Switch legs and repeat 2 to 3 times on each side.

    Lara-joint-pain-3

    Work on this sequence daily and notice the change in your joints and in your posture – it’s the prescription for happy and healthy movement! You can find more drills like this in my online daily classes at lytyoga.uscreen.io/catalog.

  • Well…THAT Happened by Julie Glick

    Well…THAT Happened by Julie Glick

    I’ve seen some really funny “Well… THAT happened” memes. There are many instances in my life when I could have or actually did utter that very same phrase.


    It’s 1998 and I am still sicker than sick with Lyme Disease. It’s been four years of feeling like I have the flu every day, carrying around a head that feels like a pain-filled bowling ball. And don’t get me started on the brain fog (i.e. car keys in the freezer…). I have done Homeopathy, Naturopathy, Chinese Medicine, hyperbaric oxygen treatments, SO much more and especially food as medicine. I had to work my very full time job (which I did not love) doing my best despite feeling like an achy, tired space cadet. 


    So it’s no wonder I woke up one Sunday morning upset and fed up with the Universe. I had lived long enough to know that when things really suck there is usually a gift wrapped in the pain. Or at the very least, a message or a lesson to grow my soul. So I started praying out loud saying, “Please send me messages. Please send me messages. Please send me messages…” I was not going to stop until I got a message, a burning bush, something! 


    My two adorable cats named PacoBean and Cosmosis are milling around, meowing for breakfast. But I am intent, I will not be deterred. “Please send me messages. Please send me messages.” Cosmo is biting my hair, Paco just stepped on my belly. “Please send me messages!” I don’t know how much time passed but at some point I heard a big, booming male voice say, “NO NEW MESSAGES!” I sat bolt upright looking for God in my bedroom. Then I heard a meow so I turned around to find Cosmo — who had just stepped on my answering machine. There were like 12 buttons on that answering machine and Cosmo steps on that one?


    After I stopped laughing hysterically and hugging my cats, I realized that I most definitely had received a message. No New Messages! Maybe I didn’t need to learn anything new about myself. Maybe I will be happiest AND healthiest when I just remember what I came in knowing. Thank you, Lymies. Thank you, Cosmosis. Thank you, Universe. I got the message…


    My body has been my teacher in more ways than I can count. Most recently my greatest teacher has been this spine of mine. Suffice it to say, my spine ain’t what it used to be. Some vertebrae decided to take a hike and stray from optimal alignment. Some are smushed. Some decided to get arthritic, narrow the spinal canal and put pressure on my poor spinal cord. So all of THAT happened…


    I was a competitive gymnast throughout high school and college so you guessed it! My pelvis got all too comfortable living in anterior tilt. I positively lived for gymnastics and spent at least 15 hours a week in the gym. Back in the day I had to tumble on a wrestling mat. I may have been in a hollow body position during my layout full twist, but I still I had to land on a 1 ½” thick mat. Now gymnasts compete on a spring floor not only to be able to tumble higher, but also to absorb the shock when they land after flipping and twisting from waaaay up high. I had no such spring and no such shock absorption so my body, especially my spine, had to deal with those landing forces.

    Julie-Glick-1

    But I stopped competing about four decades ago so I can’t blame it all on gymnastics. I kept walking around with a tilted pelvis long after I stopped sticking the landings. I carried this out-of-alignment-ness with me everywhere from marathons to yoga class.

    Julie-Glick-2

    Anything left untreated gets worse and unfortunately, I didn’t know what I didn’t know. I had the best of intentions to be fit and strong. I weight trained, ran, cycled, power walked and practiced yoga – all out of alignment. Intellectually I knew what neutral pelvis was. But mine loved to tilt forward and that felt “right.”  Factor in hyper-mobility plus a whole lotta stress and it’s no wonder my back pain got worse and worse year after year.


    I had an MRI about a year ago. When I received the very long and scary report, I went straight to freak-out mode. The more I read the more I wondered how I was even vertical. I went to a couple of well-intentioned but fear-inducing doctors who told me to expect a life of limited mobility and activity. Thank goodness I had been practicing and learning to teach LYT Yoga at this time! Both Lara Heimann and Kristin Williams talked me off of my temporary freak-out ledge. They reminded me that MRI’s do not tell the whole story and that anything is possible, especially and including healing my spine. How could I have forgotten? 


    So here are the blessings literally wrapped in the pain. LYT Yoga is ALL about optimal postural alignment. I should get a t-shirt that says “Triple S It Up!” because I Triple S It Up on and off the mat. I am in love with my transverse abdominis and I no longer have snoozy glutes, thank God! I feel so much better and practice yoga like a different Julie. LYT Yoga is a fun, functional and sustainable practice. I say, “Age-schmage!” I may have made 61 trips around the sun, but I feel more aligned, powerful and LYT up each day.

    Julie-Glick-3

    Most importantly, I am on a mission to teach the principles of LYT Yoga to every student I meet both on and off the mat. I love sequencing classes together called, “No Tipping Please!” and “Psoas to Move Well.” I even teach LYT Yoga in some of the Ophthalmology offices I call on for my day job. I hear the staff saying to one another, “Zip up that low belly and turn on your glutes!” and “You have text neck – find your Triple S!” I visit my 95 year old Dad and lovingly poke him in the butt to remind him to engage his glutes. 


    So this spine of mine led me to LYT Yoga. I honestly would not have it any other way. The Lymies (which may or may not still live in me) reminded me that food is medicine. Plant-based and loving it! All of the above and more make me so genuinely thankful for every movement, every heart beat, every breath… I got the message. All of this had to happen for me to live my mission.